Quantcast
Channel: Pinoy Mountaineer
Viewing all 610 articles
Browse latest View live

Hiking matters #567: Autumn hike up Mt. Iwate (岩手山) in Tohoku, Japan

$
0
0

IMG_9253
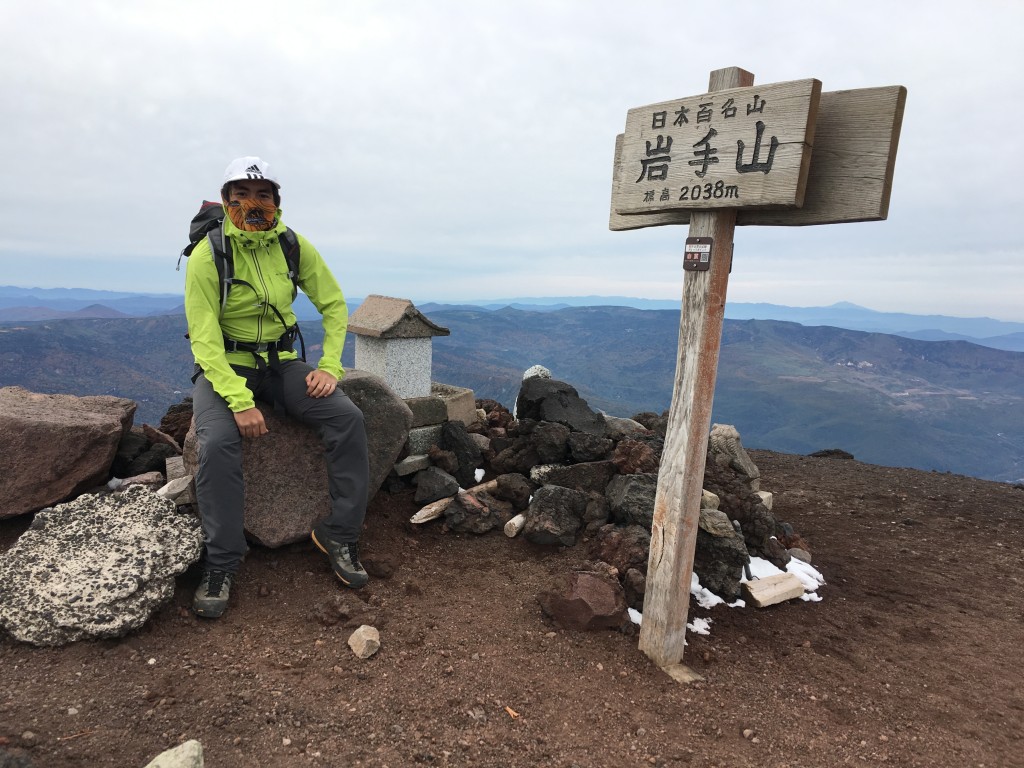
As continuation of our quest to complete Japan’s 100 Famous Mountains, my Hyakumeizan buddy Jeshua Sales and I went to the Tohoku region to do some autumn hiking. Using the town of Morioka as base, we started with Mt. Iwate (岩手山), at 2038 MASL the highest in the prefecture that’s named after it. There is no public transport to the mountain so we took a cab to the Umagaeshi trailhead.
Iwate1
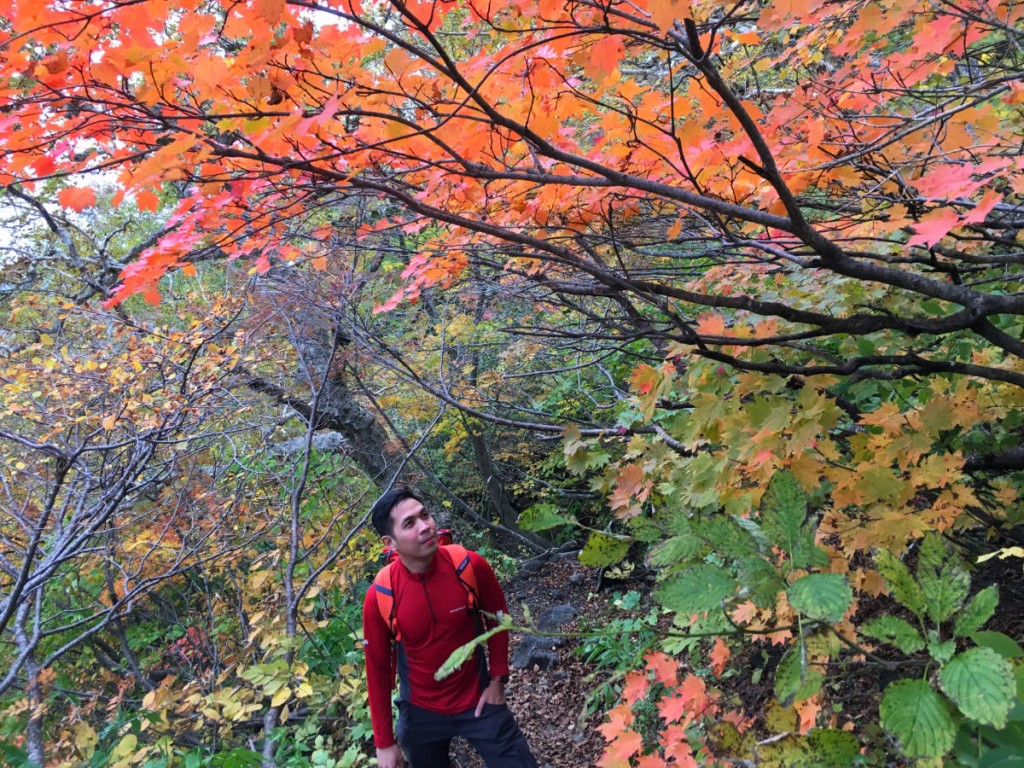
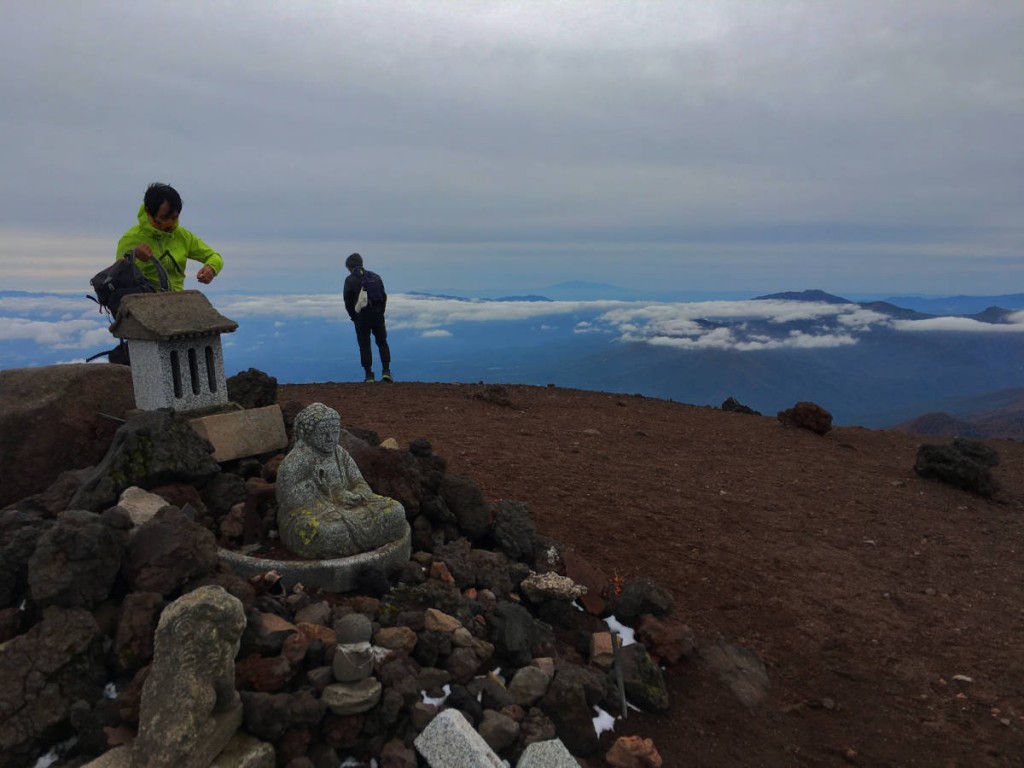
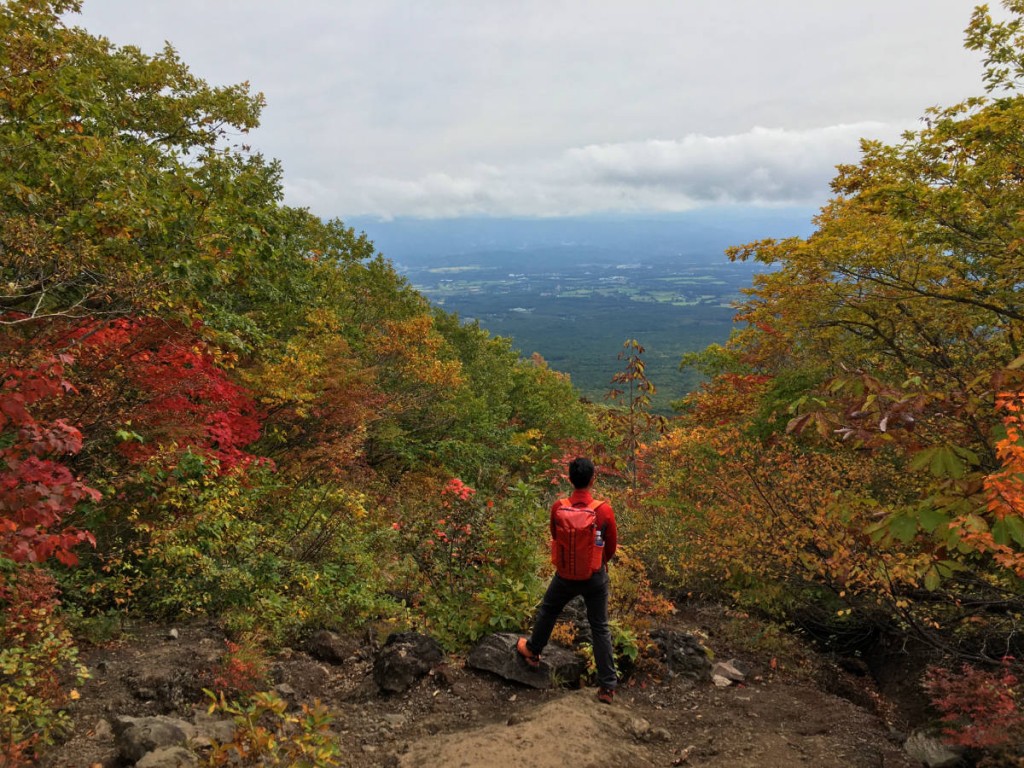
The hike started with a woodland made beautiful with the autumn foliage. At some point, two choices were offered us: an Old and a New Trail that didn’t really make much of a difference ce either way, although the Old Trail (which we took going up had more open sections). Eventually the trees grow smaller until you emerge in volcanic slopes: stunted trees, rocks, sand. Finally, after almost 5 hours of hiking, we reached the summit. It was cloudy but we could still see the surrounding mountains.
Iwate3
With an altitude gain of around 1500 MASL, Mt. Iwate was one tough hike, and also logistically challenging with public transport: at the end of the hike we had to call for a cab once more, costing us some good 4000 JPY each way. But its beautiful autumn leaves and scenic views at the summit make it a worthy Hyakumeizan – and a good beginning of another Japan hiking trip.

Iwate21

TOHOKU HYAKUMEIZAN (AUTUMN 2017)
Hiking matters #567:Mt. Iwate (岩手山), Iwate Preferecture
Hiking matters #568: Mt. Iwaki (岩木山), Aomori Prefecture
Hiking matters #569: Hakkoda Mountains (八甲田山系), Aomori Prefecture
Hiking matters #570: Mt. Hachimantai (八幡平), Iwate Preferecture

The post Hiking matters #567: Autumn hike up Mt. Iwate (岩手山) in Tohoku, Japan appeared first on Pinoy Mountaineer.


Trip Report: An exploration climb of Mt. Mingan

$
0
0

7
by Mel Solis, Team Leader

The idea for this Mt. Mingan exploration just come across my mind after the declaration of special non-working holiday in Metro Manila on dates April 27-28, 2017 due to ASEAN summit, making the 3-days long weekend (because of May 1 Labor Day) stretched to 5 days that made me think of a multi-day adventure.

Facebook posts from fellow mountaineers, long ago gave me the idea of this mystic mountain still unsummited. I am aware that there have been numerous exploratory attempts made to trailblaze on the way to summit but unsuccessful, mostly because of lack of time and bad weather. The planning has been real-quick with only a week away to plan the event with three from my team committed to join the exploration and posted an invite in CLIMBER page to complete the team of seven. There are a lot of interested joiners but I only limit it to three just enough to share with the expenses of this climb.

The list of the climb party as follows:
1 Mel Bryan ‘Mel’ Solis – Team Leader
2 Eds ‘Eds’ Ibias – Scribe
3 Rullet ‘Rullet’ Baquing – First Aider
4 John Carl ‘JC’ Nobles – Mid
5 Anne Maridol ‘Ram’ Rongavilla – Mid
6 Rodel ‘Rodel’ Roque – Mid
7 Mark Benedick ‘Macky’ Ignacio – Sweep

COORDINATION
I immediately coordinated it with the Municipality of Dingalan thru the Executive Assistant to the Mayor Sir Albert (09465974440), for the permits needed for this climb and he advised me to just accomplish a Letter of Intent to climb including the names and information of the participants and sent it thru e-mail (dingalan.lgu@gmail.com). On the climb date, we will sign a waiver and pay P50 each as the barangay registration fee.

My facebook friends who did exploratory in Mingan were kind enough to give me the contact details of Kuya Junior (09482018627) and Kuya Carding, the guide according to them who are familiar with the trail of Mt. Mingan. I coordinated with Kuya Junior thru phone call and have got valuable information of the necessary preparations and expectations during the climb whom I shared with to the rest of the climb party.
1

CLIMB PROPER
At 9 in the evening of Thursday, April 27 we are all gathered at Five Star Cubao enroute to Cabanatuan. We depart Cubao at 11pm and arrived at Cabanatuan past 2 o’clock in the morning. We then transfer to a van first trip enroute to Dingalan and depart at 3am, we arrived at Dingalan past 4am and the driver is kind enough to bring us to Brgy Davil-Davilan about 10 minutes from Dingalan proper. From here we are fetched by Kuya Junior tricycle to their home which serves as the jumpoff point.

DAY 1

At Kuya Junior house, we are warmly received and even served breakfast that we never expected. Since breakfast is served, we only bought packed lunch instead at Dingalan proper. We meet the Brgy captain and pay the P50 registration and sign a waiver. After final preparations, we started the trek at about 6:50 in the morning.

We passed through flat grassland on the first few minutes of the trail, crossed a river and reached Station 1 after 20 minutes.
2

From Station 1, the trail changes from grassland to rainforest with grueling medium to steep assaults. We reached Station 2 after 40 minutes and regrouped. We resumed the trek and reached the Balete tree landmark after 30 minutes. We proceeded and walk past 20 minutes to Station 3 and another 40 minutes to Station 4 and reqrouped.

We resume the trek and reached Station 5 after an hour. Station 5 is a wide camping ground with a water source 10 minutes away. Its past 11 o’clock so we decided to take our lunch and took a rest.

At around 12noon, we resume the trek towards Station 6. We passed through a ridge, rainforest and mossy forest at gradual to medium assault. After 2 hours of trekking we reached Station 6 (1450+masl) and since this is the last known water source we decided to set-up the camp. The level ground is not wide enough compared to Station 5, it can accommodate about 4-6 tents only. The group opted for a hammock camping instead because of limited area and more adaptable to any terrain since the next camp will depend on where trailblazing stops.

DAY 2

At 4 o’clock in the morning, the team cooked breakfast and pack lunch. Past 5 o’clock we took our breakfast, then break camp. After final preparation, the lead started the trek at 6:30am.

The trail was gradual passing through a ridge full of Pandan (endemic flora) until nearing the foot of Peak 1, from the foot the assault is quite steep which needs scrambling on vines and bushes (one man trail). After 30 minutes from Station 6, we reached a small flat area (good for two persons) pitstop which serves as the viewdeck. Here a panoramic view of the coastline of Aurora can be seen and the vast plains of Gabaldon Nueva Ecija.

Twenty (20) minutes of continued ascent we reached Peak 1, which is obstructed by giant mossy Pandan trees and gigantic pine trees. From Peak 1, the trail is relatively flat to gradual ascent descent, after 30 minutes, you will pass by ‘Durungawan’ a good spot overlooking the town of Gabaldon (Nueva Ecija).

After an hour, we reached Station 7, it has a giant mossy pine tree landmark and flat area which could accommodate 3-5 tents we waited for regroup. Past Station 7, the trail is getting struggle because of Pandan trees, mostly we call floating trail because you will step on the lying bodies of overgrown pandan trees that looks like trap or “patibong” and you will need a lot of upper body strength and balance. Every step must be very careful, testing every step or else you will shoot in a trap.

An hour from Station 7, we reached the foot of Salakot Rock (referred as the False Peak, 1740+masl) often mistaken by previous explo attempt as the summit. Its past 11 o’clock so we decided to look for a flat ground to wait for regroup and have our lunch.

Kuya Junior said that there’s no more camping ground in there so he advised us to backtrack on the last flat area we encountered about 15 minutes away from our current position. We took our lunch, and since it’s still past 11 am we agreed to assault the Salakot Peak and conduct a survey on the trail of the last group who did the exploration. And if there’s still time we can commence the trailblazing to forward the trail. We left our backpacks, we just bring assault packs with trail food and water. The trail leading to Salakot peak is quite technical assault with portions of almost 90 degrees with very limited grip. After 20 minutes, we reached the Salakot Rock.
5
After some picture taking, we traced and survey the trail established by the last group to attempt. A 10-minute sharp descent and gradual ascent, we reached Peak 3 (1720+masl) covered with bonsai trees. We continued walking since the trail is still visible, until we reached a portion we can’t see the trail anymore so we started trailblazing. The trail is still abundant with pandan that’s why we find it hard to easily penetrate. We reached a flat portion by 2pm and decided to abort and go back to our e-camp. From here, the GPS recorded that we are only 3+KMs away from the summit.

Upon descent from Salakot peak, we meet two mountaineers Jonjon Garcia of NEBMCI and Jaycee Aratan of Talahib Mountaineers with their guide, Kuya Carding who just commenced their hike that day at 5am from the jump off. They say that they will just spend the night in the flat area at the foot of Salakot rock and they will go with us tomorrow with the summit assault. We see it as a positive indication that we can fast track the trailblazing because we have two guides already. We resume backtrail to e-camp.
Past 4pm, we reached our emergency camp where we left our things. We cook dinner and had meeting for our plan for tomorrow. Majority decided to pursue the summit assault but one of our colleague, Macky decided not to continue and descend earlier to jumpoff with Byluck, the son of Kuya Junior. We decided to just bring assault pack with trail foods, emergency foods and water. We also agreed to abort the climb by 3pm (make it or break it), so we can go back to camp and descend early on Day 4.

DAY 3

At 5 o’clock in the morning, the team cooked breakfast and pack lunch. The trek commenced at 6:30am. We reached our last stop (of Day 2) at 8:00am, our guides resumed trail blazing. Most of the time, we have limited view of the surroundings because it is mostly covered with Pandan making the trailblazing more difficult. Sometimes we crawl under the Pandan, sometimes we go over it balancing through its huge trunks (floating trail). But the trail is relatively rolling.

3Lunchtime, yet we are still on the ridge and can’t still sight of the last peak assault to summit because of the fog. We decided stop and eat our lunch. Based on GPS data, we are 1.5 kilometer away and about (1800+masl). After lunch, we resume trailblazing and by 1pm we already see the last peak assault to summit. We got excited to finally see the last peak to ascend, we have to negotiate a steep descent to the foot of last peak which is about (1700+masl) still covered with Pandan and a steep ascend to summit. But we are slow moving because of thick overgrown Pandan that has hindered our way. Past 3 o’clock, we got on a semi flat area where we huddled together. We are about halfway to the summit at an elevation of 1800+masl. We gathered together and faced with a difficult decision: to pursue or call it quits. We find it heartbreaking to quit because we are almost there and we can see it already maybe about an hour to the peak. It would also be more dangerous for a night trek back to camp because of the Pandan trail. We talked openly, we have emergency foods but we lack water. But everyone are positive about spending another night, we share the same sentiment to sacrifice a night. Upon agreement, we set-up our temporary camp.
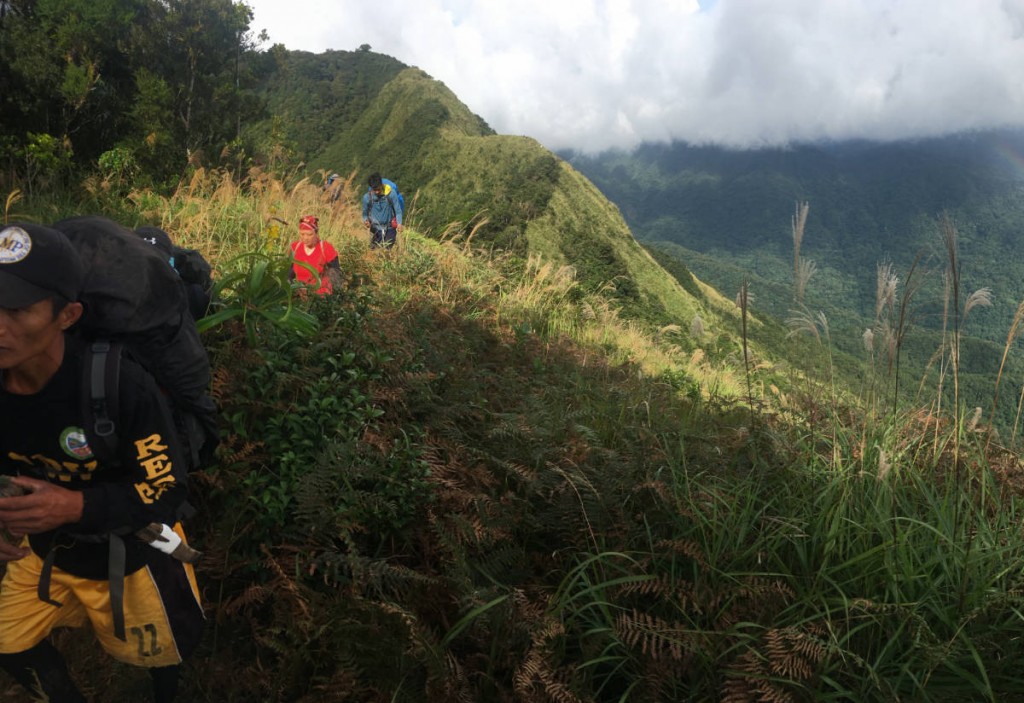
We settled for a small level ground and looked for dead leaves to serve as our ground cover. We we’re like sandines-pack in this ground to combat the cold. Our guide, Kuya Junior and Carding lit a bonfire to give us warm in the cold night. We’re still lucky that it didn’t rain that night. The sky is so beautiful, there are a lot of stars. Some got a good sleep (evident by loud snores) while I am not comfortable with my position and its very cold. Wide awake, I’m patiently waiting for the sunrise.

DAY 4

At 5 o’clock in the morning, the sky lit, we still have few trail foods and energy bars that serves as our breakfast. We continue our assault to summit with excitement, still overgrown Pandan dominates the trail. Our guide cut some small bamboo-like plant with water inside that serves as our water source. It tastes good, almost similar to coconut water. After an hour, we reached the summit of Mt. Mingan. There’s not much view on the summit ground because it is obstructed by huge pine trees. You need to climb the trees to get a panoramic view.

8

After an hour, we descended back to camp, fast pace. Took a long-deprived meal and resumed our trek back to jump off. We reached the house of Kuya Junior at 7:00pm. We are very thankful for the warm hospitality of Kuya Junior and his family, we were rewarded with a chicken tinola and buko juice as our celebratory meal for this successful expedition. Truly, it was indeed a very challenging and memorable exploration climb we had and foremost we are more than thankful to God for His guidance.

ITINERARY:
DAY 0
2100 Meet-up Five Star – Cubao Terminal
2200 ETD to Cabanatuan
DAY 1
0200 ETA Cabanatuan/ Transfer to Van bound to Dingalan
0300 ETA Dingalan Town Proper/ Transfer to Trike to Brgy. Davil-Davilan
0320 ETA Brgy Davil-Davilan Kuya Junior’s house/Prepare
0500 Breakfast
0600 Start Trek
0900 ETA Balete Tree landmark
1200 Station 5/ Campsite Take Lunch
1300 Resume Trek
1500 ETA Station 6/ Last watersource/ Pitch tent
1700 Prepare Dinner
1800 Dinner and Socials

DAY 2
0400 Wake-up Call/Prepare Breakfast
0500 Breakfast and Break camp
0600 Start Trek/ Load Water 4L minimum
0630 ETA Peak 1 viewdeck
0800 ETA Station 7
0900 ETA Station 8
1100 ETA Salakot Peak/ Take Lunch
1400 ETA Station 9/ Leave Packs/ Summit Assault
1500 ETA Station 10/ Mt. Mingan Summit/ Photo-ops
1600 Start Descent Back to Station 9
1700 ETA Station 9/Prepare Dinner
1800 Dinner and Socials

DAY 3
0500 Wake-up Call/Prepare Breakfast
0600 Breakfast and Break camp
0800 Start Descent
0900 ETA Salakot Peak
0930 ETA Station 8
1030 ETA Station 7
1200 ETA Station 6/ Take Lunch/ Load water
1300 Resume Descent
1500 ETA Camp 5
1600 ETA Balete Tree
1800 ETA Jumpoff/Kuya Junior House
2000 Back to Manila


The post Trip Report: An exploration climb of Mt. Mingan appeared first on Pinoy Mountaineer.

Hiking hydration: How much water should you bring on a hike?

$
0
0

Water
by Gideon Lasco

Water is life – this is true on and off the trails. Every hiker must bring sufficient loads of water, because dehydration is a very real possibility when hiking – especially during the summer or dry season. While its effects are usually mild, dehydration can also lead to fatigue, headache, confusion, and more severe illnesses or injuries, and thus must be avoided.

But it brings us to the question: Just how much water does one need when hiking?

There is no one-size-fits-all rule for bringing water. This will depend on the climate, the humidity,  the amount of forest cover or sun exposure, and individual preferences/needs, but as a general rule for hiking in the Philippines, I recommend bringing at least two liters of water as an absolute minimum, and adding 500 mL for every hour of hiking beyond the 4th hour. Thus, for dayhike that would require 6 hours of hiking, 3 L of water is recommended.

But again, this will depend on the availability of water sources on the trail and the kind of trail you’re hiking. When I’m doing MakTrav, for instance, I only bring 2 liters, knowing that the forest cover and trail conditions will not dehydrate me too much. But when I’m going for the mountains of Central Luzon – Arayat or Balingkilat for instance – I bring the full 3 liters; probably more if I’m doing Balingkilat in the middle of the day. Of course when I haven’t climbed the mountain yet, I exercise an abundance of caution.

Beginners may need more water than experienced hikers as the trails will exact a heavier load on their bodies. Also, hikers under extreme stress or fatigue will require a lot of water. I’ve seen this happen in the past: an injured or overfatigued hiker can end up consuming the team’s whole water supply – to dire consequences for everyone.

Bear in mind also that the water in your bag is not just for drinking; it can be used for emergency situations like injuries to cleanse wounds, clean your gear, wash your hands, face or other parts of your body as needed. When you’re hiking with beginners, it’s also good to bring some extra in case others will need it. Of course water is also essential for cooking especially if there are no water source in your campsite, so you may also want to bring a water canteen for camp purposes.

The presence of water sources can lower the required volume of water you need for a hike – but bear in mind that not all water sources are reliable. Especially in the dry season, some sources dry up – so it’s still better to be prepared. (It is also worth noting that some individuals are more sensitive to the quality of spring or mountain water than others.)

What about sports drinks like Gatorade or Powerade? For intense hikes, they can be useful due to electrolyte loss. But there are other ways to replenish electrolytes without resorting to sports drinks – so I think they’re optional. Bananas, dates, raisins, and coconuts all have high potassium and anything salty has sodium and chloride (others also go for oral rehydration salts). Personally, I aim for plain water and electrolyte-rich mix of fruits and nuts, and, if the hike were intense, I’d reserve a bottle of energy drink and a chocolate bar.

One final reminder is that hydration is not just a concern during the hike – but before and after. Following Leo Oracion’s advice, I drink a “loading dose” of 500 mL of water before starting a hike (1 liter if high altitude), and I also try to drink  1 L in the hour immediately after the hike. Hikers can lose 0.5-2 kilos of body weight after a day of hiking but most of this is due to dehydration – it is important to replenish.

To summarize: Water is essential in hiking and while there is individual variation in exactly how much to bring, it is important to make sure one brings amounts that are more than adequate to the activity at hand.

The post Hiking hydration: How much water should you bring on a hike? appeared first on Pinoy Mountaineer.

Staying safe: Hiking security tips for mountaineers

$
0
0

IMG_0257
We often associate mountain climbing with freedom, and fortunately, most of the time it is true: hiking in the Philippines remains generally safe and highly recommended.

Even so, crimes have unfortunately happened in the mountains – from mugging and physical assault to campsite theft. For a long time, Mts. Sembrano and Mt. Romelo gained a bad reputation for theft, and very recently we are hearing reports of a mugging incident in Mt. Balagbag.

Meanwhile, mountains are also occasional venues for conflicts involving the military and armed insurgents, and while there has not been any report of mountaineers getting caught in the crossfire in recent memory, the risk of being affected – or even just inconvenienced – by such situations also merit consideration. Hiking security is thus an important matter for everyone – particularly hike leaders and organisers – to consider.

Here are some tips that can help mountaineers stay safe and deal with security concerns:

(1) Research about your hiking destination’s present situation before proceeding with your hike. Were there recent security issues or incidents? Recent reports of ‘encounters’ between military forces and armed insurgents? If so, it is probably to change the venue of your hike. Sometimes, this information can be gathered in media or social media report (and Pinoy Mountaineer tries to post about them) but there are times when you must contact the locals directly.

(2) Register and exchange contact numbers with proper authorities. Most hikers leave their contact numbers in logbooks, but it is also important to get their numbers in return. Let them know of your exit point and estimated time of return. It is also good to know other relevant emergency numbers:

National Emergency Hotline: 117 / 911
Philippine National Police 24-hr hotline: 027222353 / 027229587
Tourist Assistance Hotlines: 025241728 / 025241660

(3) Give your itinerary, names, and contact numbers to a third party or a ‘rescue officer’. This is standard protocol for hiking clubs and should be standard practice for all hikers. Someone not in the hiking team should always know your whereabouts, and this applies to every individual in your team, not just the team as a whole. This individual must have access to their mobile phone and must have the details of relevant emergency numbers.

(4) As civilians, hikers are discouraged from wearing military-looking outfits. People involved in armed conflict, on whichever side, usually leave mountaineers alone – and they can readily identify us with our big backpacks and colourful clothes.

(5) As much as possible, get authorized guides and make clear the terms of your agreement beforehand. Many experienced hikers know as a fact that guides are not just there for navigation – but for dealing with other people in the mountains, and vouching for your identity and helping ensure your security. Guides, however, can be a source of conflict: in making deals with locals involving money, make sure the transaction is well-understood by both parties.

(6) Do not climb mountains that are closed unless you have official permission to do so. Climbing mountains that are have been ordered closed is both illegal and disrespectful of local authorities, and mountaineers make themselves liable to prosecution and imprisonment if they do so – as has happened in the past.

(7) Do not bring too much cash and flashy items when climbing. The most common security concern when hiking is theft, and bringing too much cash and expensive items will only attract the attention of would-be thieves. Keep your valuables safe (in some cases it might be appropriate to entrust them to the local police station or just leave them behind). When doing summit assaults, make sure your basecamp is secure – bring your valuables with you.

(8) Avoid excessive drinking and making loud noises in the mountains. Any unnecessary behaviour can attract unnecessary attention, and is best avoided.

(9) Think before you post your whereabouts in social media. Internet access even in campsites and summits is both a blessing and a curse. On one hand, you can share your experiences in real time. But on the other hand, imagine a scenario in which you post something like: “Wow, I’m at the summit of Mt. X and we’re the only ones here. Now proceeding to Y camp.” You have just announced the world where you will spend the night, and just imagine what individuals with malign intent can do with that information.

(10) Consider every hike as a different situation. When thinking about security, think not just about the hiking destination, but the people you’re hiking with, the itinerary you’re taking, how many days you’ll be on a mountain. If you’re hiking with minors, for instance, you may want to talk to their parents first. If you’re hiking with a celebrity, you may also want to have extra security measures. If you’re hiking with a big group including many beginners, you may want to choose a more-established mountain. And if you really want to hike a mountain with reported security concerns, you may want to do it as a dayhike rather than an overnight. Considering every hike’s particularities can help you deal with safety and security concerns more effectively – and avoid any untoward incident.

The post Staying safe: Hiking security tips for mountaineers appeared first on Pinoy Mountaineer.

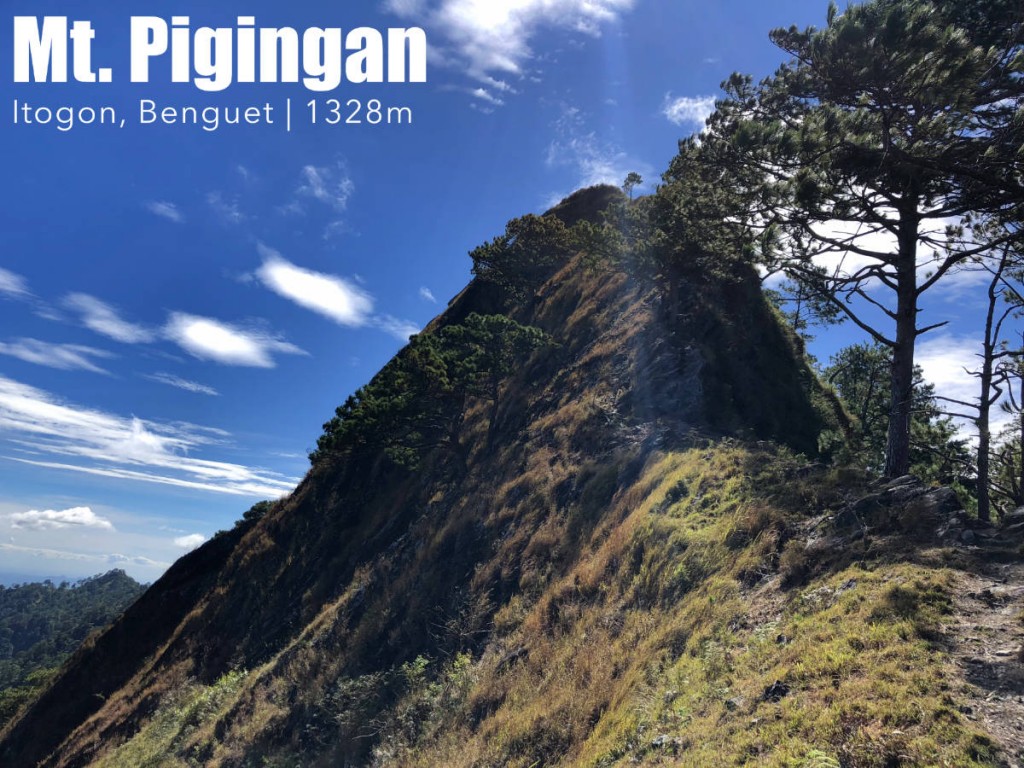
Mt. Pigingan (1328m) in Itogon, Benguet

$
0
0

IMG_1205
MT. PIGINGAN
Itogon, Benguet
Major jumpoff: Sitio Balocloc, Brgy. Dalupirip, Itogon
LLA: 1328 MASL (to be verified)
Days required / Hours to summit: 1-2 days / 5-7 hours
Specs: Borderline major, Difficulty 4/9, Trail class 1-4
Features: Pine forests,  scenic views of the Cordilleras
Article history: Created 6-Jan-2018 by Gideon Lasco

BACKGROUND
The hiking landscape in the Cordilleras has greatly expanded in the past few years, and among them are a growing number of dayhike possibilities from Baguio City. Among these, by far the most popular has been Mt. Ulap. For those wishing for a more serious dayhike, however – or even a new, relatively-relaxing overnight hike – there’s Mt. Pigingan in Itogon, Benguet, just under the shadow of Mt. Ugo. Though a low-altitude mountain – 1328m – by Cordillera standards, this mountain, which means “slanted” in the local language, nonetheless possesses the elements of a classic hike in the region.

The trip to Pigingan takes the hiker the same way to Brgy. Tinongdan, one of the major trailheads of Ugo, but the trip continues for 8 more kilometres to Sitiop Balocloc in Brgy. Dalupirip, making for a total of a 1.5-2-hour jeep or van ride from Baguio City. The hike, which initially courses along the banks of Agno River, heads to a couple other hamlets before proceeding with the hike proper. Because the location of Mt. Pigingan places it close to Pangasinan and the lowlands, expect a warmer-than-usual Cordillera hike especially at the initial sections. There have also been reports of niknik (i.e. gnat or sandfly) bites especially along the riverbanks (although this could be truer during the wet season as the author didn’t encounter any during his hike in January 2018).

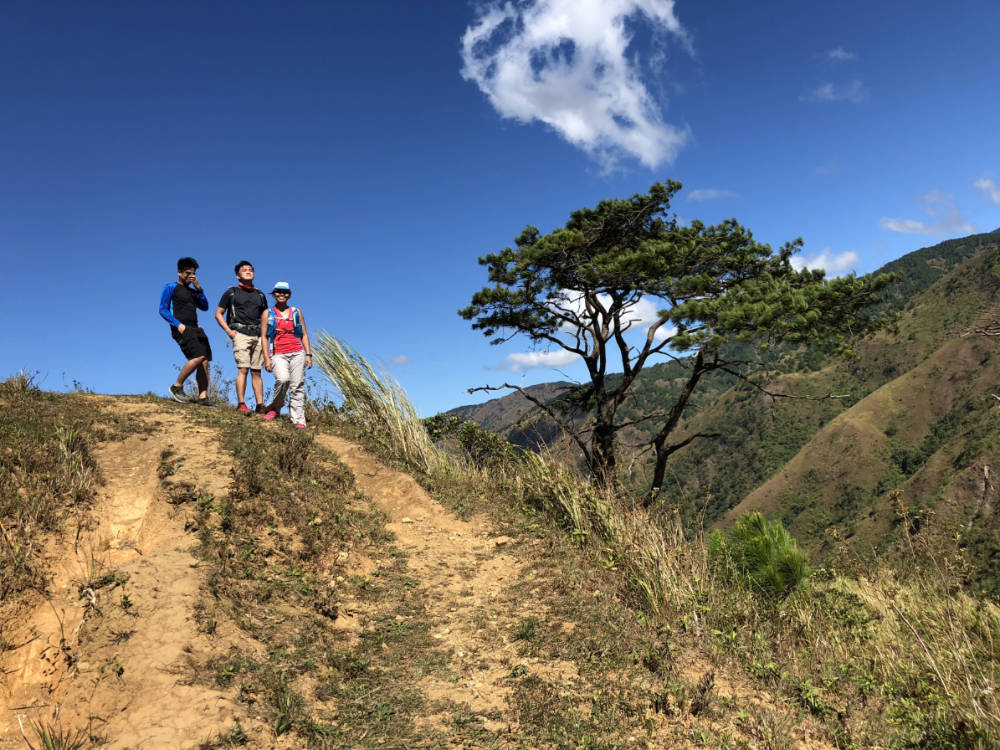
A junction which doubles as a rest area marks the halfway point; the real ascent to Pigingan proper begins at this stage; there is also the possibility to traverse to Mt. Ugo. If proceeding to Pigingan, the hike is typical Cordillera: village paths – i.e. future roads – that lead to pine forests, refreshing winds, scenic views of the mountains, and occasional cattle encounters. The summit (1328 MASL) is a prominent rocky peak, from which one can view the surrounding semi-barren, semi-pine hills dominated by Ugo,  Binga Dam, and, to the south, the lowlands of Pangasinan.

Mt. Pigingan does not reach the grandeur of Pulag or Napulauan nor their lofty elevation, but given its proximity to Baguio City and the fact that it is a more serious hike than Ulap, it is nonetheless a very welcome addition to the Cordillera hiking scene. At the same time, possibilities for a traverse to Mt. Ugo makes it a possible gateway to longer adventures.

ITINERARY

DAYHIKE

Day 1

(2300 Leave Pasay or Cubao for Baguio)
0400 ETA Baguio City. Take chartered jeep to Brgy. Balocloc*
0600 Arrival at Sitio Balocloc. Register and secure guides.
0630 Start trek
0900 Arrival at junction
1200 ETA summit
1300 Start descent
1630 Back at trailhead; tidy up
1700 Take jeep back to Baguio City
1830 Back in Baguio City. Dinner
(2100 Take bus back to Manila)

OVERNIGHT

Day 1
(0100 Leave Pasay or Cubao for Baguio)
0600 ETA Baguio City. Take chartered jeep to Brgy. Balocloc*
0800 Arrival at Sitio Balocloc. Register and secure guides.
0830 Start trek
1200 Arrival at junction. Lunch
1300 Resume trek
1600 Arrival at Camp 2. Set up camp.
1700 Optional ascent to the summit for sunset
1800 Dinner / socials

Day 2
0530 Optional ascent to the summit for sunset
0700 Back at campsite. Breakfast / Break camp
0900 Start descent
1200 Lunch
1400 Back at trailhead; tidy up
1500 Take jeep back to Baguio City
1700 Back in Baguio City. Dinner
(2100 Take bus back to Manila)

Notes in the itinerary:
1. See other transport options below
2. An even-earlier start is recommended for those who wish to avoid sun overexposure

PRACTICALITIES: MT. PIGINGAN

Transportation Public (1) Jeep, Baguio Center Mall to Itogon  [75 mins; first trip 6am] then
(2) Jeep, Itogon to trailhead [40-60 mins, approximately 4 trips a day; last trip 5:30 pm]
OR  (1) Take direct jeepney rom Baguio Center Mall – only 1-2 trips a day that leave around lunchtime.Approximately 3 hours travel time from Baguio 

Chartered. Jeepney (or even taxi) from Baguio City to trailhead, 1.5-2 hours. Rates are usually negotiable depending on number of people, whether the vehicle will wait, overnight vs. dayhike, etc.

Registration (1) Logbook at trailhead; P100 registration fee; Walk ins possible
Guides Available P500/day (for up to 7 persons)
Contact numbers ✆ Guides –
Jeep Rental – 09198169234
Note: Please provide more contact numbers – they are more than welcome.
Campsites and waypoints ⛺ (1) Camp 1 – Junction 🚰
(2) Camp 2 – Ambel 🚰 (~5 min)
Water sources 🚰 Multiple water sources from Agno River to 1000m. Last reliable water source 5 minutes away from Camp 2.
Cellphone signal 📶 Highly limited in lower reaches; present in upper reaches.
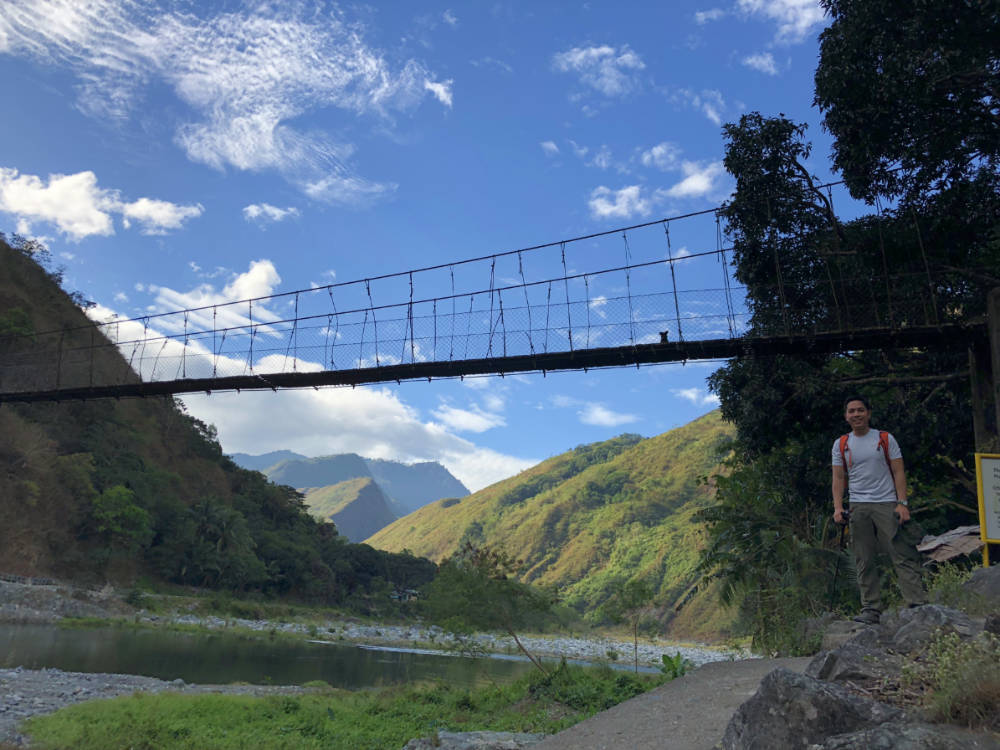
River crossings There is a hanging bridge Agno River (+30 min from start). No unsupported river crossings.
Roped segments None
Limatik None
Lipa None
Rattan
None
Hiking notes Niknik (gnats or sandflies) reported during the rainy season.
Sidetrips Baguio City itself; Mt. Ulap
Alternate trails There is a traverse to Mt. Ugo (+1-2 days)
Dayhikable Yes, but not recommended for beginners. Consider an early start especially if not confident about pace and endurance
Facilities at jumpoff (+) Sari-sari stores
(+) Parking
Estimated budget P800-1000 from Baguio City for a group of 7-10 if renting a jeepney; P2000 from Metro Manila.

MT. PIGINGAN PICTURES

Pigingan 1
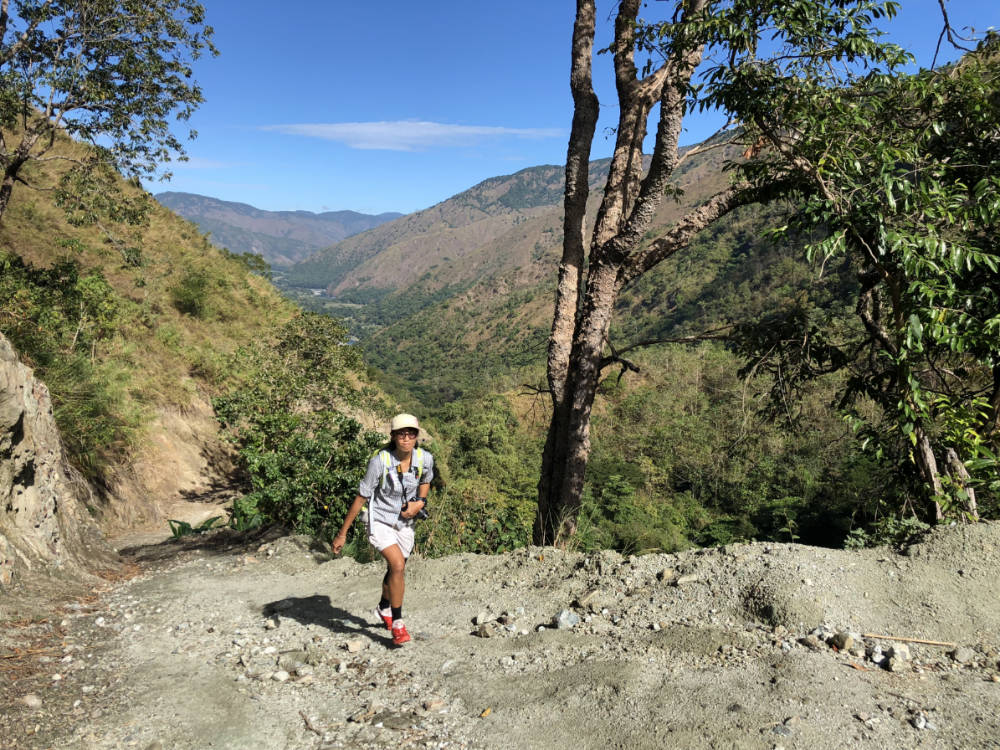
The wide paths that may someday be cemented roads like the ones in Mt. Ugo
Pigingan 2
Hanging Bridge across Agno River
Pigingan 4
Trails exposed and wide open
Pigingan 3
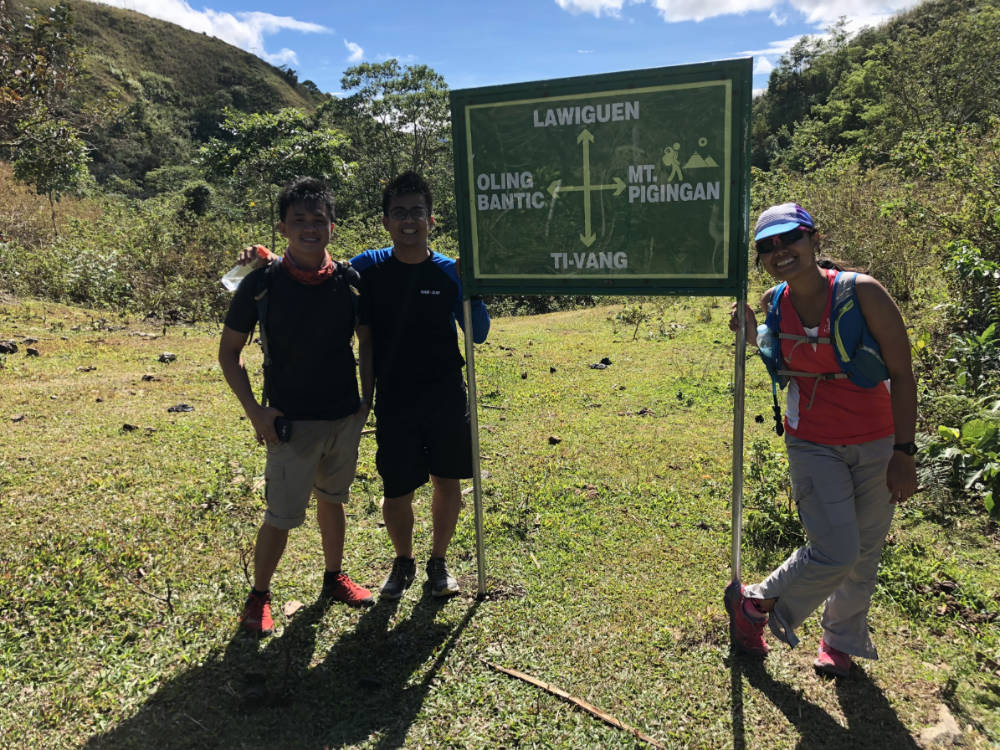
At the junction, where trails to Mt. Ugo are also possible to take
Pigingan 5
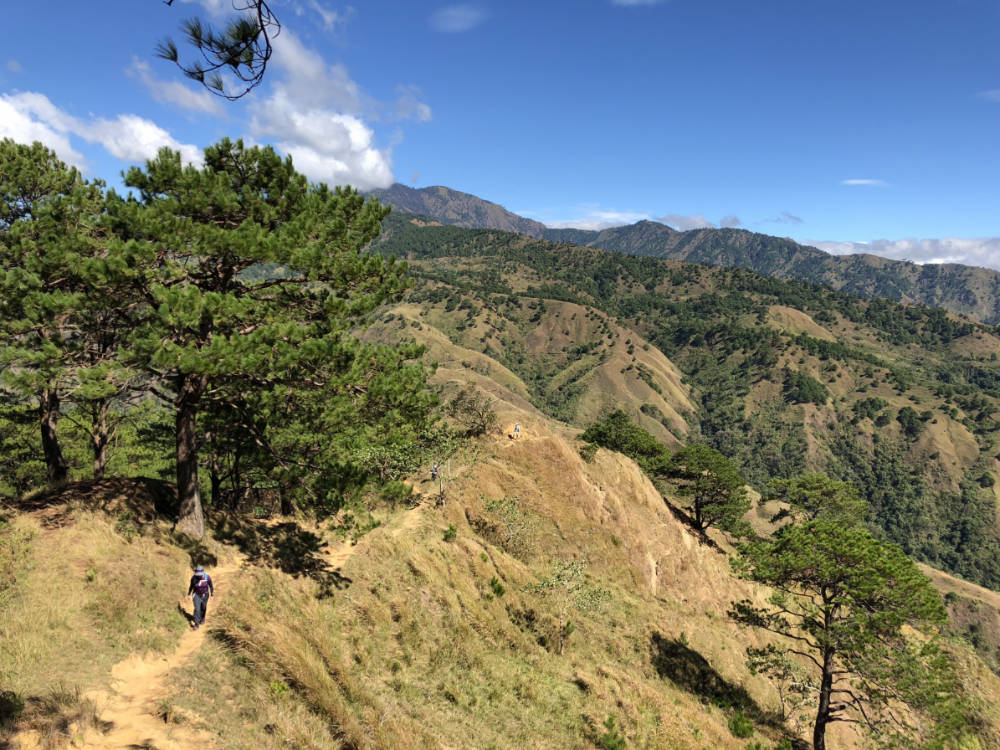
At the upper reaches the trail becomes more Cordillera-like, with pine forests and scenic mountains views
Pigingan 7
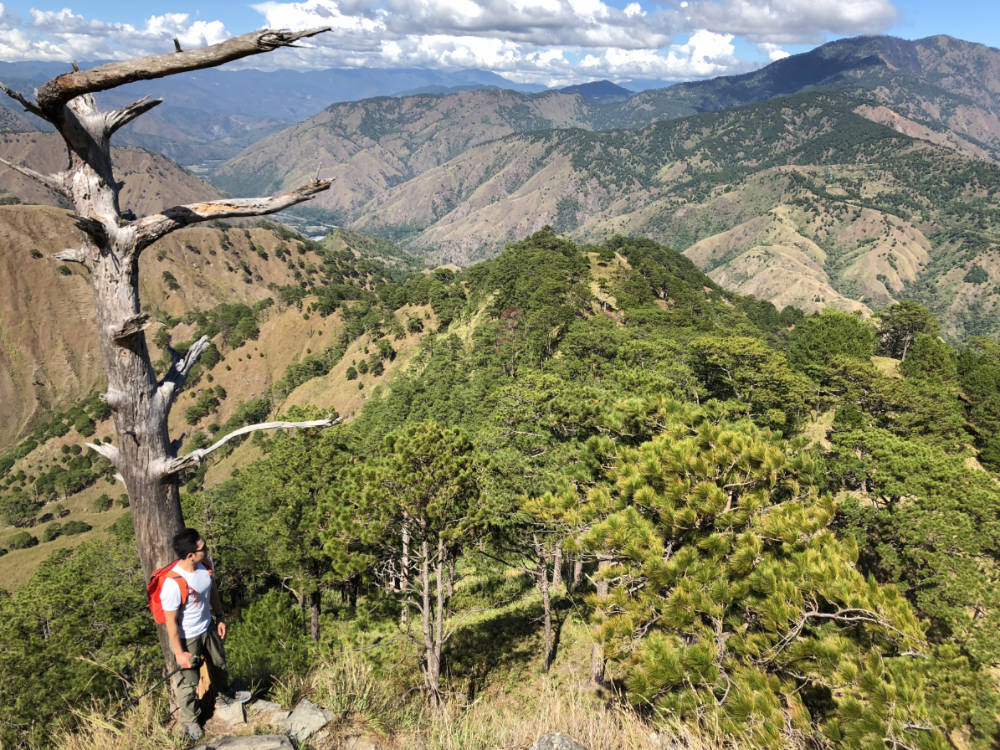
At the final approach to the summit
Pigingan 9
The blogger at the summit of Mt. Pigingan, January 6, 2018.

TRIVIA
Mt. Pigingan is very near the “tri-border” of Ilocos Region (Pangasinan), CAR (Benguet), and Cagayan Valley (Nueva Vizcaya).

Agno River, which is a prominent part of the Pigingan landscape, is over 200 kms long, originating at the Mount Data area in Benguet and empties into the West Philippine Sea through the  Lingayen Gulf in Pangasinan. There are three dams in Agno: Binga Dam – visible from Pigingan – the very-familiar Ambuklao Dam, and San Roque Dam.

The post Mt. Pigingan (1328m) in Itogon, Benguet appeared first on Pinoy Mountaineer.

Nick the ‘niknik’: How to prevent and treat gnat and sandfly bites

$
0
0
Niknkik
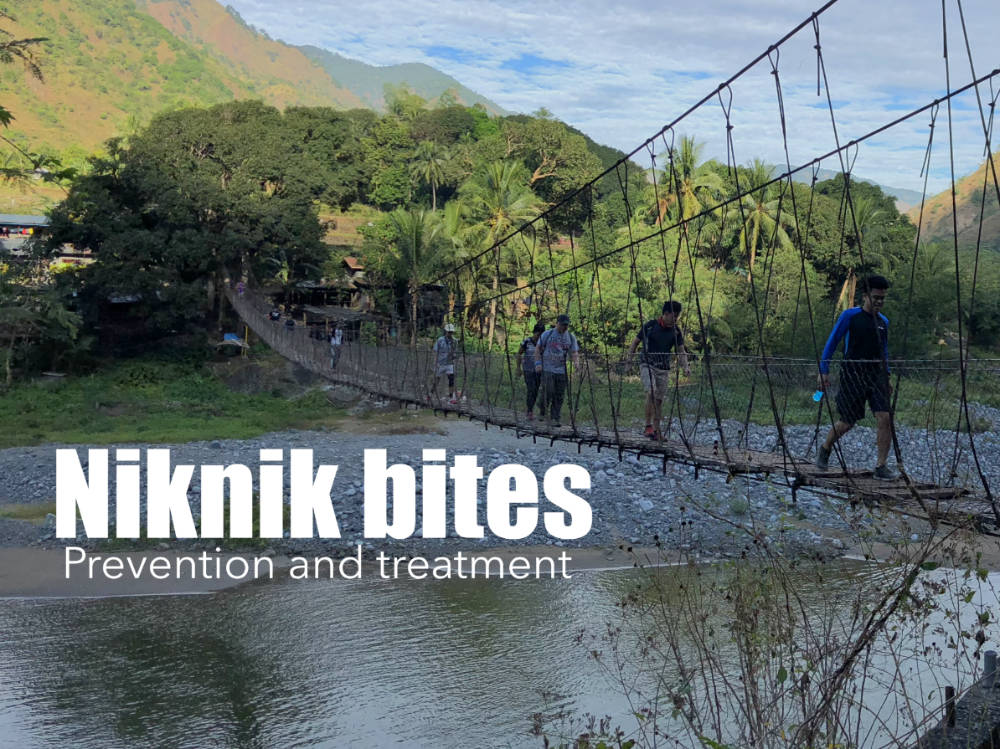
Mt. Pigingan in Itogon, Benguet is one hiking destination where niknik bites have been reported.

by Gideon Lasco, MD

More feared by mountaineers than mosquitos and perhaps even the notorious limatik, niknik are a group of tiny insects also known as gnats, sand flies, or sand mites. They thrive in riverbanks and coastal areas but have a broad geographic range; some species may have a predilection to certain weather conditions. Interestingly, only female niknik actually bite humans. Males just feed on flowers and plants. This is because females need protein to produce eggs.

Just like the limatik, niknik secrete anticoagulants, which cause the allergic reaction that cause the severe pruritus (itching). Symptoms of the bite – particularly itching – can persist for weeks; some individuals are more sensitive to insect bites than others.

Here are some ways to prevent niknik bites.

  1. Know your hiking destination. Is it a niknik-prone mountain? If so, where in particular are they found? Avoid stopping or taking breaks in those places.
  2. Apply insect repellant. Off Lotion and other repellants with DEET have been reported to be effective in warding off gnats and similar insects. Citronella is a natural alternative.
  3. Scents emanating from citrus fruits (i.e. orange and lemons) have also been reported to have some preventive effect vs. gnats and flies. There is no guarantee that this is effective, but it will not hurt to include oranges, dalandan, and the like as part of your trail food.
  4. Wear bright colors. Some studies suggest that some species of flies are attracted to certain colors like blue and black. I do not think there is sufficient evidence to back this for insects in general and niknik in particular but there is no harm in trying out this tip, especially since wearing bright colors is more advisable for hikers anyway.

What if you already had a niknik bite? What are the treatment steps for it? Importantly, go to the hospital immediately the bite marks are expanding rapidly and you are having difficulty breathing – this can be a sign of a severe allergic reaction.

Otherwise, in most cases, here are the reasonable measures to take:

  1. Clean the bite areas.  Soap and water will suffice, but you can also use alcohol or even vinegar – which is reported by some to be effective and soothing.
  2. Consider taking antihistamines. There are over-the-counter antihistamines that can help tone down the allergic reaction and control the sensation of itchiness.
  3. Alternative treatments such as applying a decoction of guava leaves or extract from citrus have been reported to help.
  4. Do not scratch the bites! Scratching niknik bites can worsen the itchiness, injure the skin and cause a secondary bacterial infection.

  5. Consult a doctor (any general practitioner, family physician, or dermatologist) if the bite marks are growing, if the itch is getting more severe, if you have fever and other symptoms, or if the bites are still there after 1-2 weeks.

Do you have any experiences with niknik or tips you’d like to share? Send us your feedback at info@pinoymountaineer.com

The post Nick the ‘niknik’: How to prevent and treat gnat and sandfly bites appeared first on Pinoy Mountaineer.

Hiking matters #585: A dayhike up Mt. Danayag in San Luis, Aurora

$
0
0

Danayag

BALER, Aurora – From the time I first visited Aurora and hiked Mt. Udok way back in 2010 (see Hiking matters #105), I knew that the hiking possibilities in the province are boundness. Unfortunately, save for an ocular climb up Mt. Mingan in 2015 (which I have not blog about), I was not able to pursue them.

28699320_1768063949913267_4150974345563097881_o

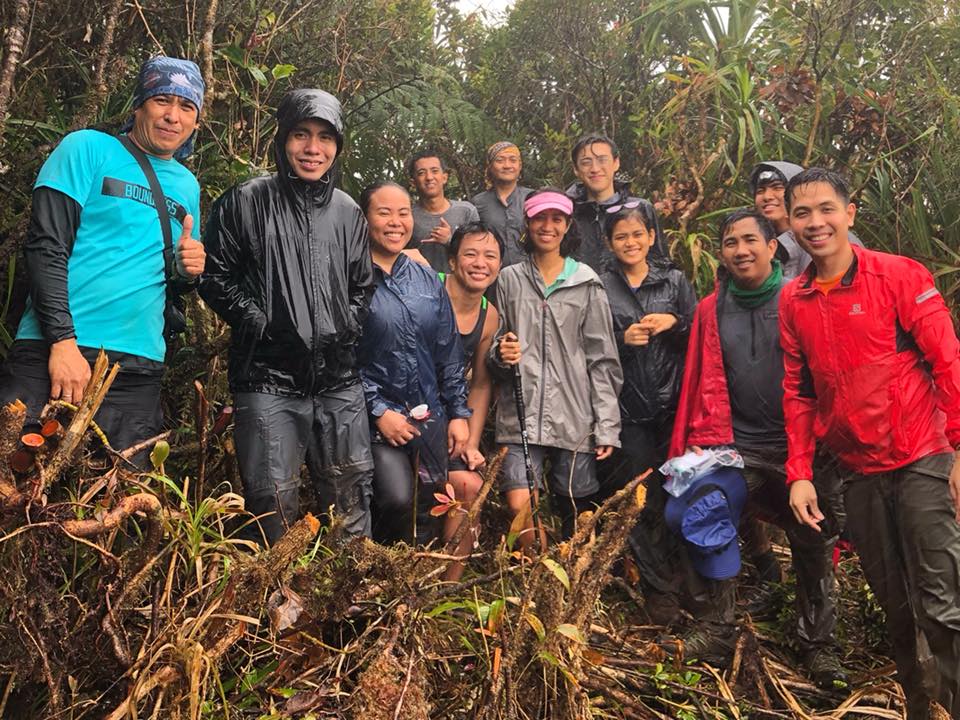
‘Thankfully I was able to go back and add to my Sierra Madre hikes with a 13-hour hike up Mt. Danayag in San Luis, Aurora. As with Mt. Udok eight years ago,  was assisted by Carl of Piknikers Mountaineers and accompanied by Ver John Duran, who also brought along his nephew Von Gomez. We were joined by various guides and trainees from San Luis as well as Konsehal Ondon Amazona.

28515176_1768063879913274_2419572822428135989_o

The hike starts at Brgy. Ditumabo, famous for its “mother falls” that can either be visited as a sidetrip or the terminal end of a loop hike. Initially the trail is a logging road which leads to a forest path. With parts that are narrow and overgrown, it is reminiscent of the MakTrav of olden days – or the veritable Mantalingajan. However, the Sierra Madre have a distinct flavour to them: one that mountaineers have yet to get acquainted to, given the dearth of hiking destinations (although I expect this to change in the coming months).

28516660_1768063706579958_4548552422369093248_o

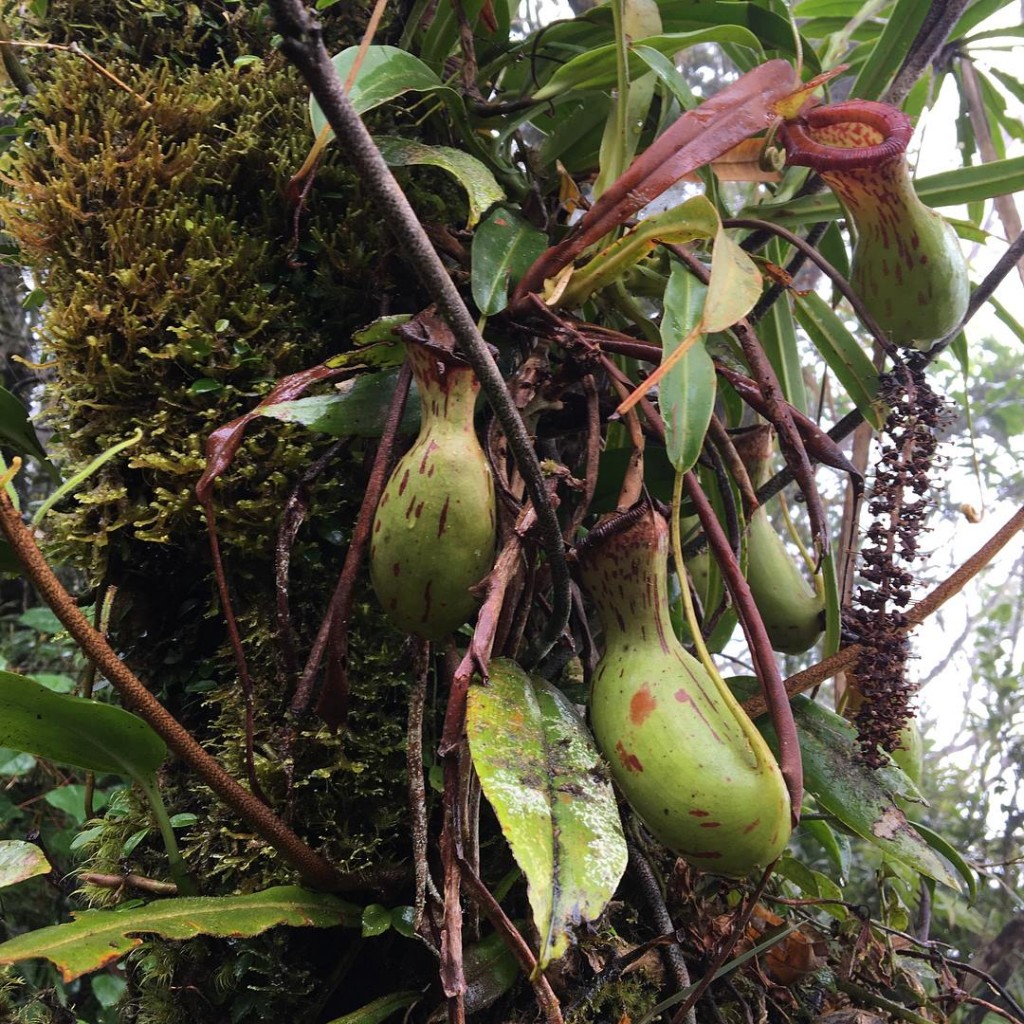
A few rest stops / campsites interrupt the otherwise continuous and straightforward hike that consists mostly of ascents. Along the way, we encountered some Luzon bleeding-hearts, giant earthworm, pitcher plants, and various orchids. We reached the summit at 11 am – after over 6 hours of hiking. Unfortunately there was no view but we did manage to have a peek at the Pacific, and forested environs of Aurora. The descent proved to be even tougher than the ascent given the slippery portions – and took almost just as long; and it was already 1730H when we arrived back at the trailhead…

28468537_10157187331258082_4840110951532453000_n

…but what a worthy hike! The postclimb dinner in Baler was a great treat. Thank you to everyone who joined. We will surely be back to do more hikes in the Sierra Madre!

The post Hiking matters #585: A dayhike up Mt. Danayag in San Luis, Aurora appeared first on Pinoy Mountaineer.

Hiking matters #584: Mt. Palukong Simbahan (1098m) in Infanta, Quezon

$
0
0

27788119_10211499090495357_5785351810569939134_o

A decade ago, the Sierra Madre was seemingly beyond the reach of mountaineers, for many reasons: insurgency and lack of access among them. But this is set to change in the coming years with more infrastructure – and an improving peace and order situation. Now that there’s a link between Rizal and Northern Quezon via Infanta, for instance, it is now possible to reach Infanta in less than two hours, making hikes that go beyond the foothills (i.e. the popular Rizal hikes) feasible, even as dayhikes.

27798192_10211485875444989_2537079288128008745_o

One such dayhike is Mt. Palukong Simbahan (1098m), with a trailhead not far from the Marifanta or Marilaque highway. The drive itself, which passes the same road to Daraitan but goes beyond, is quite scenic, as it reaches 900-1000 MASL. Mt. Palukong Simbahan is just one of the many hikes in the area, which include yet-another Mt. Susong Dalaga and Mt. Taronton (Simon Adriano et al., 2017) which locals say is now off-limits to hikers.

27798297_10211499090535358_4772885596884753827_o

The trailhead alone of Mt. Palukong Simbahan is quite interesting as it has a small waterfall where you can take a dip. It is forested throughout, but the forest is not without its visual delights: from pitcher plants and flowers to a number of birds.

27972184_10157120494588082_5620194498113243374_n

The summit supposedly offers some nice views of the surrounding mountains and even Laguna de Bay, but unfortunately we are not able to see much, due to the rainy weather. Even so, I was very much impressed with the hike and intend to return to the area for more.

27983468_10211485874764972_7646204892411032426_oA

The post Hiking matters #584: Mt. Palukong Simbahan (1098m) in Infanta, Quezon appeared first on Pinoy Mountaineer.


Mountain photography: How to capture the Milky Way

$
0
0

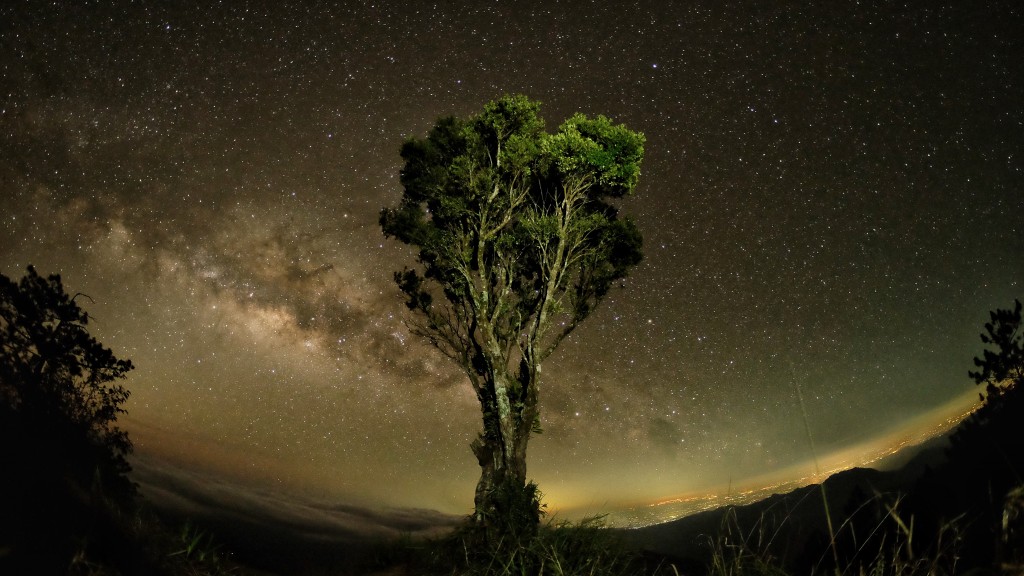
2018_0217_16560100_2-01
by Kevin Jason Manuel

Ever wanted to photograph the Milky Way? Well, you’re in luck–read on.

What is the Milky Way? Basically, it’s a dense band of stars that look very impressive in a photo. It comes and goes, rises and sets, and capturing it isn’t easy… but it’s definitely rewarding.

Things you’ll need:

1. A camera that can take long exposure photos–a DSLR, micro four-thirds, mirrorless, digicam, or even a cellphone.
Know your camera — there are many makes, models, and lenses. Do yourself a favor and learn how to use that expensive camera you bought. You’ll need a basic understanding of how your camera works, the various modes, and how to set the ISO, shutter speed, and aperture.

Lens — use your widest angle lens, if you’ve got one.

2. Tripod (or any stable thing you could place your camera on) — It takes anywhere from 10 to 30 seconds to capture the Milky Way. If your camera moves, even the tiniest bit, you’ll get a blurry shot.

3. Sky map / general knowledge of constellations —There are a lot of free apps on your phone that you could use to find out your chances of getting a good shot. Basically, you just need to keep track of the constellation Sagittarius to find the core of the Milky Way galaxy.

4. Luck and patience. Pray for clear skies and good weather. Comfort yourself in knowing that it takes a lot of attempts to get it right. Most probably, you will not get it right the first time.

Got everything you need? Ok, let’s start.

One thing i’ve learned from shooting the Milky Way is that it’s all about timing. It’s only visible at specific months and specific times. If the moon is present in the night sky, no matter how small, your chances of a successful shot will drop. That’s the reason it’s best to time your attempt during a new moon. Or since the moon rises, sails across the sky, and sets, check your sky map and see if there’s a window where the core would be present without the moon around.

Sometimes the Milky Way will be visible at 8 pm, sometimes at 1 am, or even 3 am. Check your sky map, set your alarm clock and pray that you get up.

And while you’re waiting for your camera to take the photo, brew some coffee. Make sure you’ve got a warm jacket–it’s usually freezing out there.

Settings:
Focus: set it to manual, and focus to infinity
Aperture: set it to the largest opening
Shutter speed: I generally go with 30 seconds, as i’m not that much of a pixel-peeper.
ISO: trial and error–the ISO is basically how much your camera will compensate for the lack of light. A higher iso means higher compensation, but leads to more visible noise or graining. Noise/grain can be defined as the speckles of varying brightness that stand out on a photograph. Too much noise isn’t really pleasant to look at as it ruins the swabe-ness.
So start with maybe iso3200 and start dialling down by increments until you get a nice result.

Set the image quality to the highest possible setting. If you’ve got the patience to tediously post-process, set it to RAW+JPEG.

White balance: completely up to you. I usually go with shade–not much of an issue as you can change how it looks in post-processing.

Framing: having some foreground is really nice. A tent illuminated from the inside, maybe a friend who can stay still, mountain ranges, or maybe a nice tree. Illuminate your foreground by briefly shining your headlamp on them. How brief is a matter of trial and error. And if you’re photographing a person, it’ll be better if they’re facing away from you since their faces turn out blurry most of the time.

Set a two-second delay. this is to avoid any blurring caused by you actually pressing the shutter button. Yep, it’s that tedious.

Well, that’s about it for the instructions. Click your shutter and watch the magic happen. Remember, shooting the Milky Way is all about trial and error. You may not get it right the first time. Make sure you have extra batteries and a spare memory card–long exposures eat away at your battery fast.

The post Mountain photography: How to capture the Milky Way appeared first on Pinoy Mountaineer.

Hiking matters #586: An early spring hike up Mt. Oyama (大山) in Kanagawa

$
0
0

IMG_0250
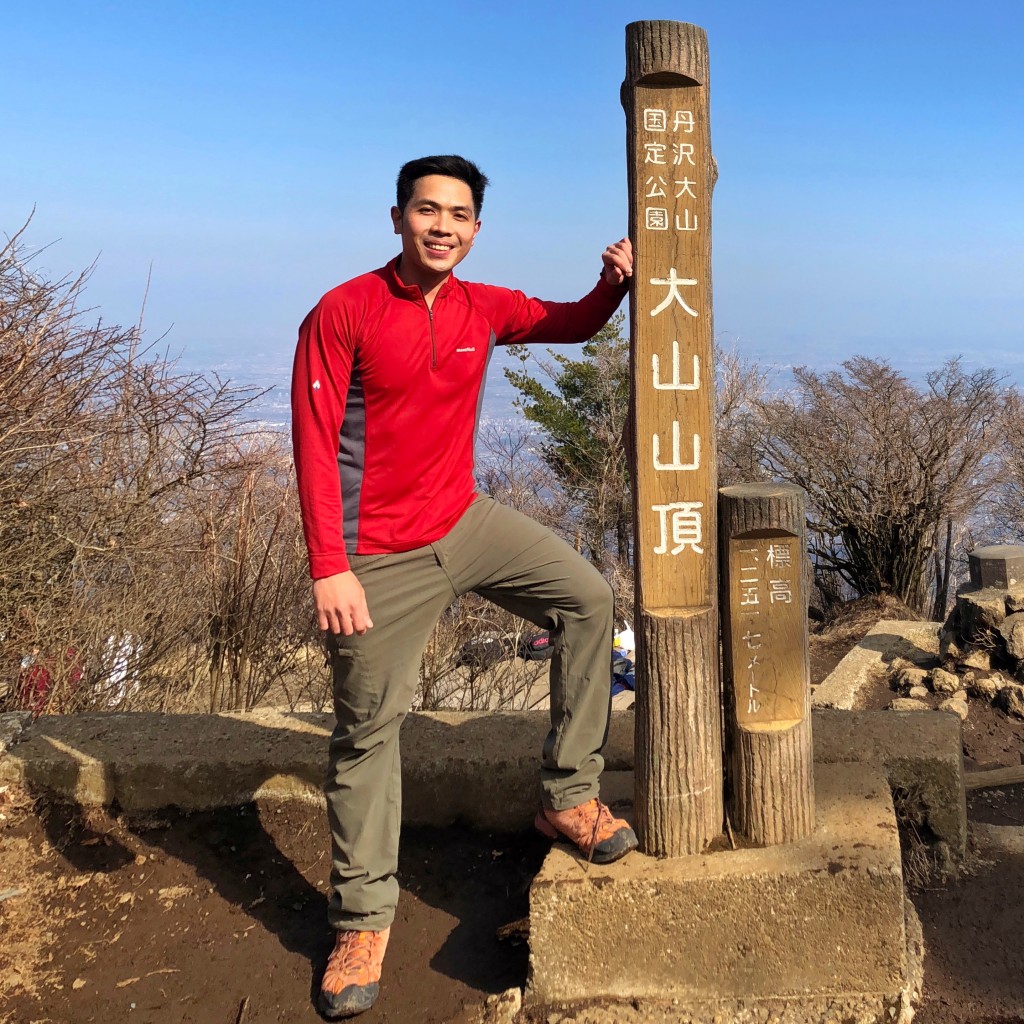
TOKYO – Springtime in Japan is nice when it’s sunny, and there is the additional anticipation of the arrival of the sakura-hana. I was a bit too early for the full bloom, but just in time for a sunny day, and I decided to dayhike Mt. Oyama in Kanagawa – in between Tokyo and Yokohama. Just like many Japanese peaks this mountain is seen as a sacred landmark and there were various shrines along the trail. I took the Odakyu Railway train to Isehara, then the bus to Oyama Cable Car, taking around 90 minutes.

IMG_0111

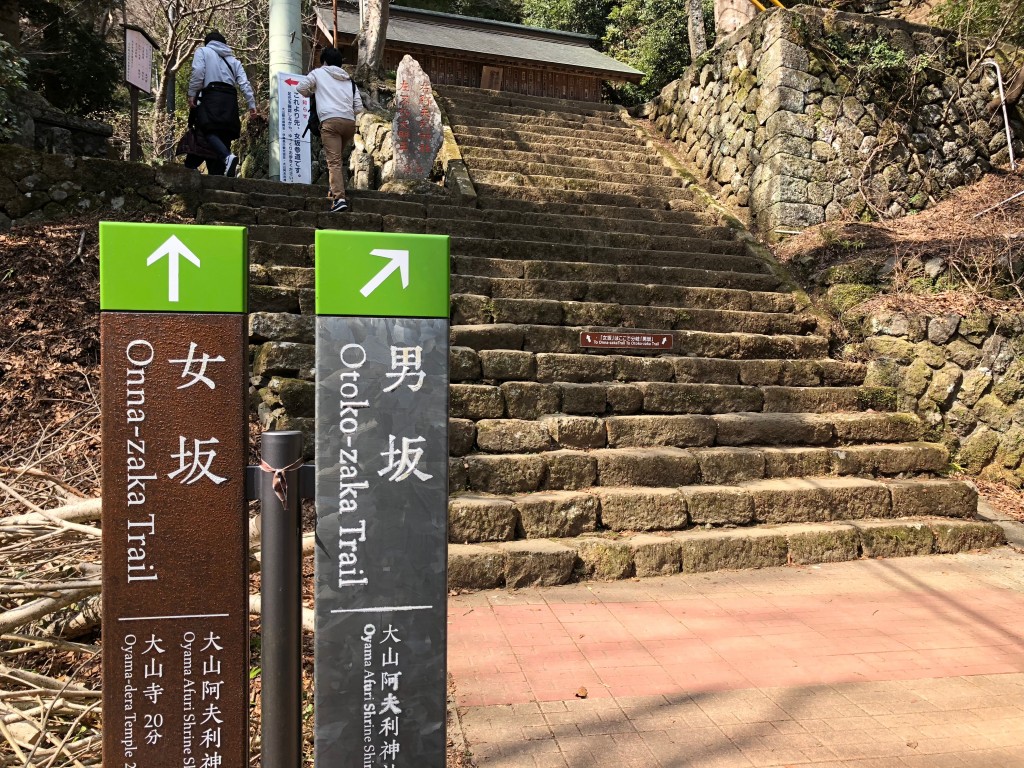
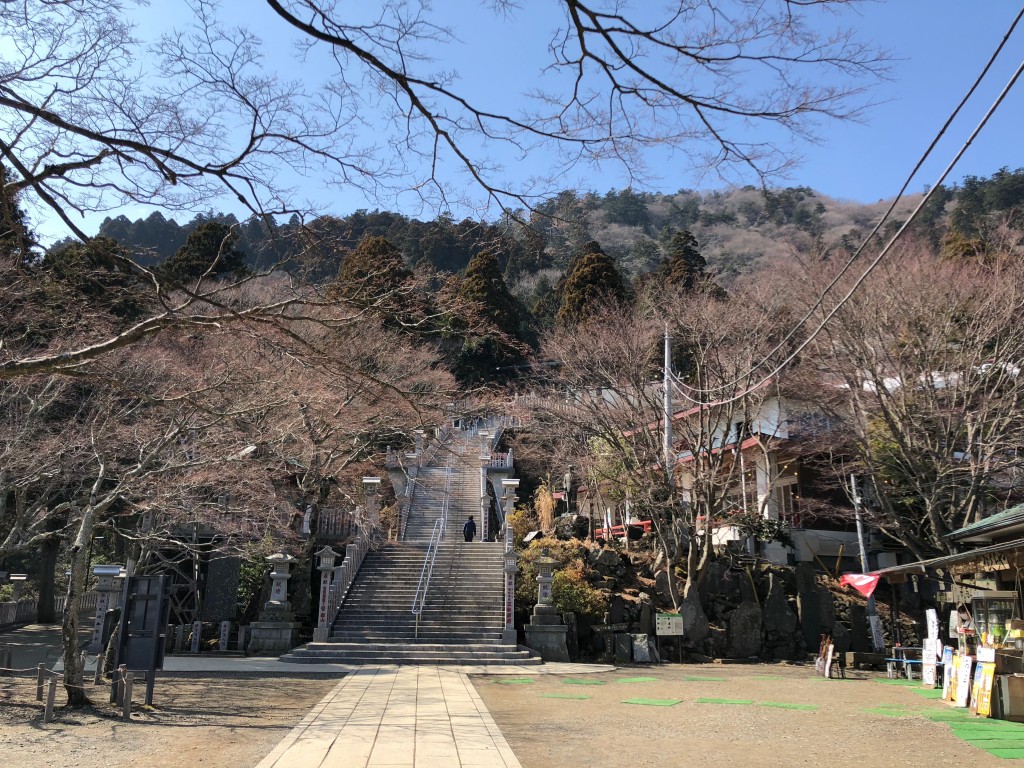
One interesting thing in Oyama is that there’s a “Men’s Trail” (Otoko-zaka) and a “Women’s Trail” (Onna-zaka); the former is steeper, the latter is gentler. I opted for the Otoko-zaka, and found that it was indeed very steep – but also easy because it’s mostly a staircase. Moreover, it takes only 30 minutes to complete it.

IMG_0136

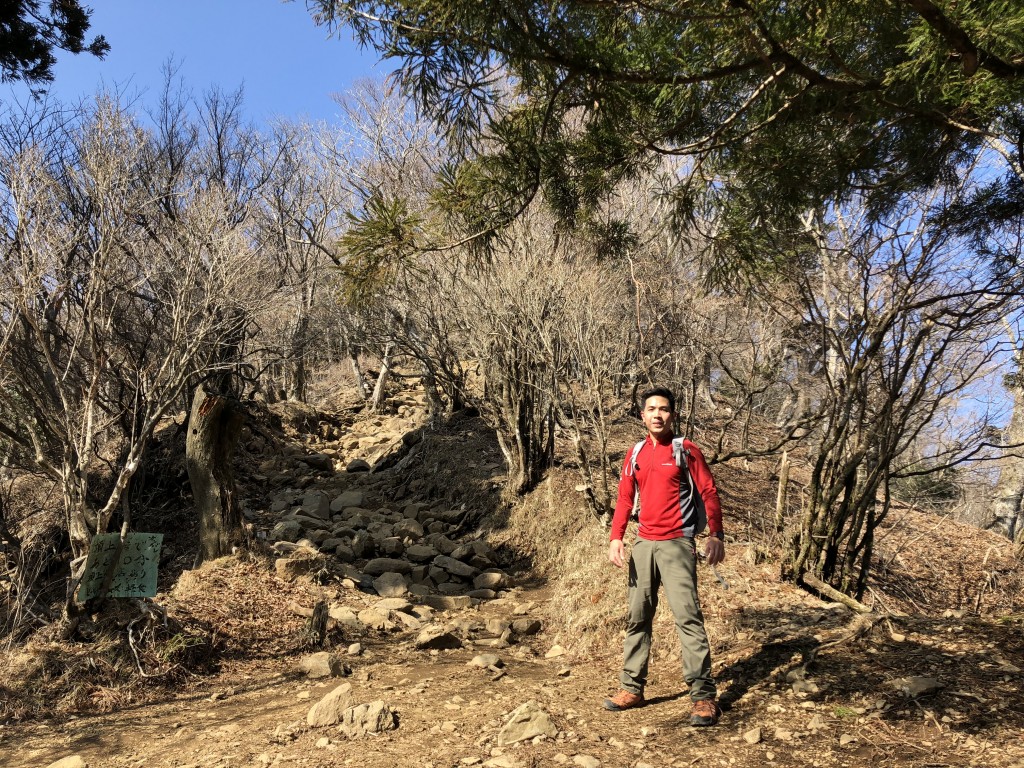
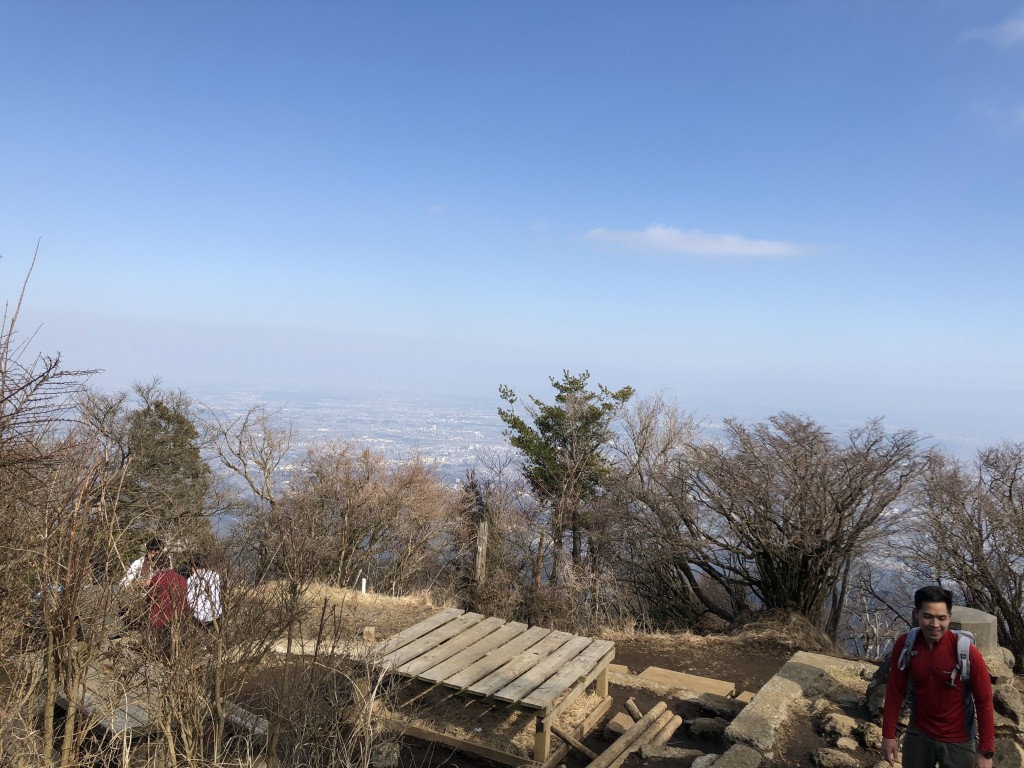
At the end of either trail (one can actually also use a cable car), there is a final shrine called Afuri-jinja, and beyond this point it is where the real trail to Oyama begins. The projected time is 90 minutes but it can actually take just an hour to reach the summit. The wooded trail is moderate in steepness but well-established. At a decent 1252 MASL, the summit offers some interesting views of the Kanto plain but unfortunately Mt. Fuji on the other side was blocked by clouds.

IMG_0269 2

It was still cold at the summit – probably 7-9 degrees Celsius – and I didn’t linger, opting to go back as soon as I can so I can still have time to go around Tokyo that night. I will have to wait a few months before I can do more hiking in Japan, but hopefully Oyama will be beautiful beginning to those hikes of the future. 確かに私は戻ってきます!

IMG_0358

The post Hiking matters #586: An early spring hike up Mt. Oyama (大山) in Kanagawa appeared first on Pinoy Mountaineer.

Guiding Document: 5th National Mountain Cleanup Day, May 5, 2018

$
0
0
29244582_10157227482413082_4920027231906481796_n
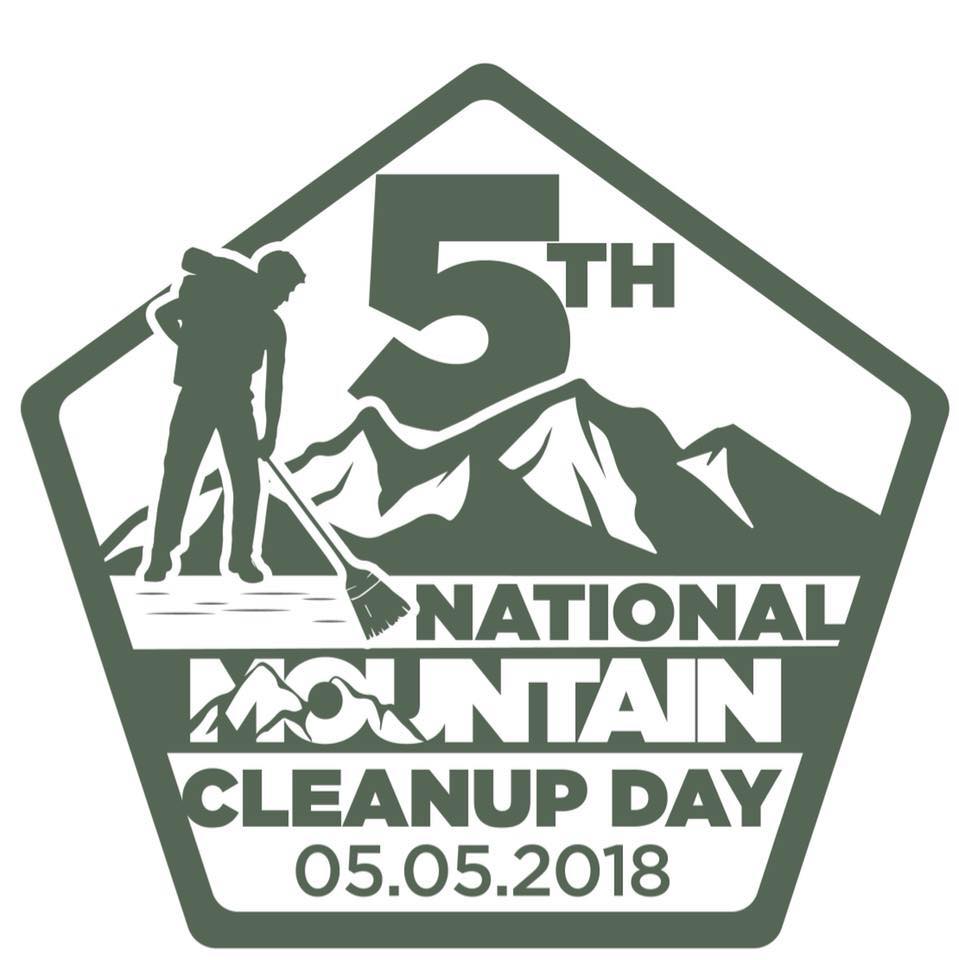
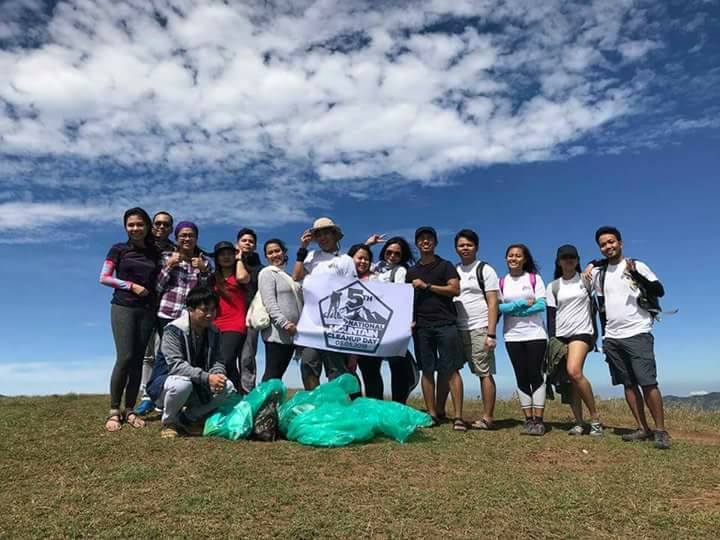
The 5th National Mountain Cleanup Day logo by Wey Dela Peña


STATEMENT OF PURPOSE

Continuing the annual tradition, the fifth NMCD – held in cooperation with the DENR – is envisioned to live up to being an annual reminder to the public of the importance of having clean mountains, as well as a set of simultaneous activities organised by different groups that will clean up mountains and other natural areas in different parts of the Philippines. Alongside cleanup activities, measures geared towards the sustainability of cleanliness – including local ordinances, guide trainings, and awareness campaigns, are also encouraged.

SCHEDULE AND VENUE

The fourth NMCD is scheduled to be held on May 5, 2018, although groups are most welcome to organise their cleanup hikes in other dates. The venues are are the mountains and areas with hiking activity that are both within and outside the designated Protected Areas by the government.

ORGANIZATION

1. At the national level, the lead proponent/s of the project will be coordinating the initiative in partnership with the Department of Environmental and Natural Resources through its relevant agencies. The local events however will be organised by different groups.

2. The organisers of each of the clean-up climbs will be assembled in one Internet group through a suitable social media platform in order to disseminate information. For climb organizers, please click this link to access the Facebook group for the NMCD.

3. There will be a designated coordinator for each clean-up climb who will be responsible for the participants and the conduct of the hike and the clean up. All coordinators must have basic mountaineering skills and must have experience in organising hikes.

PARTICIPATION

1. Any hiking or outdoor club, civic organization, or group of individuals may join the NMCD. Groups are at liberty to select their target mountain for clean-up. However, there may not be several groups doing a clean-up in a single trail or area.

2. Participating groups are responsible for the safety and well-being of their participants.

3. Every group must have a designated coordinator.

4. The coordinator for each climb must make sure that his participants are sufficiently fit to participate in the activity, have sufficient mountaineering skills and experience, knows what to do in case of emergency, and is aware of the Leave No Trace principles. If a participant is below 18 years of age, parental consent must be secured.

5. The maximum number of participants per group is 18. However, this is just a general guideline. The policies set by the mountain authorities (i.e. PASU, ENRO, barangay officials) take precedence over this guideline.

6. The organising party will coordinate with the Protected Area Management Board through the Park Superintendent. If the mountain is not a protected area, the organising party should instead coordinate with the local government unit in charge of the mountain. The following should be endorsed and consulted:

a. The number, names, and contact information of participants
b. The itinerary of the hike
c. Areas that will be cleaned up
d. Emergency plan
e. Waste disposal plan

7. In case there are several groups seeking to hold clean-up activities, the Park Superintendent will determine the maximum number of participants for each group, as well as how the groups will be divided according to target areas of clean-up. In mountains not falling under protected areas, should designate a lead coordinator for the clean-up efforts for the particular mountain, and discuss beforehand to designate particular areas to be cleaned by each group.

8. In protected areas, the Park Superintendent will designate the designated waste disposal facility. For other areas, the DENR will provide advice at the national level while the participating groups will also coordinate with the relevant LGU on where the garbage will be disposed.

9. All participants must treat every clean-up climb as a regular hike and thus they must have contingency plans, designation of tasks (i.e. lead, sweeper, medic). Importantly, every team should have a first aider who can respond to injuries like cuts that may be caused by picking up garbage.

10. Participating groups should feel free to organise other activities concurrently with the clean-up, including, but not limited to community outreach, dialogues and lectures about Leave No Trace principles, among others.

GARBAGE COLLECTION AND DISPOSAL

1. For the purposes of the event, garbage is defined as any material that was brought by humans to the mountains and does not serve any useful purpose. Common garbage in the mountains include various kinds of plastics, glass bottles, cans, any form or piece of paper, cloth, or any other material left by humans. All forms of garbage should be collected from the campsites, trails, peaks, and other areas of interest.

2. Participants will be advised to use garbage bags to collect the trash. Each participant should try to fill one or two garbage bags depending on the number of trash on the trail. The bags must be of sufficient thickness to withstand being transported through the trail. If in doubt, consider using two bags for double thickness. Biodegradable, environment-friendly garbage bags are preferred.

3. Participants should wear rubber gloves or equivalent for sanitary reasons, as well as to protect themselves from possible cuts or injuries from sharp trash like bottles. Special precaution should be exercised when handling glass shards as well as opened tin cans, as their edges can cause injuries.

4. Participating teams should consider bringing other tools such as a hand trowel that can assist in retrieving buried cans, glass, and other forms of garbage.

5. The sweeper, or the last person in the group, must ensure that no trash bags are left behind, and that they are not left in huts, rest stops, not even in the trailhead, regardless of the existence of trash cans there. Only the designated waste disposal area should be considered. If necessary, groups should transport the garbage with them to a point where proper waste disposal is assured.

6. At the designated waste disposal facility, the groups should measure the weight (i.e. in kilos) and volume (in number of bags) of the garbage they were able to collect. In the absence of a designated waste dis

7. In cases where locals would demand that participants leave the garbage in certain places, like campsites, participating groups are encouraged to abide with the chain of waste disposal as long as this can be done amicably.

IMPORTANT: CALL FOR FEEDBACK

In order to improve on future clean-up days and also to guide future clean-up activities, participating groups will be requested to submit the TRASH DATA FORM  to the PASUs, LGU, and to pm.encomm@gmail.com for consolidation. The form will be sent to group coordinators an posted on the official NMCD FB group.

The post Guiding Document: 5th National Mountain Cleanup Day, May 5, 2018 appeared first on Pinoy Mountaineer.

Pinoy Mountaineer joins the ‘Best Friends of the Forest’ Movement

$
0
0

Screen Shot 2018-03-29 at 12.31.16 PM

Last March 23, 2018, Pinoy Mountaineer joined the Forest Foundation of the Philippines (FFP) in its ‘Best Friends of the Forest’ movement, which aims to raise awareness about the many environmental issues that our country faces today -and build a community of advocates. Both Pinoy Mountaineer Gideon Lasco and PM Environmental Committee head Carlo Cunanan attended the event alongside other environmental advocates. “Environmental advocacy should not be a special activity,” said Gideon. “It should be a way of life.” For his part, Carlo invited people to support the upcoming 5th National Mountain Cleanup Day on May 5, which also aims to raise awareness about environmental issues.

The movement builds on the FFP’s four thrusts:

Grow Forests. As mountaineers we can grow forests by participating in tree growing initiatives and supporting efforts to protect forests.

Grow Livelihoods. Ecotourism is one way to grow livelihoods while growing forests as well.

Grow Partnerships. The goal is to build a community, because this is a task we can only do together.

Grow Advocates. How do we inspire people – especially the youth – to join this cause?

Leading the activity, held in Makati, was Atty. Jose Canivel, Forest Foundation Philippines’ Executive Director, and the whole FFP team. BFFs included Jen Horn for  Social Entrepreneurship, woodcarver Niccolo Jose for Arts & Culture, and the UP Mountaineers for Ecotourism. Beyond the initial ‘best friends’ identified, the goal of the movement is to involve as many people as possible. As Gideon said, it all begins with the recognition of the importance of forests in our everyday lives: “The forests have been best friends to us for a long time, nourishing and protecting us. The challenge is to return this friendship, and be the best friends they deserve.”


The post Pinoy Mountaineer joins the ‘Best Friends of the Forest’ Movement appeared first on Pinoy Mountaineer.

Hiking matters #587: Exploring Hong Kong Global Geopark in Sai Kung

$
0
0

Hong Kong 3

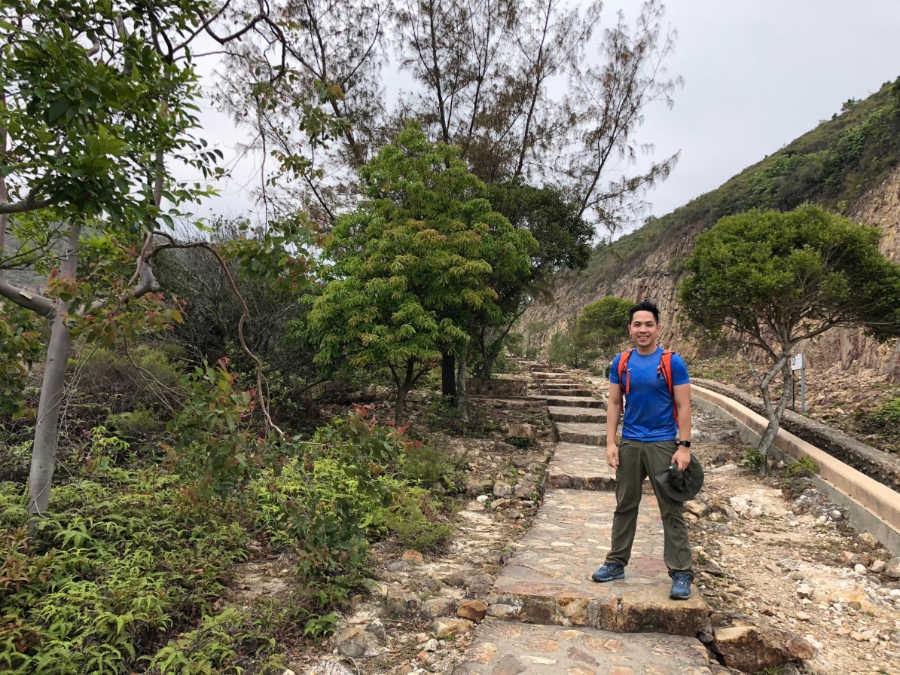
MONG KOK – Hong Kong may be known as a commercial centre and a shopping paradise, but it is a great outdoor destination. Although the land area of the territory is just 1,104 square kilometres – just around the size of Rizal province – it is hilly and mountainous, and while the highest peak, Tai Mo Shan, is “just” 957 MASL, it is made more dramatic by the fact that many trails start at sea level, and that the trails are so well-established that many of the hikes can be connected. One of these long trails is the 100-km MacLehose Trail, the first section of which I had the opportunity to visit recently.

Hong Kong 4

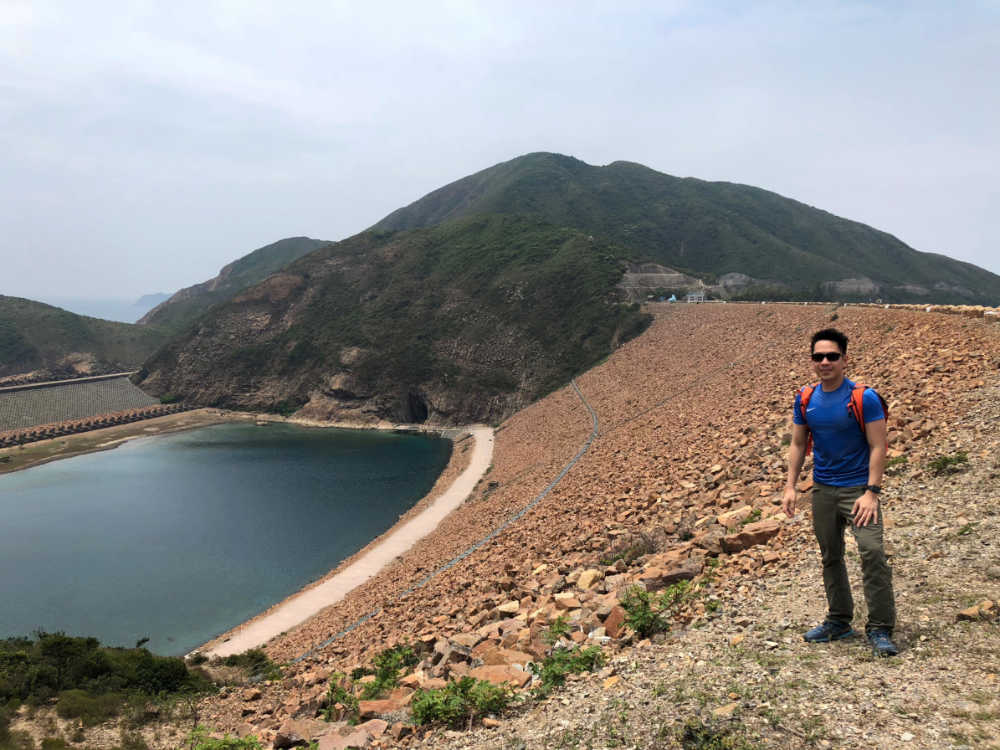
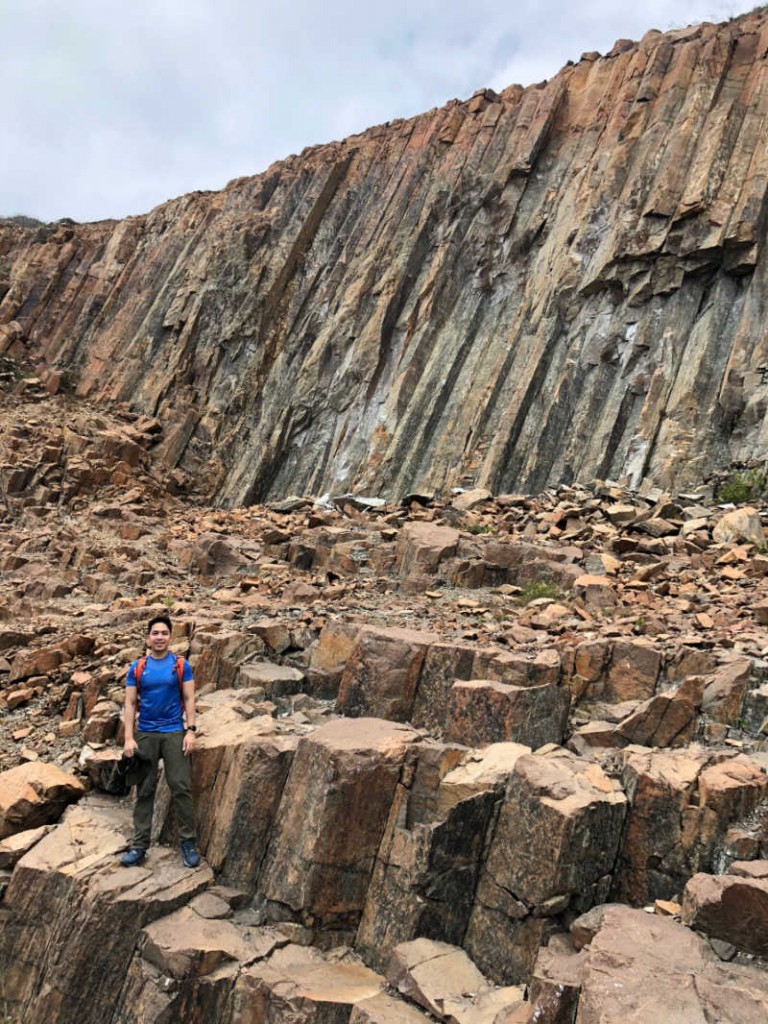
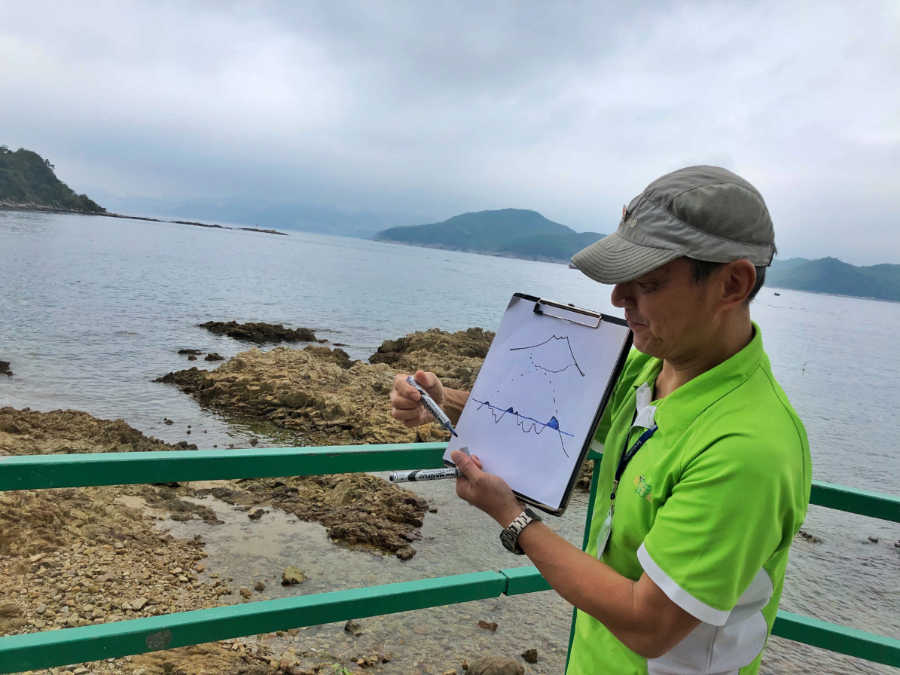
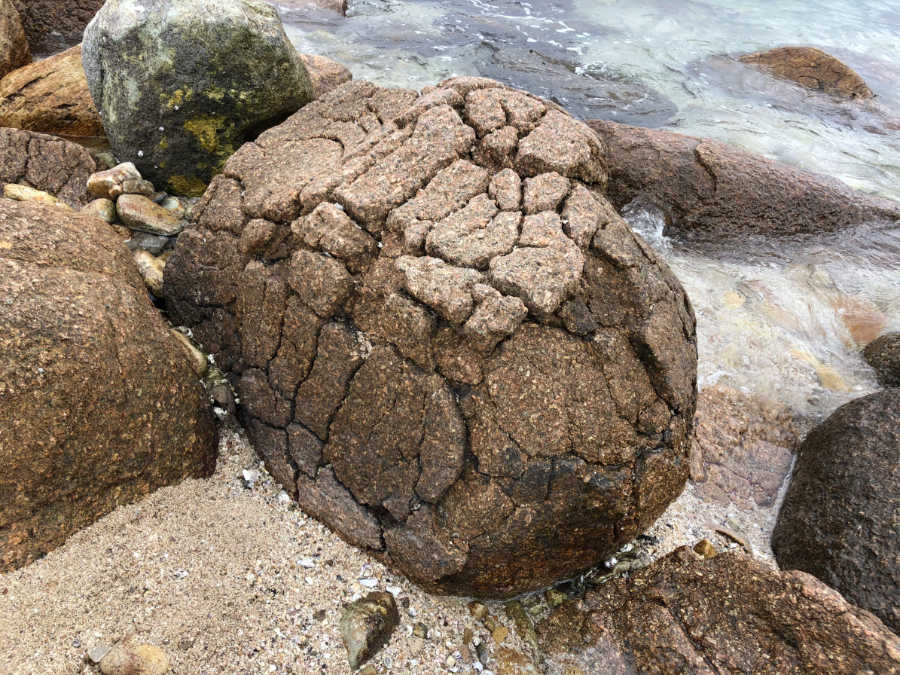
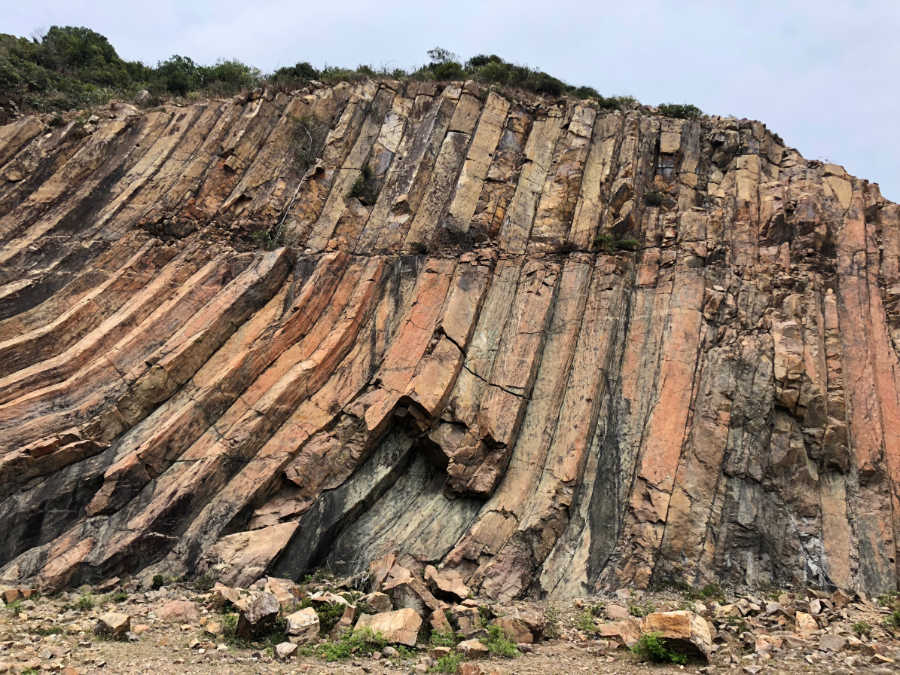
The trail starts in Pak Tam Chung, Sai Kung Peninsula, passing through the High Island Reservoir. At the tip of the reservoir is a dam which is surrounded by hexagonal rock columns. Dating to 140 million years ago when a volcano was said to have erupted, these columns are a geologic marvel as it required precise circumstances for them to form as such, and the twisted columns are even more impressive because it necessitated a combination of phenomena happening at the same time. Recognised by the UNESCO as the “Hong Kong Global Geopark”, this is definitely one of the outdoor highlights of Hong Kong.


Hong Kong 2

Section 1 of the trail continues all the way to the Long Ke beach, but we had to turn back and return to Kowloon. Still, just visiting the Geopark is a reward in itself, considering the grandeur and scale of the rocks. The beauty of Hong Kong as a hiking destination, after all, is the fact that it caters to many different skill levels and time commitments; one can spend 3-5 days in the MacLehose trail or just an hour in a section of it. Another great thing is that although you can avail of tours, you can also just do it by yourself: no registration fees or guides required.

HongKong1

For more information about this destination, please visit the Hong Kong Tourism Board website.

DISCOVER HONG KONG 2018
Hiking matters #587: Sai Kung’s Global Geopark
Hiking matters #588: Fan Lau to Yi O heritage trek
Hiking matters #589: Sai Kung – Sharp Island
Hiking matters #590: Plover Country Park trek

The post Hiking matters #587: Exploring Hong Kong Global Geopark in Sai Kung appeared first on Pinoy Mountaineer.

Hiking matters #588: Hong Kong’s Lantau Trail – Fan Lau to Yi O

$
0
0

HK3

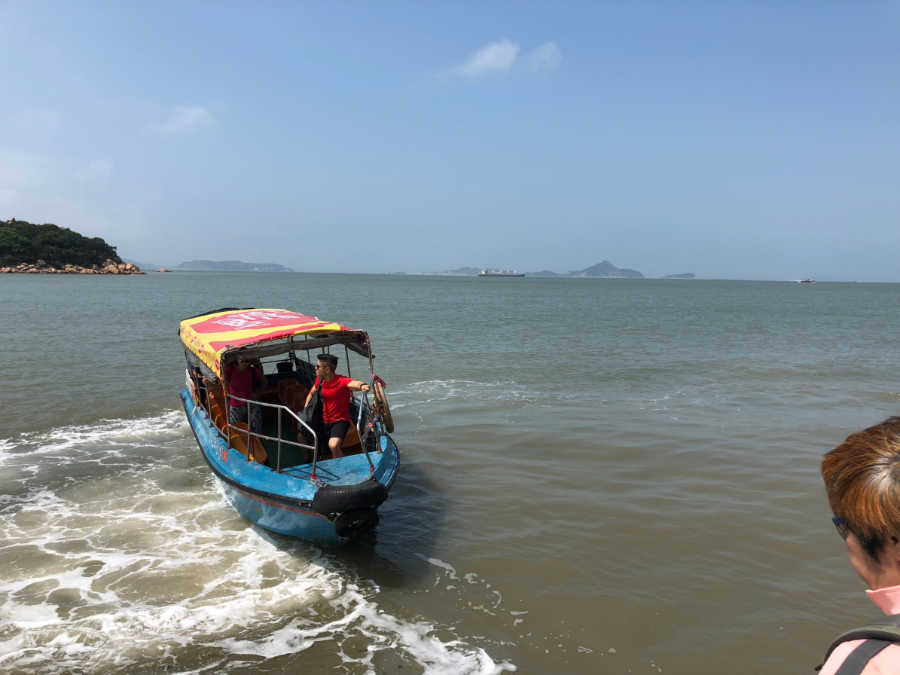
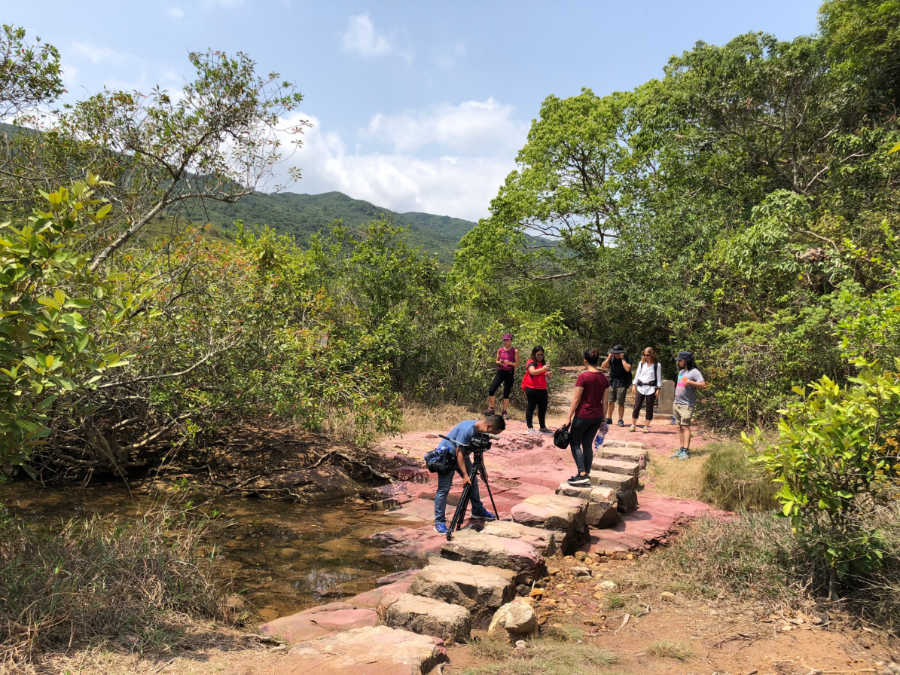
MONG KOK – After the geologic wonders of Sai Kung (see Hiking matters #587), we turned our attention to exploring the agricultural (and another unexpected) side of Hong Kong by visiting the southern slopes of Lantau Island. This time we took a boat from the fishing village of Tai O (大澳)  and hiked a short section of the Lantau Trail from Fan Lau (分流東灣) to Yi O.

HK4

The trail – part of Lantau Trail Stage 7 – was once again well established, and largely cemented. From the beach in Fan Lau it led us through a wooded section, parts of which offered views of the nearby coast.

HK1

Interestingly, the trail was teeming with wildlife: we saw a lot of birds and reptiles, as well as a number of insects. It was like being in the mountains of Batangas or Rizal!


HK2

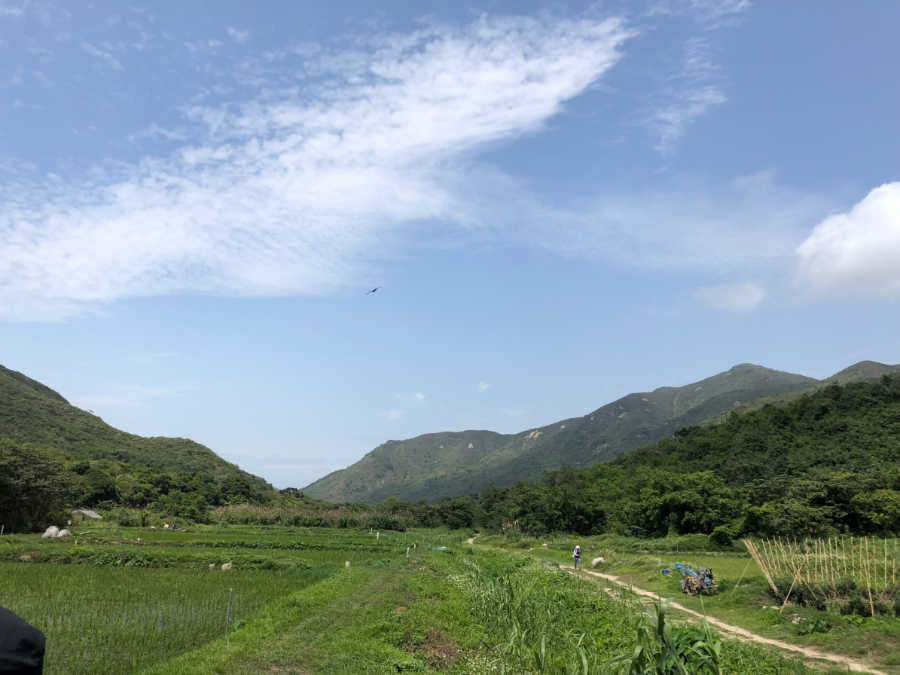
The hike took us just around 1.5 hours and soon we were in the farm near Yi O, where they grow all sorts of vegetables; they are also trying to produce rice just as the ancients used to. Unfortunately, agriculture is not really profitable in Hong Kong and farms can only sustain themselves with the help of tourism. Even so, there is growing interest in sustainable agriculture and “going back to the soil” and the Yi O farm taps into this rising enthusiasm over how we grow our food. We had lunch there and enjoy a meal of pork, chicken, farm-grown beetroot, and of course, white rice!HK5

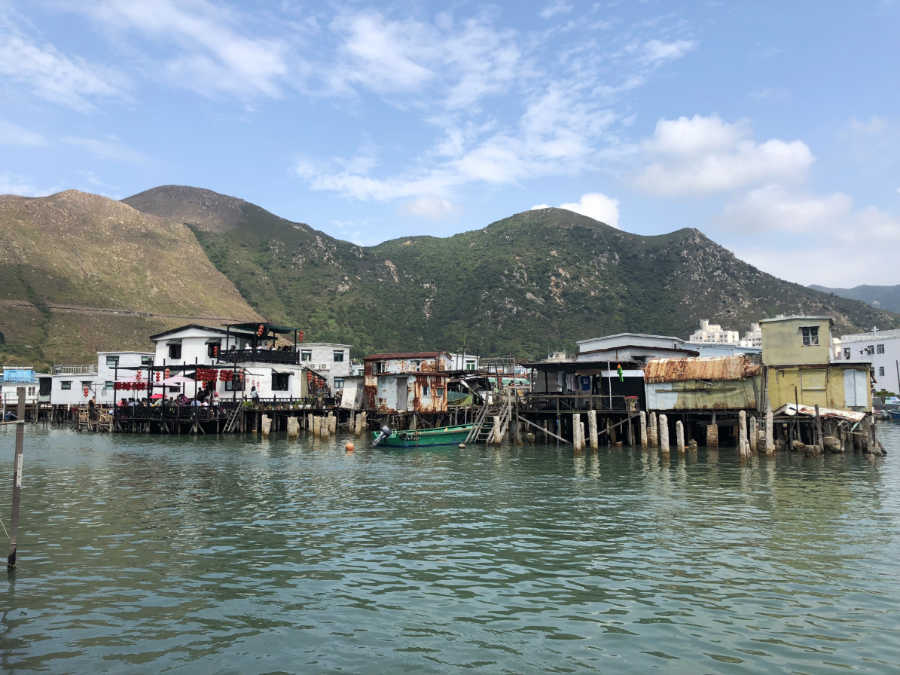
After the hike and the return boat ride (where we saw some dolphins!) we headed back to Tai O (大澳) and explored the village, which is interesting its own right, with stilt houses like the ones we see in the Philippines, a hilly background, and some nice shops (it also caters to city dwellers who want to go on a day trip). I have hiked in Lantau before (i.e. Lantau Peak and Sunset Peak) but seeing another side of Hong Kong’s largest island turned out to be another easy but quite rewarding adventure.

HK6

DISCOVER HONG KONG 2018
Hiking matters #587: Sai Kung’s Global Geopark
Hiking matters #588: Fan Lau to Yi O heritage trek
Hiking matters #589: Sai Kung – Sharp Island
Hiking matters #590: Trekking to Lai Chi Wo

Disclosure: This hike was part of a media familiarisation trip organised by the Hong Kong Tourism Board. The content and the opinions in this post are solely the author’s.

The post Hiking matters #588: Hong Kong’s Lantau Trail – Fan Lau to Yi O appeared first on Pinoy Mountaineer.

Hiking matters #589: Sai Kung revisited – Hong Kong’s Sharp Island

$
0
0

KH2

MONG KOK – As a sequel to our trip to the hexagonal columns (see Hiking matters #587), we returned to the area this time to visit Sharp Island, which is also part of the Hong Kong Global Geopark. Although the island is relatively tiny, it does have a good hiking trail that allows for views of the seascape, as well as its own unique geologic features.

KH4

As our guide Raymond Poon made clear, the emphasis of the trip is actually these geologic wonders, and he proceeded to tell us about the various rocks in the area and how they were formed as part of an ancient eruption that led to a prehistoric caldera. One of interesting rocks was the “pineapple bun rock”, so named after a local pastry delicacy that we got to try after the trip! (By the way, there is no real pineapple in the bun – only the shape).
KH1
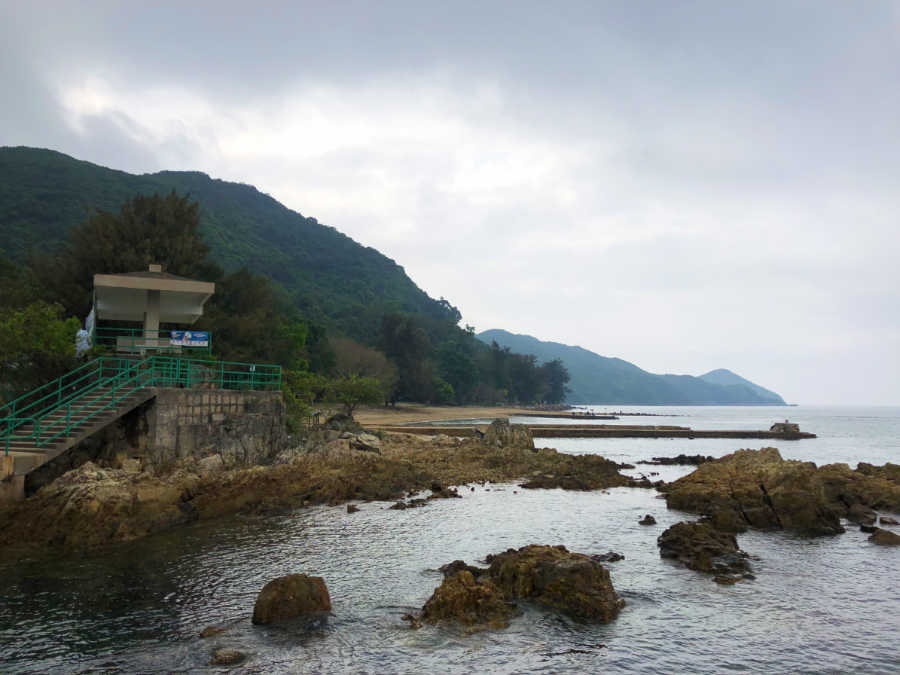
Another interesting feature in Sharp Island was the tombolo that connected it. A tombolo, it turns, out, is a narrow piece of land (i.e. a sandbar) that was formed due to different wave patterns. What’s fascinating about the tombolo is that it actually connects Sharp Island with a smaller island called ‘Kiu Tau (橋頭) – but the tombolo or land bridge can only be crossed during low tide. Unfortunately the water was only beginning to subside when we were there, but we did witness some locals doing a wet crossing.


KH3

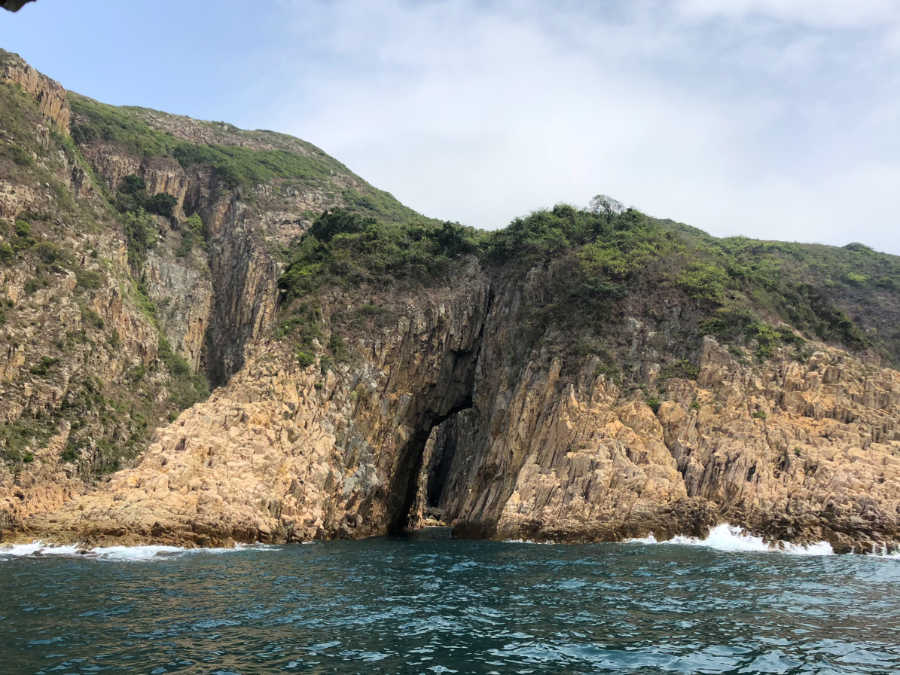
After the short trek around Sharp Island we proceeded by boat to check out other geologic wonders in the area, including the Bell-shaped Arch (see above) in Jin Island. There were more hexagonal columns and other interesting features, and it made me think how we take so many of our mountains and volcanoes for granted, when there is really much more to them than just their summits or views.

KH5

After the hike we returned to Sai Kung for a noodle lunch, and back to our hotel in Kowloon. Although I would have wanted to hike longer, I was nonetheless inspired by the tour because it emphasises a commonly-overlooked aspect of our natural wonders: their geologic heritage.

KH6

DISCOVER HONG KONG 2018
Hiking matters #587: Sai Kung’s Global Geopark
Hiking matters #588: Fan Lau to Yi O heritage trek
Hiking matters #589: Sai Kung – Sharp Island
Hiking matters #590: Trekking to Lai Chi Wo

Disclosure: This hike was part of a media familiarisation trip organised by the Hong Kong Tourism Board. The content and the opinions in this post are solely the author’s.

The post Hiking matters #589: Sai Kung revisited – Hong Kong’s Sharp Island appeared first on Pinoy Mountaineer.


Hiking matters #590: Trekking to Lai Chi Wo, home of Hong Kong’s Hakka people

$
0
0

IMG_1654 (1)
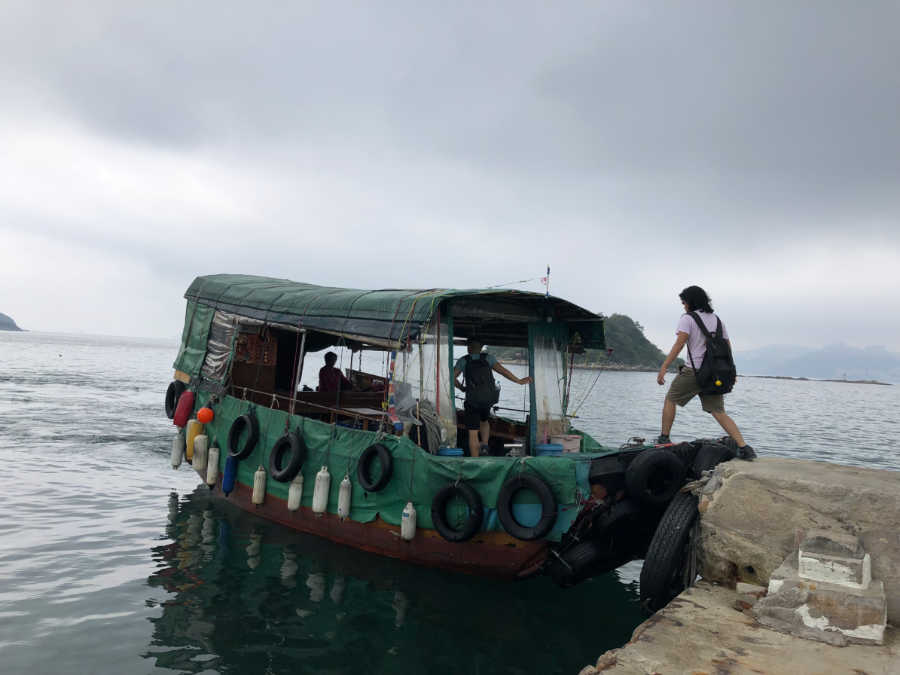
On the final day of our four-day Hong Kong itinerary, we headed to Plover Cove Country Park in the New Territories, very close to the border with mainland China, to do a trek to Lai Chi Wo, an ancient village that is home to some of Hong Kong’s Hakka people (客家). Although they belong the Han Chinese ethnic group, they have their distinct culture that have a common language, ancestry, and cultural traditions.

IMG_1578 (1)

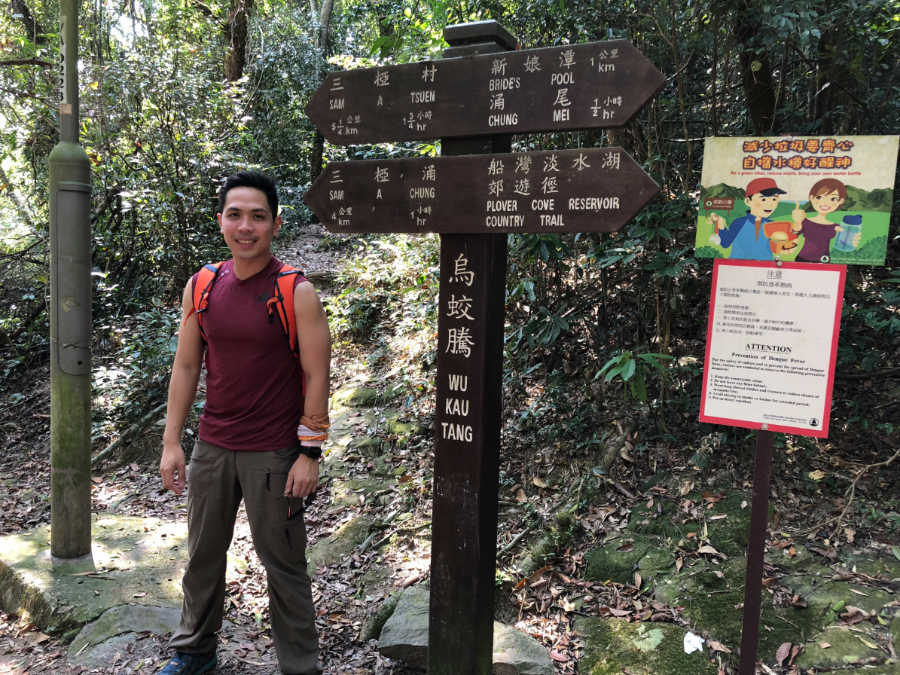
Our guide in the trek was Gabi of Walk Hong Kong – a hiking enthusiast from Switzerland who has lived in Hong Kong for over 20 years. Our trailhead was at the tiny hamlet of Wu Kau Tang and we immediately entered a trail that’s beautifully forested – and having a nice trail.

IMG_1590 (1)

IMG_1628 (1)

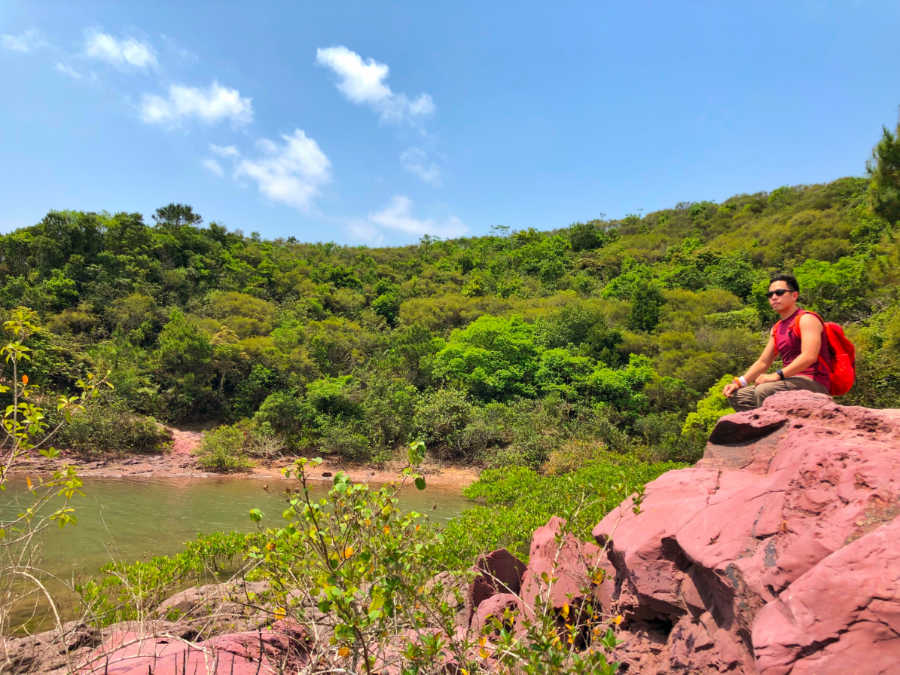
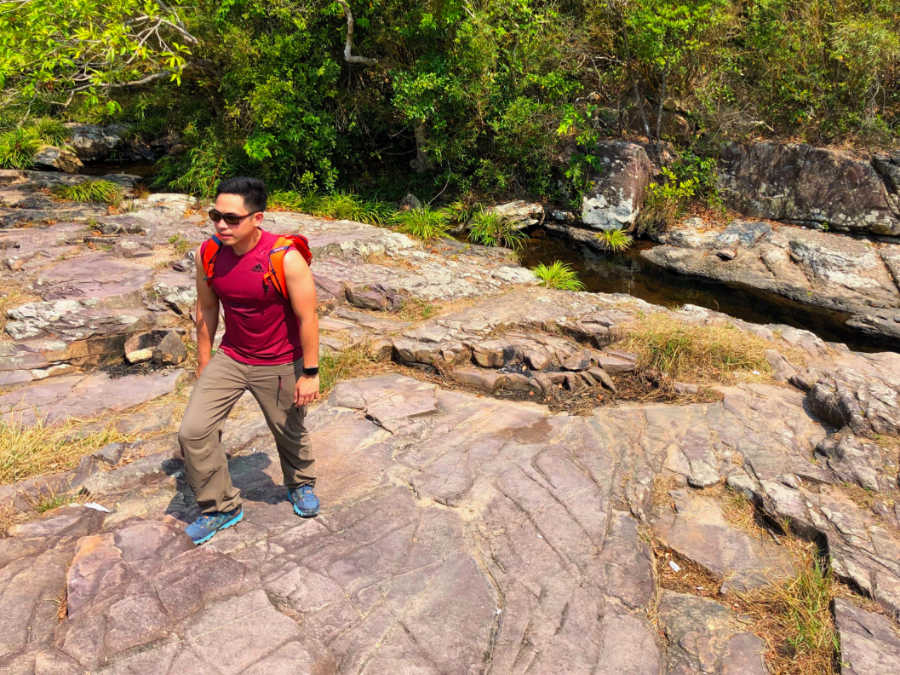
Unlike in the past days where it was mostly cemented, we were actually trekking on soil and rock which felt better for the feet; the variety of environments was manifest in the fact that there was even some mangrove. The soil in itself was an attraction as it had a reddish hue in parts – owing to the mineral content of the area. Adding another dimension to the trip, we also saw some abandoned Hakka houses along the way, foreshadowing our destination.

IMG_1679
After less than two hours of trekking we arrived at Sam A village, where there was also some farming (as with Lantau); we had a very nice lunch of seafood and rice in one of the houses that double as a restaurant on weekends. Continuing on, we reached the shore and even a small hill with a view of China’s Yantian Harbor before finally arriving at Lai Chi Wo.

IMG_1681


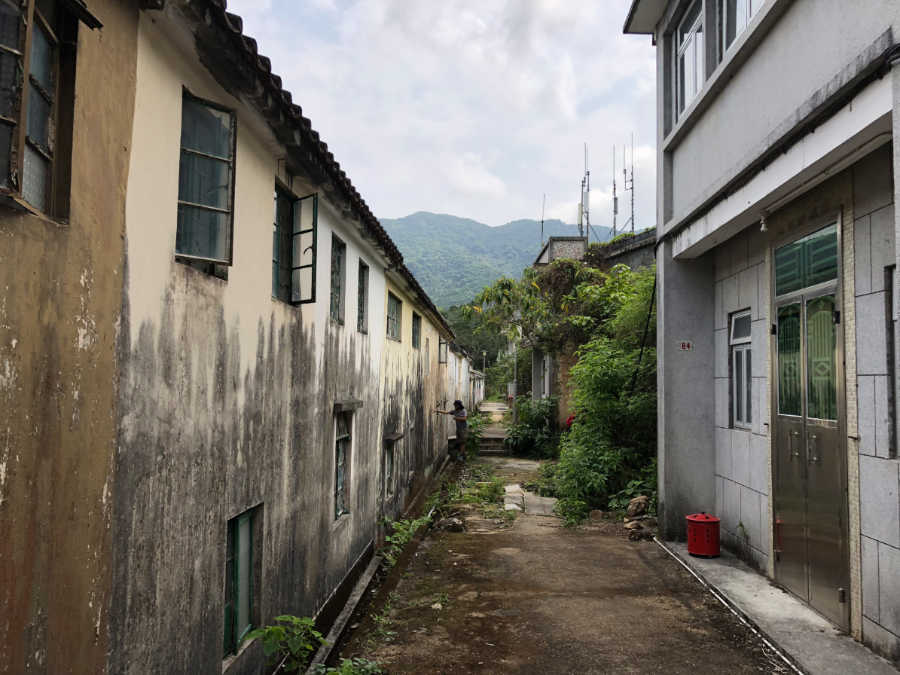
Lai Chi Wo – the name comes from the fact that there used to be a lot of lychee trees –  is like a village lost in time, and must have looked pretty much the same and it was centuries ago. A quiet farming village that dates to the 1670s, it is characterised by the distinctive Hakka layout of houses that look the same – both inside and outside; the only distinct houses are those that serve as ancestral halls for the two (or three, depending on the source) major families. Two small temples, one for  Guan Di and another for Guan Yin, mark the entrance. It would have been nice to stay under the big banyan tree in the middle of the village just to meditate.

IMG_1683

IMG_1685

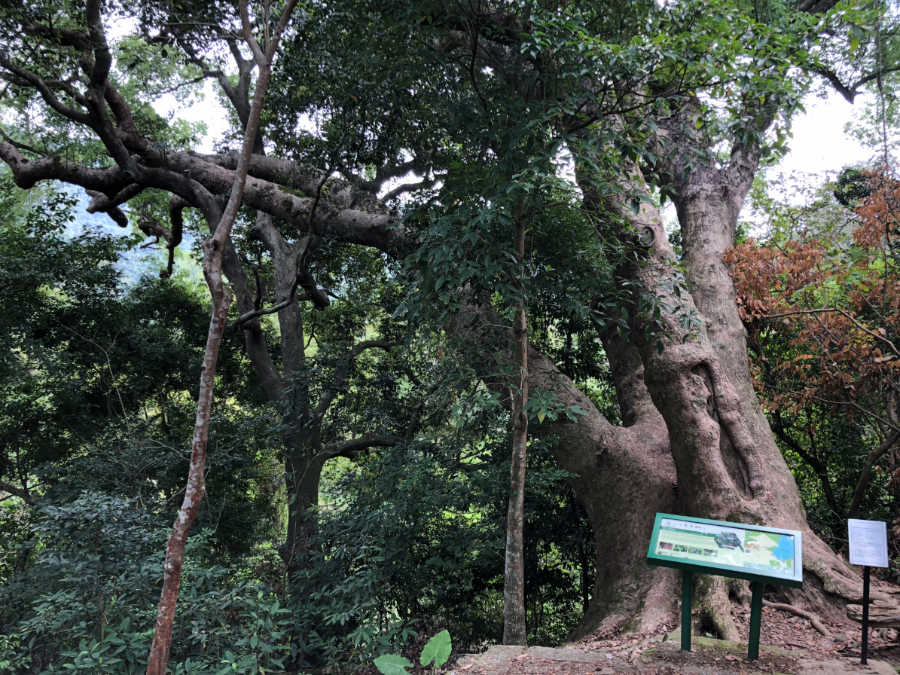
One final attraction was the Feng Shui wood just behind Lai Chi Wo – a forest that has some pretty amazing (and ancient trees), including camphor, autumn maple, and incense trees. Legend has it that one of them – the “five-finger tree” (see below) was about to be cut off by the invading Japanese troops but the villagers defended it, risking their own lives in the process. Today the Hakka are mostly gone but their legacy remains both in the village and its surrounding woodland.

IMG_1693

Overall I really enjoyed this 7-km walk, as well as the entire four-day adventure. On top of the walks we also had a great time sampling Hong Kong cuisine (I always go for roasted goose) and of course, shopping in Nathan Road. I can live without the shopping and to a lesser extent the food, but surely I will go back to Hong Kong to do more hiking in the future!

IMG_1678

DISCOVER HONG KONG 2018
Hiking matters #587: Sai Kung’s Global Geopark
Hiking matters #588: Fan Lau to Yi O heritage trek
Hiking matters #589: Sai Kung – Sharp Island
Hiking matters #590: Trekking to Lai Chi Wo

Disclosure: This hike was part of a media familiarisation trip organised by the Hong Kong Tourism Board. The content and the opinions in this post is solely the author’s.

The post Hiking matters #590: Trekking to Lai Chi Wo, home of Hong Kong’s Hakka people appeared first on Pinoy Mountaineer.

“My Deuter Adventure” photo contest offers hike in the Alps as grand prize

$
0
0

2-BASICPHASE-Instagram-PhotoSize-1080x1080px

Wanna hike in the Alps? Deuter is holding a contest that gives you a chance to do so – for free! “My Deuter Adventure”, a photo contest, invites hikers to fill in an entry form, post their best hiking photos on Instagram or Facebook, use #mydeuteradventure, mark @deuter. Two winners from the Philippines will be awarded  a 7-day round trip adventure in the German Alps, and a Deuter Futura Pro hiking pack!

MECHANICS
(Visit https://mydeuteradventure.ph/participation-conditions/ for the full mechanics)

NOTE: NO PURCHASE NECESSARY TO ENTER OR WIN! A PURCHASE DOES NOT IMPROVE YOUR CHANCES OF WINNING. VOID WHERE PROHIBITED BY LAW.

Online Entry: Enter the Competition during the Promotion Period online by signing into the entry form and perform the tasks provided. The entry form can be found on the following website at http://www.mydeuteradventure.com. Automated or robotic Entries submitted by individuals or organizations will be disqualified. Internet entry must be made by the entrant. Any attempt by an entrant to obtain more than the stated number of Entries by using multiple/different email addresses, identities, registrations, logins or any other methods, including, but not limited to, commercial contest/Competition subscription notification and/or entering services, will void that entrant’s Entries and that entrant may be disqualified. Final eligibility for the award of any prize is subject to eligibility verification as set forth below. All Entries must be posted by the end of the Promotion Period in order to participate. Sponsor’s database clock will be the official time keeper for this Competition.

Eligibility: Open to legal residents of the Philippines who are 18 years or older. Void where prohibited or restricted by law. Sponsor and their respective parents, subsidiaries, affiliates, distributors, retailers, sales representatives, advertising and promotion agencies and each of their respective officers, directors and employees (collectively, the “Promotion Entities”), and members of their immediate families and/or persons living in the same household as such persons, are ineligible to enter the Competition or win a prize.

Winner Selection: The winner of the Competition will be selected through a jury (Deuter, photographer, media partner & retail partner) from among all eligible Entries received throughout the Promotion Period. The price drawing will be conducted by 07/16/2018 at 12:00 PM (Berlin) by Sponsor or its designated representatives, whose decisions are final. Odds of winning will vary depending on the number of eligible Entries and on the quality of the image received. Winner will be notified by email at the email address provided in the Entry Information on or about 48 hours after the random drawing. Potential winner must accept a prize by email as directed by Sponsor within 48 hours of notification. Any winner notification not responded to or returned as undeliverable may result in prize forfeiture. The potential prize winner may be required to sign and return an affidavit of eligibility and release of liability, and a Publicity Release (collectively “the Prize Claim Documents”). No substitution or transfer of a prize is permitted except by Sponsor.

PRIZES

–  2 (#) winners will receive a one-week round trip to Germany (approximate retail value or “ARV”: PHP 65.000); the trip will take place from 09/08/2019 to 09/15/2019
– every winner will receive a Deuter Futura Pro hiking pack model in addition (approximate retail value: PHP 9.000)

Only one prize per person and per household will be awarded. Gift cards and gift certificates are subject to the terms and conditions of the issuer. Prizes cannot be transferred, redeemed for cash or substituted by winner. Sponsor reserves the right in its sole and absolute discretion to award a substitute prize of equal or greater value if a prize described in these Official Rules is unavailable or cannot be awarded, in whole or in part, for any reason. The ARV of the prize represents Sponsor’s good faith determination. That determination is final and binding and cannot be appealed. If the actual value of the prize turns out to be less than the stated ARV, the difference will not be awarded in cash. Sponsor makes no representation or warranty concerning the appearance, safety or performance of any prize awarded. Restrictions, conditions, and limitations may apply. Sponsor will not replace any lost or stolen prize items.

Prize will only be awarded and/or delivered to addresses within the Philippines. All federal, state and/or local taxes, fees, and surcharges are the sole responsibility of the prize winner. Failure to comply with the Official Rules will result in forfeiture of the prize.

Disclosure: PinoyMountaineer.com is a media partner of Deuter for the “My Deuter Adventure” photo contest.

The post “My Deuter Adventure” photo contest offers hike in the Alps as grand prize appeared first on Pinoy Mountaineer.

5th National Mountain Cleanup Day held in over 50 mountains!

$
0
0
31945032_10156194059008190_141781345796882432_n
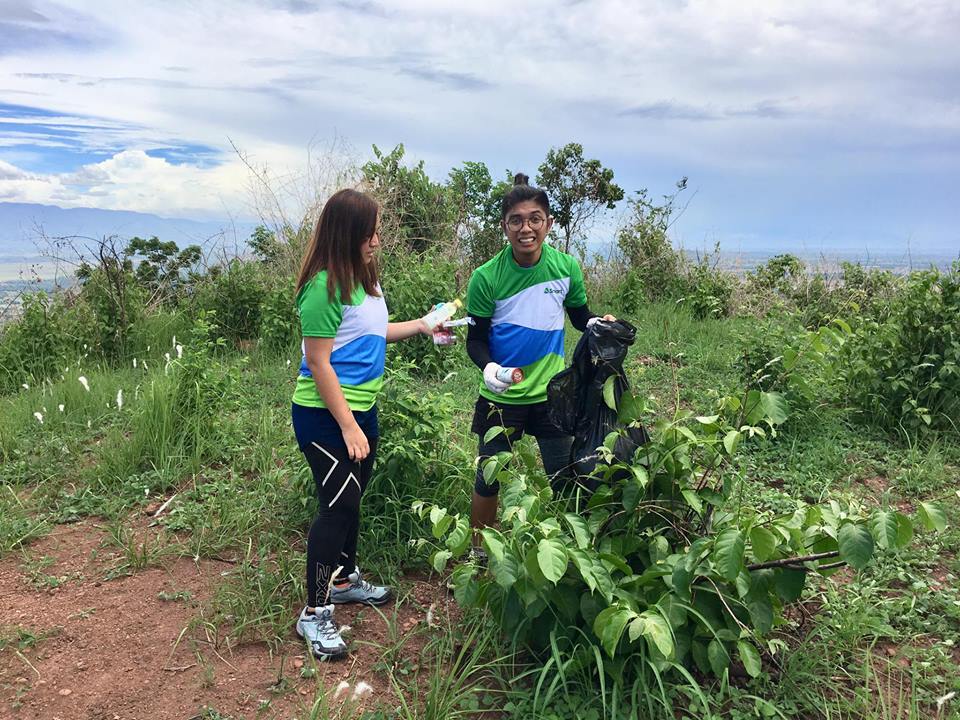
National Mountain Cleanup Day in Mt. Yangnbew (Ayan Apilar)

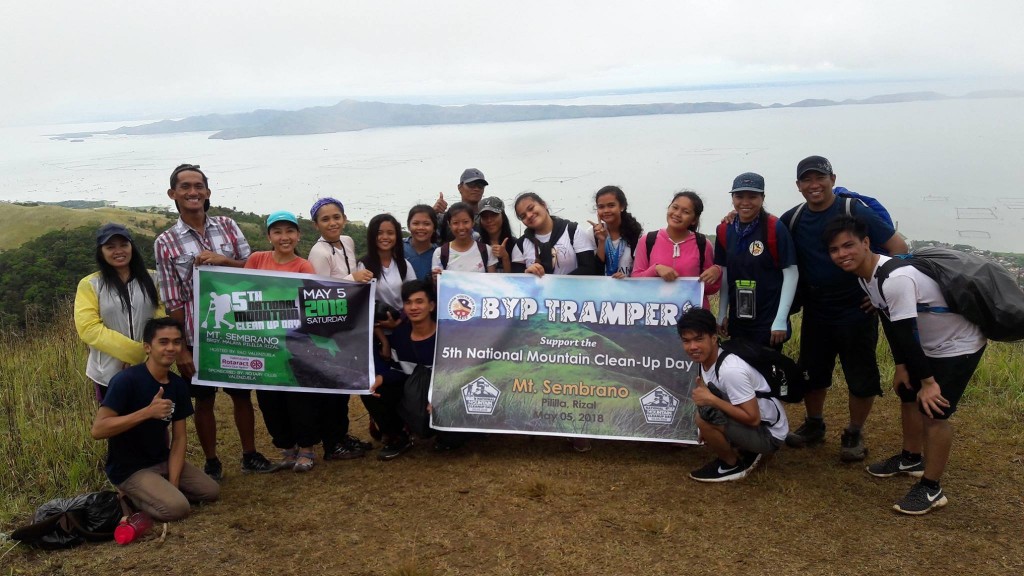
(FIRST UPDATE) – Images and reports indicate a successful 5th National Mountain Cleanup Day, with over 50 hiking destinations serving as sites for the annual cleanup. In addition, hikers are reporting that the mountains are mostly “cleaner than expected”, suggesting that efforts within the mountaineering community to install the Leave No Trace principles are beginning to have impact.

31948992_10209017259628248_2513772061164306432_n
Smart Mountaineering Club at Mt. Balungao, Balungao, Pangasinan (Jessy Ignacio)

Even so, significant amounts of trash were still collected in many mountains, indicating that much work needs to be done in spreading the message. Hopefully all the participants were inspired to keep making a difference, and that in the process of cleaning up the mountains they were also able to inspire others to do so. “If all climbs were clean climbs, there would be no need for cleanup climbs.”

31942763_10157675975474199_6260479725198639104_o
Bayanihan Youth for Peace (BYP) at Mt. Sembrano, Pililia, Rizal (Edmon Pacson)

The post 5th National Mountain Cleanup Day held in over 50 mountains! appeared first on Pinoy Mountaineer.

Opinion: Conquering disability through determination and teamwork

$
0
0

31944795_10160283327795057_3621473603163258880_o

by Simon Adriano

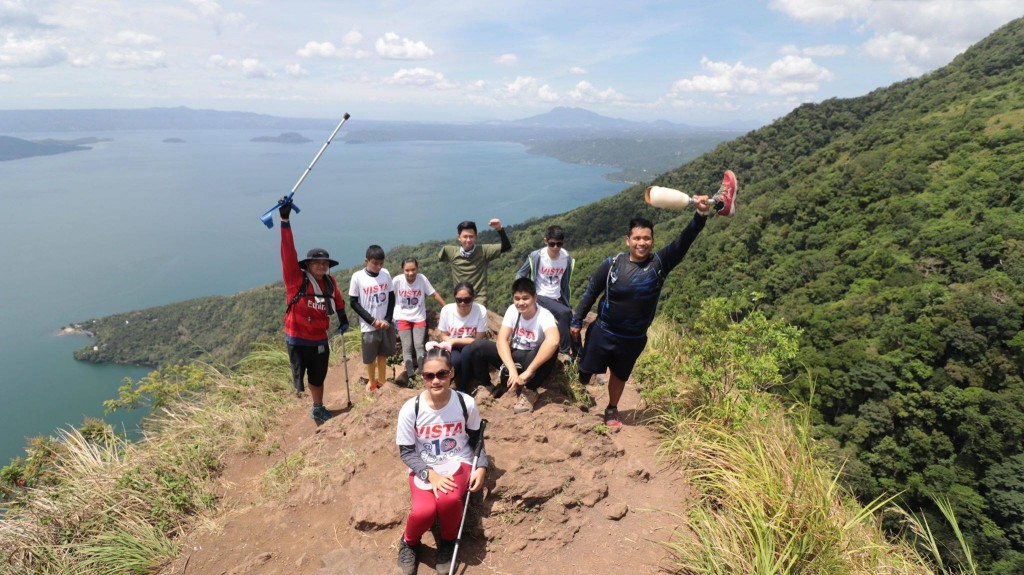
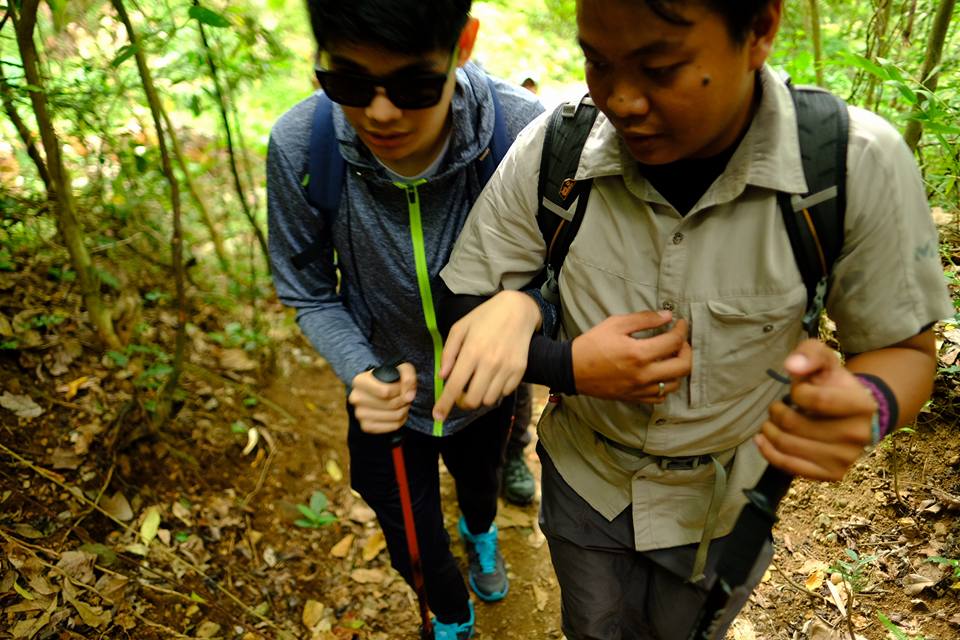
Blogger’s note: Mountaineer Simon Adriano has worked closely with the visually-impaired community to bring VIs to the mountains, and he most recently organised a hike together with the ‘Adaptive Climbers of the Philippines’ – a group of amputees that summited Mt. Apo recently. Pinoy Mountaineer, which co-organised the First Amputee Climb in 2009, is very pleased to be involved in these efforts. We are committed to make the outdoors an inclusive place.

Climbing a mountain is never easy. It always require sweat (sometimes blood) and sheer determination. It means hours of walking under steep terrain, exposure to various elements and uncertainty. But the reward outweighs the pain and hardship. Most often, pain and hardship becomes most sought pleasure. Not many understand this except those who have tried and succeeded. But it’s also harder to fathom if one is differently abled who tries to follow the same suit. In this case, these guys broke boundaries. They say “Limitations are just a state of mind we let ourselves imprison into.”

It was an exalting journey to Maculot’s Rockies. Excitement and a bit of fear may have set in at the beginning, but it eventually gave way to decisiveness, confidence and fortitude. I’m glad to be part of this great feat. Not only it taught us about resilience in the face of adversity but how meaningful relationships can turn hardships and sacrifices into hope and blessings. Riveting as it was, what fascinates me is what parenting has done to mold these kids to pursue greater heights. I can imagine how triumphant both the kids and parents must have felt.

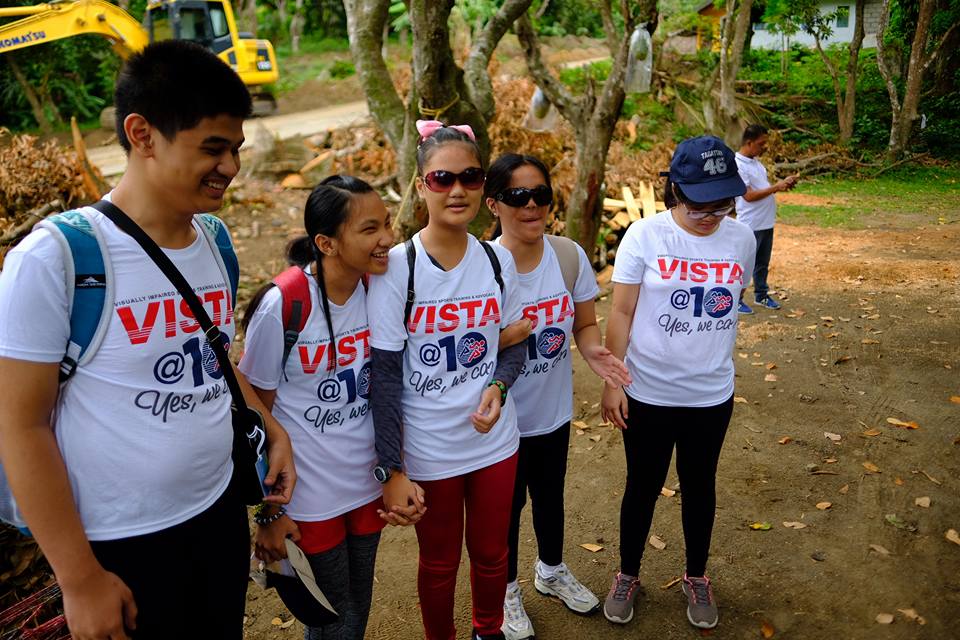
In the photo above we see visually impaired kids with their newly found amputee friends conquering the rockies of Mt. Maculot. It’s not just about the view but also about what we feel, hear and the experience of getting there that draw us back to the peaks.

Thanks to all the people who were part of this wonderful journey. You brought an unforgettable experience to these amazing bunch.

31602872_10213314308350596_8252776828880551936_n
Photo courtesy of Wilfredo Garido
31882973_10213314298150341_7630184245167652864_n
Photo courtesy of Wilfredo Garido

The post Opinion: Conquering disability through determination and teamwork appeared first on Pinoy Mountaineer.

Drone etiquette for the outdoors

$
0
0
Hiking
Photo courtesy of Chris Brookfield

by Gideon Lasco

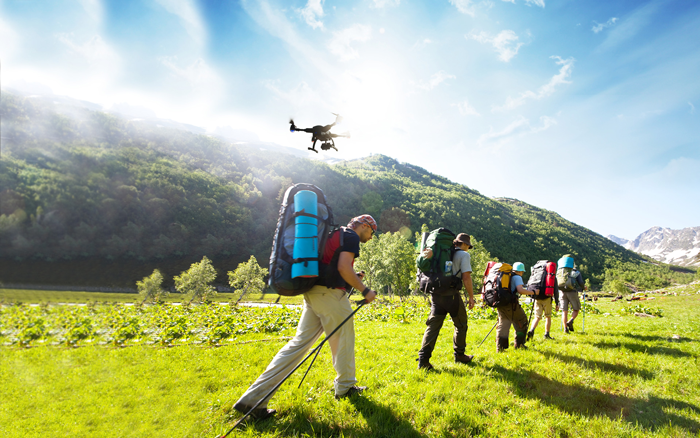
As drones become more popular and affordable, expect them to appear in greater frequency in the mountains. While there is nothing wrong in making use of technology, however, we must also be mindful that using them can have negative consequences, especially in relation to other people on the trail. Here are some guidelines for using drones in the mountains:

1. Make sure you know how to operate the drone. For obvious reasons, you should know how to operate your drone before bringing it to the mountains. Bear in mind also the mountains have special conditions (i.e. strong winds, rain) that you must prepare for.

2. Avoid flying over people on the trail. Even if drones are fairly reliable, flying over people on the mountain can still put them in unnecessary risk, especially because weather conditions in the outdoors are not always predictable.

3. Do not use drones to take pictures of other people’s camping areas or private spaces without permission. Drone photography, just like any other photography, must be grounded on respect for the rights of other people, and taking photos/videos of them against their will is considered unethical. (See also:  The etiquette of hiking photography )

4. Be considerate of others when documenting scenic spots. Oftentimes, drone photography takes much longer than normal photography, and some drone photographers can seem inconsiderable when they are taking over a scenic spot while others are waiting. This situation can be avoided by selecting times and dates with less people, and ultimately giving way when there are people queuing  to take photos in the same spot.

5. Avoid disturbing the peace and the quiet. Drones are noisy, and can be a nuisance to other hikers especially when beyond a few minutes of use. Similar to #4, this can be avoided by using drones during times and dates when there aren’t other people. Remember that many people go to the mountains for peace and quiet and the last thing they want is to have to contend with the buzzing sound of drones.

Got any additional insights or comments? Let us know! This is a preliminary article and we will update it in the future.

The post Drone etiquette for the outdoors appeared first on Pinoy Mountaineer.

Viewing all 610 articles
Browse latest View live