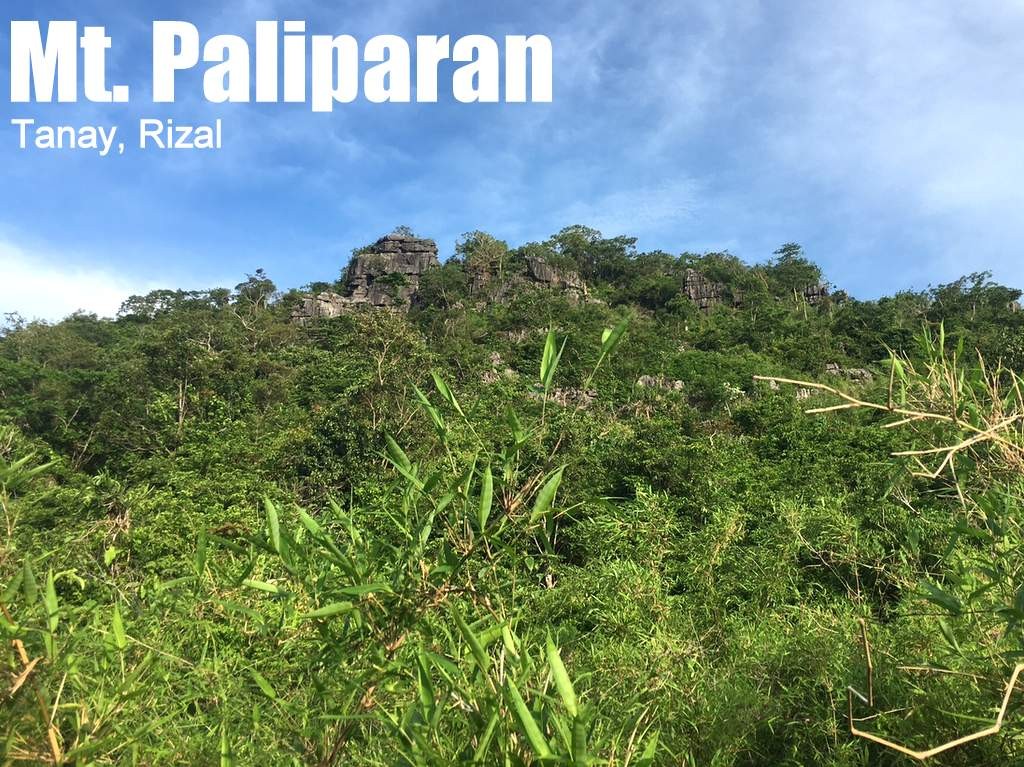
MT. PALIPARAN Tanay, Rizal
Trailhead: Barangay Hall, Brgy. Cuyambay, Tanay
LLA: 562 MASL (Peak 2 / “summit”)
Days required / Hours to summit: 1 day / 2.5-4 hours
Specs: Minor climb, Difficulty 4/9 +R (with rock precaution), Trail class 1-5
Features: Rock formations, scenic views, waterfalls, Dumagat village
Article history: Created 29 May 2016 by Gideon Lasco
BACKGROUND
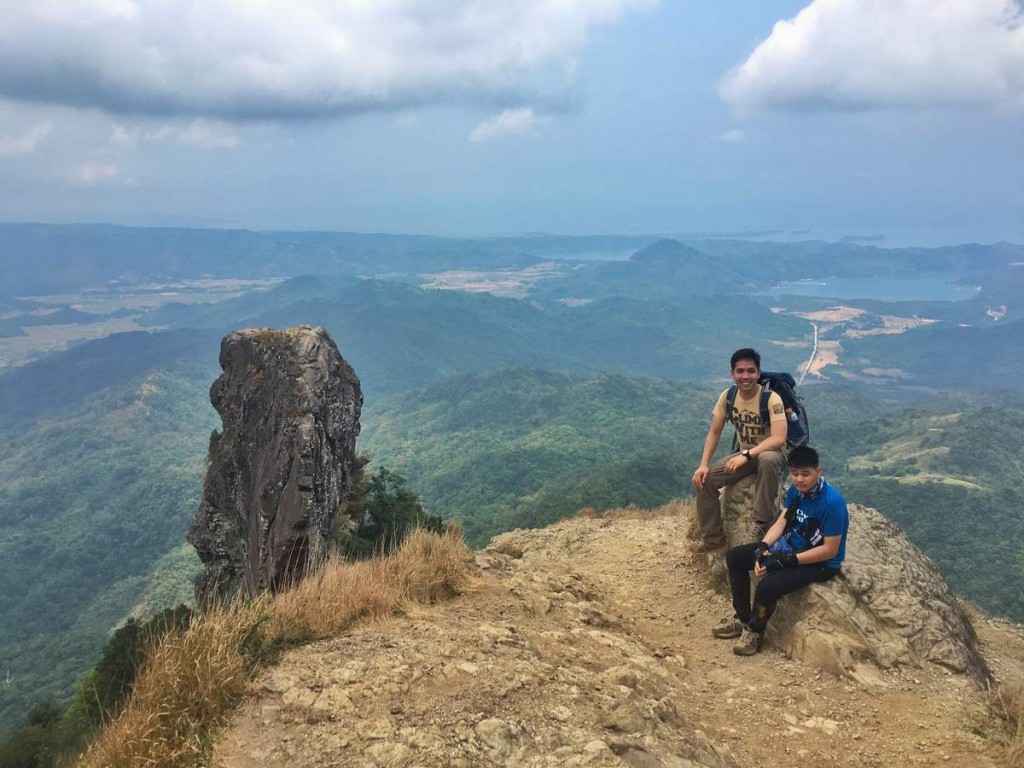
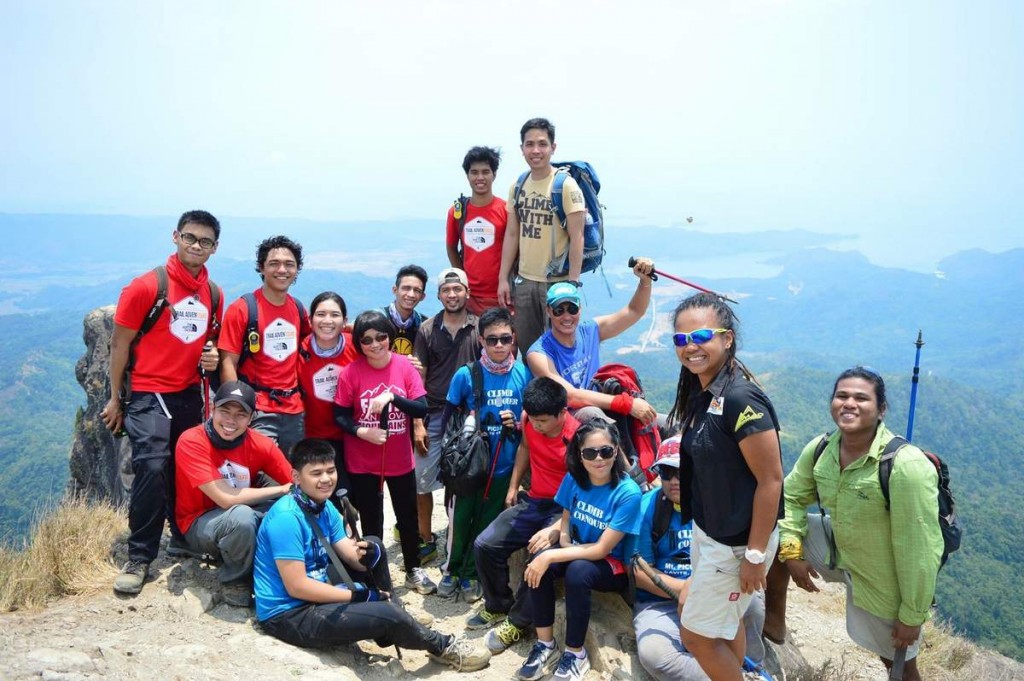
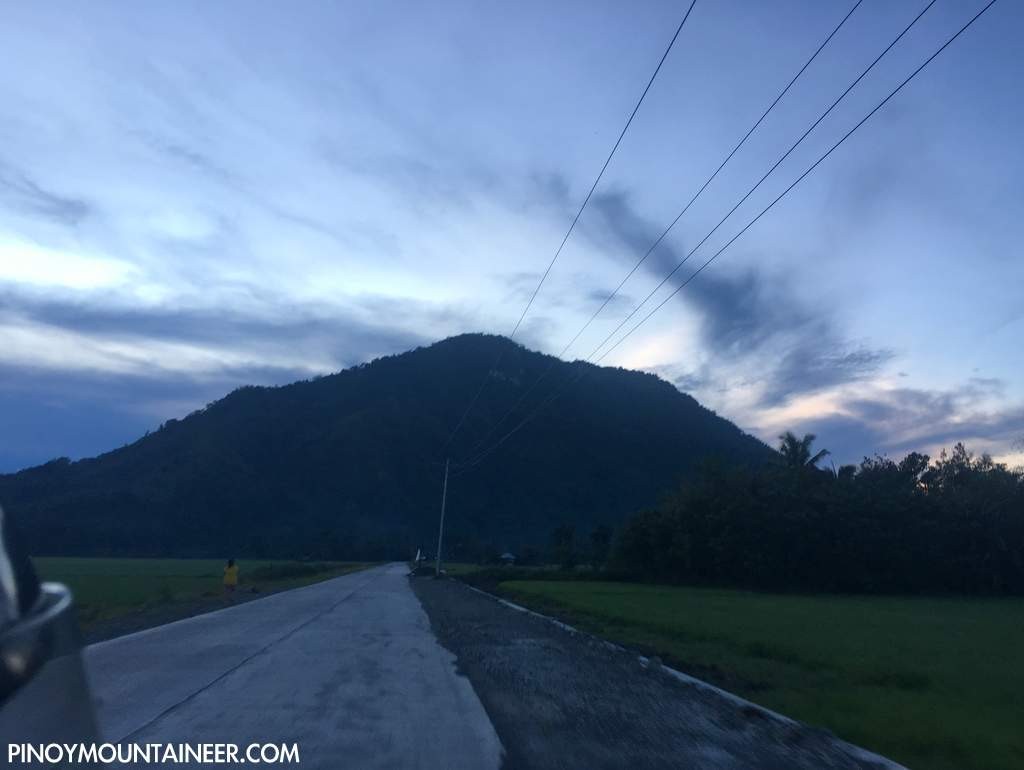
Another hiking destination in Rizal characterized by rocky, limestone prominences is Mt. Paliparan in Brgy. Cuyambay, Tanay, Rizal. Named as such by local Dumagats because it once served as a venue for kite-flying contests by their youths, this destination was just opened to hiking activities in April 2016. Passing through woodlands and occasional grassy slopes, the trail is not yet well-established but is gentle and gradual, save for the occasional scrambling up the rocks that require some caution and care.
Highlights of the hike include scenic views of Laguna de Bay and the Pililla wind turbines, rock formations, the impressive Tungtong Falls, and Tuoy – a nearby Dumagat village. Though not as spectacular as the Sierra Madre-facing (i.e. east-facing) mountains such as Mt. Irid or Mt. Lubog, the mountain has its own unique rewards. Easy enough to do in a day, it is another recommended dayhike from Manila.
ITINERARY
0400 Take jeep from Sampaloc to Cogeo
0500 ETA Cogeo. Take jeep to Cuyambay junction
0615 ETA Cuyambay. Take habal-habal to Brgy. Hall
0630 ETA Barangay Hall. Register / Secure guides
0700 Start trekking
0930 ETA viewpoint / Peak 1
1030 ETA Peak 2. Star
1200 Lunch at Tuoy village
1300 Head to Tungtong waterfalls
1500 ETA Tungtong waterfalls.
1530 Resume trek
1600 Back in barangay hall. Tidy up
1700 Return to Manila
2000 ETA Manila
PRACTICALITIES: MT. PALIPARAN
Transportation
Public (1) Jeep, Sampaloc to Cogeo [P20, 30-60 mins]
(2) Jeep, Cogeo to Cuyambay [P48, 60-80 mins]
(3) Habal-habal, Cuyambay junction to Brgy. Hall [P25/5 mins]
Note: Jeepney travel times are highly variable due to the traffic, but you are likely to get the lower end if you leave very early.
Private: Marcos Highway > Brgy. Cuyambay – turn right – follow the road until you reach the barangay hall
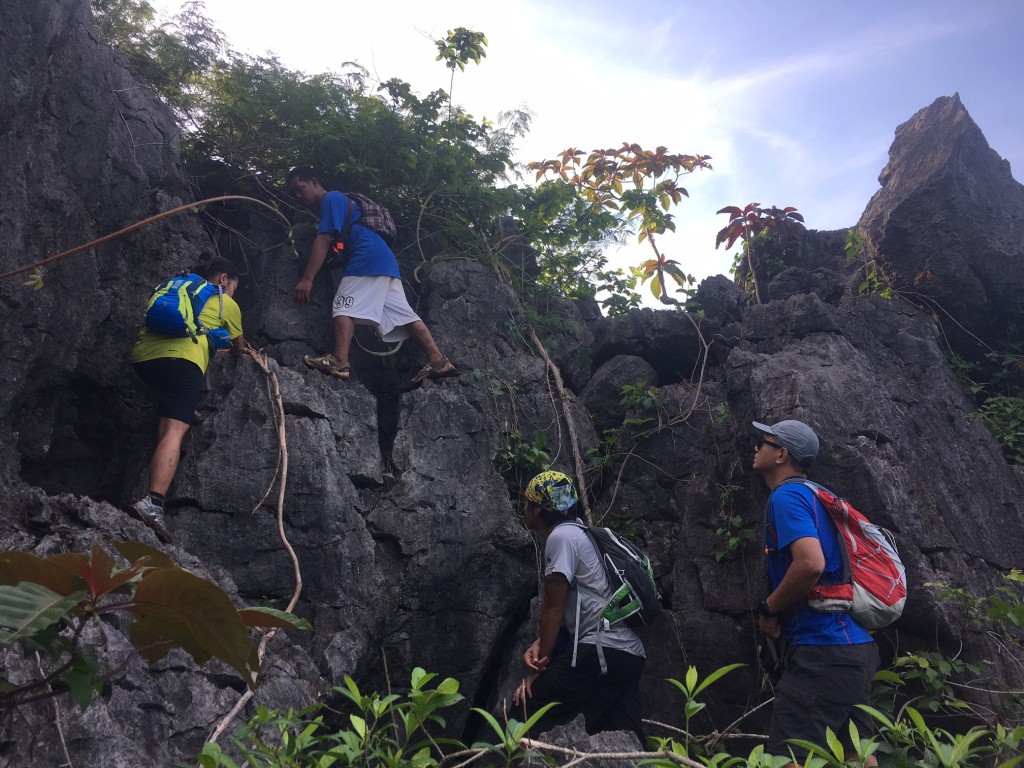
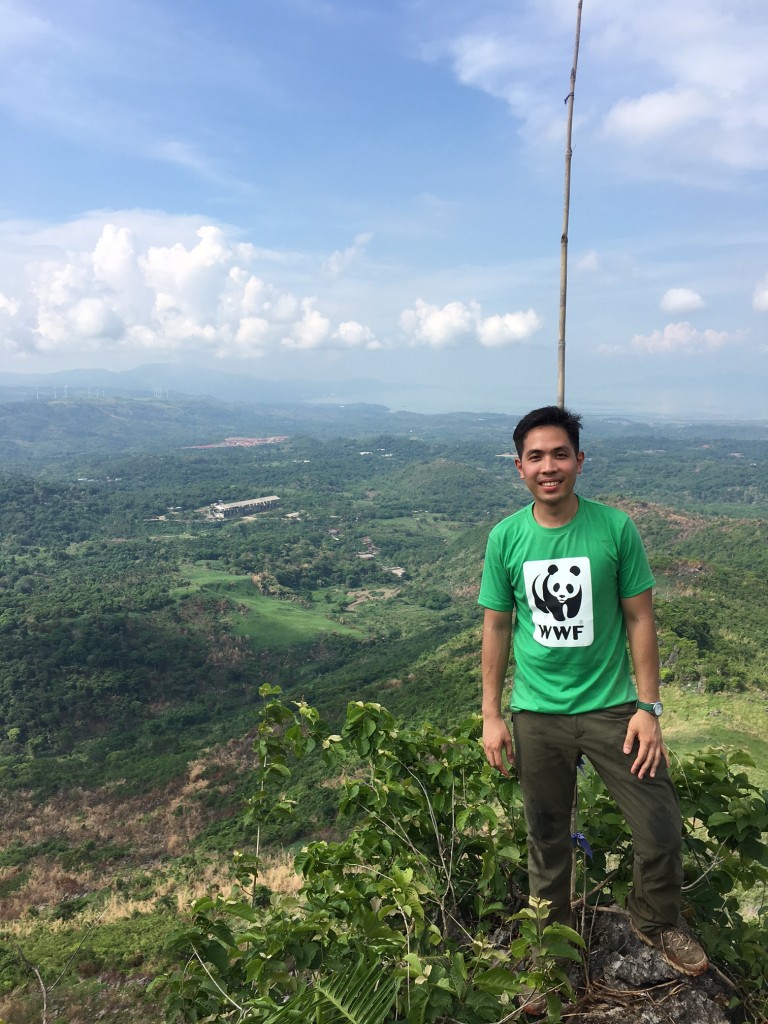
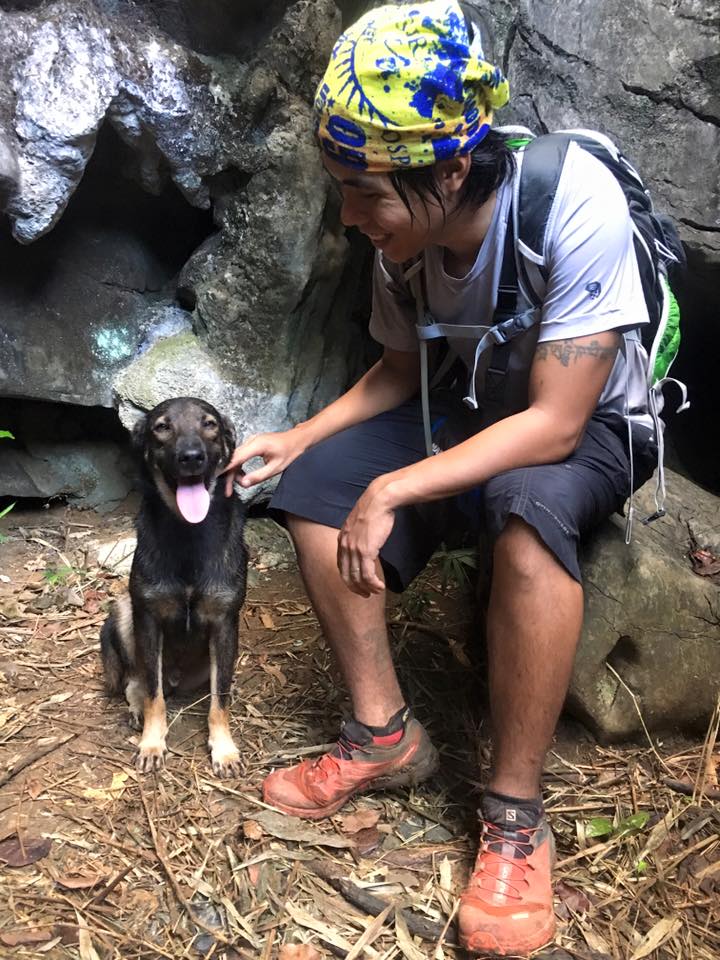
Scrambling up the first viewpointAt the summit of Mt. PaliparanMeet Ogog, the mountain dog of Mt. Paliparan
TRIVIA Ogag, a guide dog in Mt. Paliparan, has been featured in Pinoy Mountaineer Facebook page and is one of the attractions, by himself, of the mountain as of June 2016. He accompanies all groups of hikers and was part of the initial exploration and trailblazing.
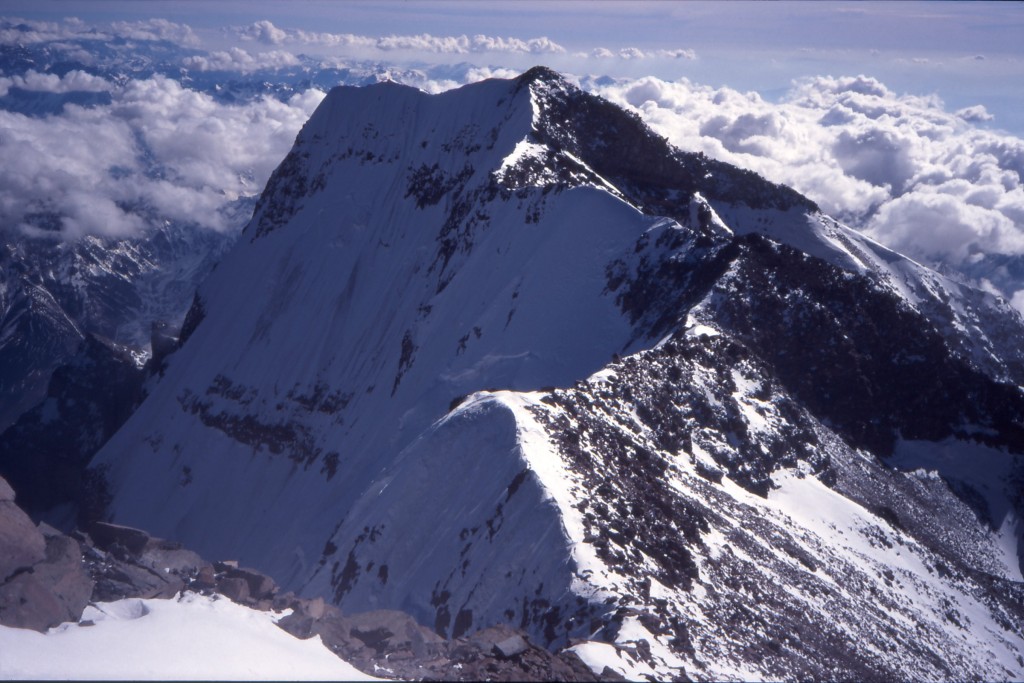
Pinoy Mountaineer Gideon Lasco together with hiking partner Jacob Sarreal will attempt to climb Mt. Aconcagua in Argentina, at 6962 MASL the highest mountain in South America and one of the Seven Summits.
The expedition, from late December 2016 to early January 2017 is expected to take 18 days.
Although it is a non-technical hike, Mt. Aconcagua is still regarded as a very challenging hike, with an estimated success rate of 30% . Only two Filipinos, Romi Garduce (2005) and Mon Dysangco (2011), are on record to have summited the mountain, out of the five persons known to Pinoy Mountaineer to have made the attempt.
This is Gideon Lasco’s fourth Seven Summits hike, after Kilimanjaro in Africa (2011), Elbrus – Europe (2013), and Kosciuszko – Australia (2014). Jacob Sarreal has also climbed Kilimanjaro (2015) and was part of Gideon’s Elbrus expedition in 2013. Both mountaineers’ highest altitude reached is 6153 MASL, in Stok Kangri at the Indian Himalayas. Gideon has already previously climbed in South America, reaching the altitude of 5126 MASL in the Ecuadorian Andes.
Their training is expected to start in July with at least two 3000-meter mountains in Japan, including Mt. Fuji. Further hikes are contemplated in Europe and Asia in preparation for the expedition, which is staged from Mendoza, Argentina. Aside from a series of hikes, the training includes physical conditions, weight training, and nutritional conditioning.
For more information about the expedition, please contact expeditions@pinoymountaineer.com.
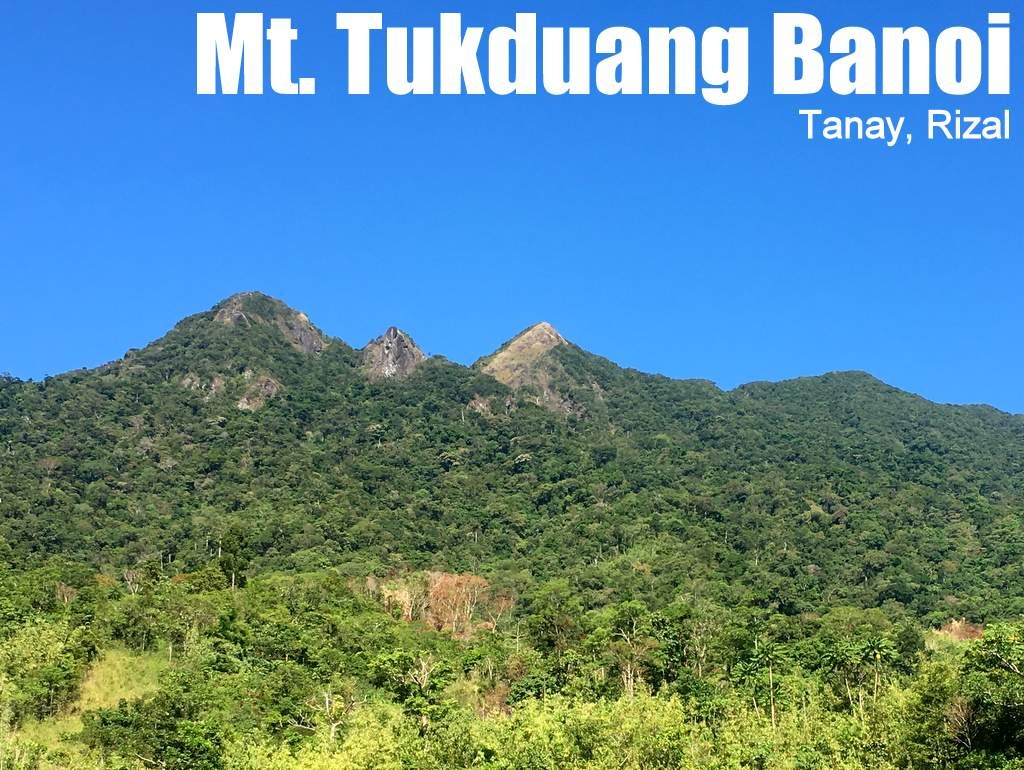
MT. TUKDUANG BANOI Tanay, Rizal
Major jumpoff: Brgy. Sta. Ines, Tanay
LLA: 14°45′36.8′′N,121°18′6.88′′ E, 1258 MASL (+998m)
Days required / Hours to summit: 1-2 days / 4-6 hours
Specs: Major Difficulty 5/9, Trail class 1-4
Features: Tropical rainforest, scenic views of the Sierra Madre
Article history: Created June 1, 2016 by Gideon Lasco
Note: For more information please check out the Mt. Irid page.
BACKGROUND
The companion mountain of Mt. Irid on the other side of Brgy. Sta. Ines, Mt. Tukduang Banoi is a challenging hiking destination in its own right. Named after the eagles (banoy) that locals say used to bring their prey atop the mountain, the mountain has a distinct W-shaped summit with three distinct peaks, only one of which (the easternmost) is commonly-accessible to hikers.
Sharing the first part of the Mt. Irid trail, it branches off past the village of Kinabuan, and enters the slopes of the forested mountain: a straightforward ascent to reach the eastern peak, which rises at 1258 MASL. Mt. Tukduang Banoi doesn’t have the same spectacular rocky formations of Mt. Irid, but it is a nice addition to an action-packed Mt. Irid overnight trip – or a dayhike in itself.
ITINERARIES
DAYHIKE
0300 Leave Manila for Antipolo (Cogeo Gate 2)*
0400 Take jeep from Antipolo to Brgy. Sta. Ines
0530 ETA Sta. Ines. Register, secure guides.
0630 Start trekking
0800 ETA Sitio Kinabuan
0830 Arrival at Tukduang Banoi junction
1100 ETA summit of Mt. Tukduang Banoi, Lunch.
1200 Start descent
1400 Back at Sitio Kinabuan; optional sidetrip Kinabuan Falls
1500 Head back to Brgy.Sta. Ines
1630 Back at Brgy. Sta Ines. Tidy up.
1730 Head back to Manila
200 ETA Manila
OVERNIGHT (COMBINED WITH MT. IRID)
Day 1
0500 Leave Manila for Antipolo (Cogeo Gate 2)*
0600 Take jeep from Antipolo to Brgy. Sta. Ones
0730 ETA Sta. Ines. Register, secure guides.
0830 Arrival at Tukduang Banoi junction
1130 ETA summit of Mt. Tukduang Banoi, Lunch.
1300 Start descent back to Sitio Kinabuan
1500 Back at Sitio Kinabuan. Proceed to Sitio Sadlak
1700 ETA Sadlak basecamp; set up camp
1800 Dinner / socials
Day 2 0400 Wake up call. Breakfast.
0530 Start summit assault. Earlier is better
0900 ETA summit of Mt. Irid
1000 Start descent
1200 Back at campsite. Lunch.
1300 Break camp. Head back to Brgy. Sta. Ines
1530 Back at Brgy. Sta Ines. Tidy up.
1630 Head back to Manila
1930 ETA Manila
*Note: For small groups habal-habal to Batangasan then jeepney rental or commute thereafter. Add 30 minutes.
*Note: The dayhike itinerary assumes moderate pace with minimal stops.
PRACTICALITIES: IRID
Transportation
Public (1) Van, EDSA Crossing to Cogeo Gate 2 in Antipolo (2) At Cogeo Gate 2, take jeep and get off at ‘Batangasan’ junction where there is an entrance arch for Brgy. San Andres (3) Take a habal-habal to the barangay (P150/person).Alternatively, travel to Tanay, Rizal and take the twice-daily jeep (1200H, 1700H? – please confirm) that goes to Brgy. Sta. Ines Approximately 2-3 hours travel time because of various stops and delays.
Private. Follow the Marcos highway to reach the Batangasan junction. Park there and take a habal-habal to Sta. Ines, or if you have a 4×4, you can go all the way to Sta. Ines. There are several river crossings though and the rivers swell after heavy rains so I wouldn’t advise it. Approximately 1.5-2.5 hours travel time.
Registration
Note: Prior written permit must be secured beforehand. The permit can be coordinated over the phone with the numbers below, and can also be done by email (tanaymenro@gmail.com) 1 week before the hike proper. Include a “letter of intent”, the names of your participants, and a contact number. The written permit will then be handed to you during the hike.
(1) Logbook at the barangay hall (P20 registration fee)
(2) Courtesy call with military detachment in Sta. Ines.
Kagawad Toto: +639302355562
Pitoy- +09293265454 or 09263652353 Contact either of the two for assistance in securing the permit beforehand.
Campsites and waypoints
Camping is possible in Sitio Sadlac and Sitio Kinabuan. Theoretically, the summit can also make for a small campsite.
Brgy. Sta. Ines 14°42′30′′N 121°19′42′′ E 426 MASL
Kinabuan Falls 14°45′34.5′′N 121°19′19.7′′ E 514 MASL
Water sources
Sitio Kinabuan, Sitio Sadlac
Cellphone signal
+/- Sporadic at the summit and >1000m
(+) Smart (-) Globe at Brgy. Sta. Ines
River crossings
Eleven river crossings from Brgy. Sta. Ines to Sitio Sadlac. Exercise caution especially during the rainy season or after heavy rains as the rivers can become impassable or precarious.
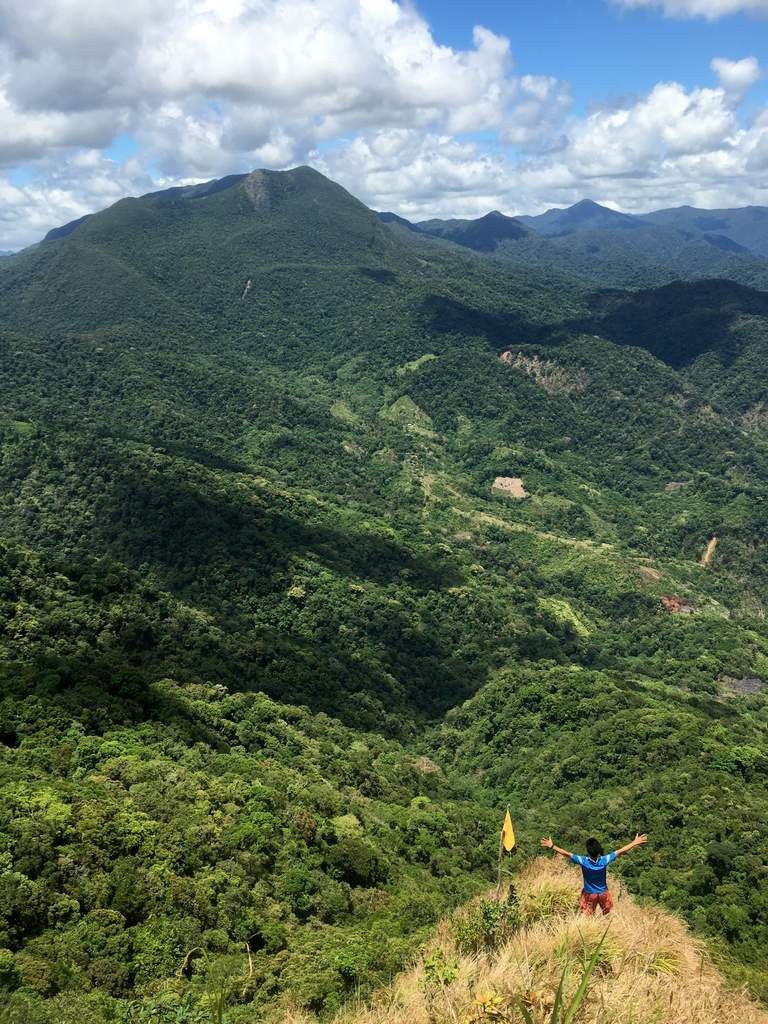
Mt. Irid as viewed from the summit of Mt. Tukduang Banoi
TRIVIA
There are many other trail possibilities in the vicinity of Mt. Tukduang Banoi, including a possibility of traverse to Quezon via Mt. Angelo.
Though there have always been trails in and around Mt. Irid and Tukduang Banoi, we acknowledge the efforts of Simpson Domoguen and other mountaineers for pioneering the recent spate of hiking activities (2010-present) in the area.
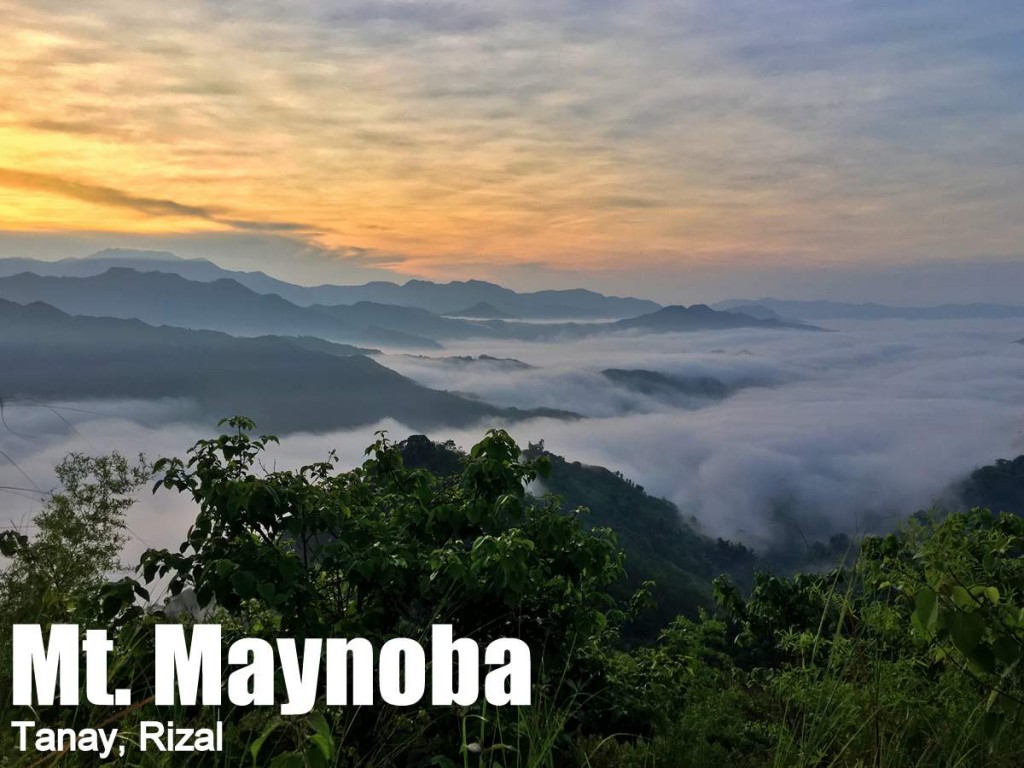
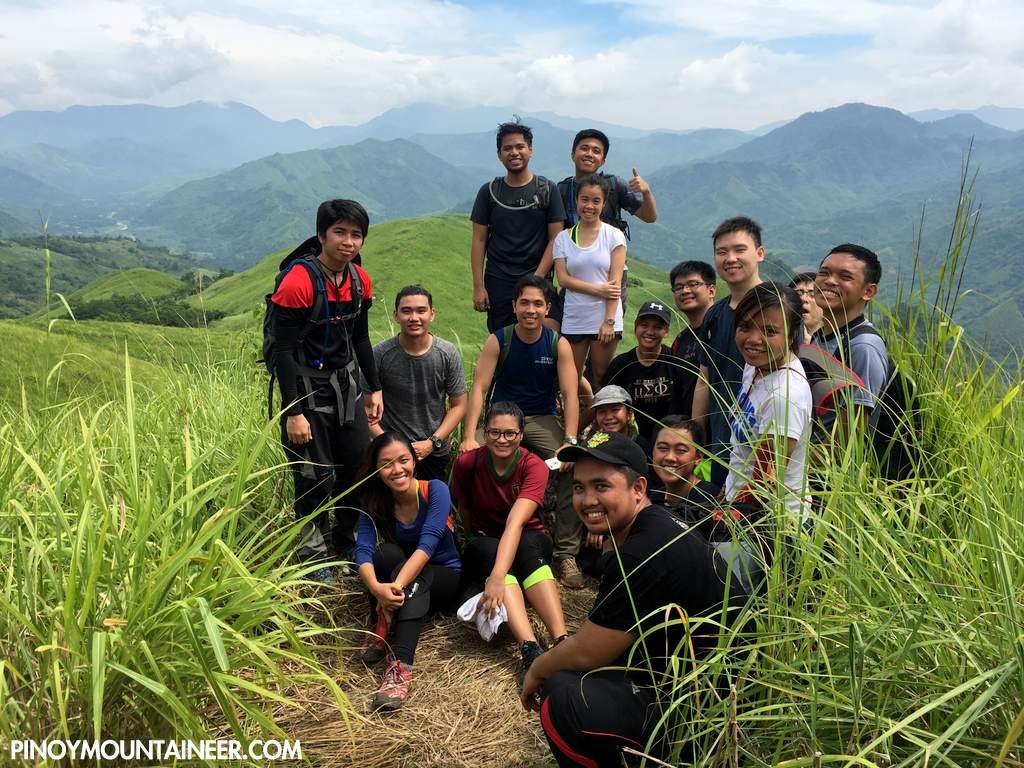
MT. MAYNOBA (CAYABU-MAYNOBA LOOP) Tanay, Rizal
Trailhead: Brgy. Cayabu, Tanay, Rizal
LLA: 14°36′22.4′′N, 121°25′18.6′′ E, 728 MASL (+470m)
Days required / Hours to summit: 1 day / 2-3 hours
Specs: Minor hike, Difficulty 3/9 (Summit); 4/9 (Loop hike), Trail class 1-4
Features: Sea of clouds, scenic views of the Sierra Madre, waterfalls
Article history: Created 4 June 2016 by Gideon Lasco
BACKGROUND
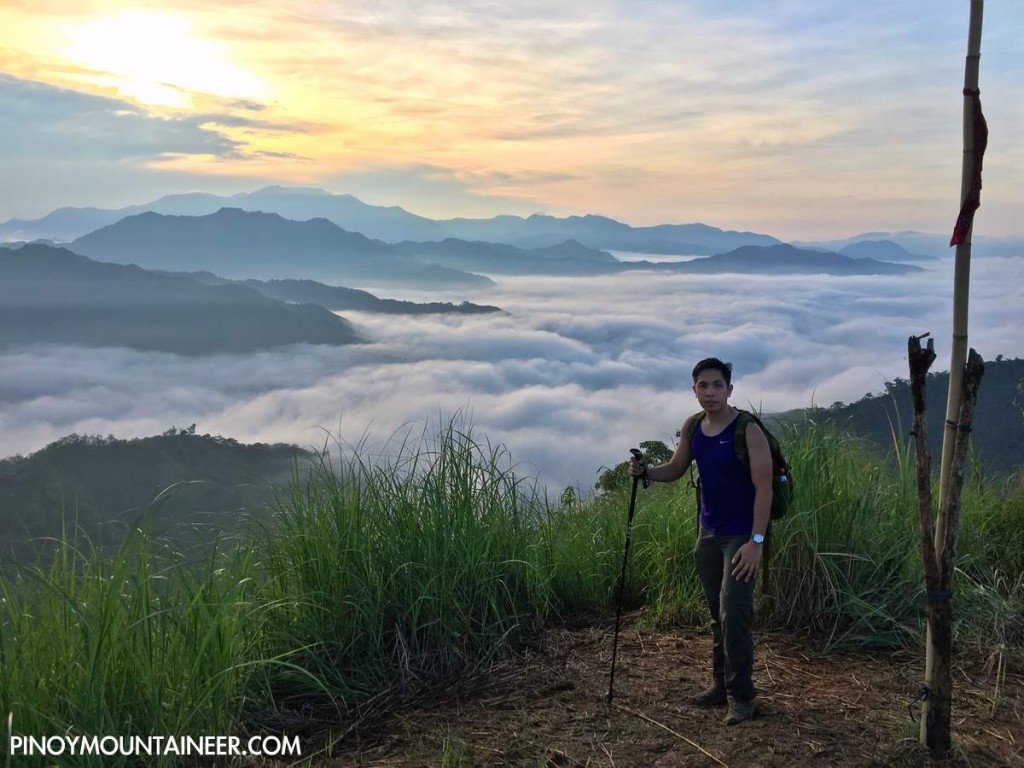
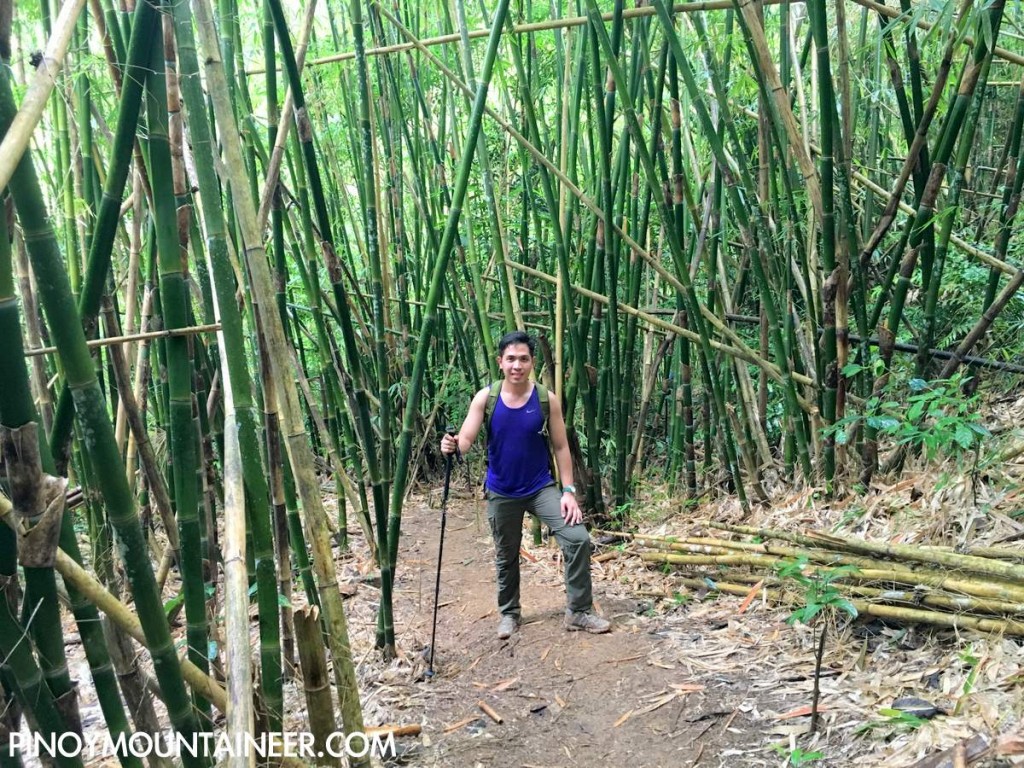
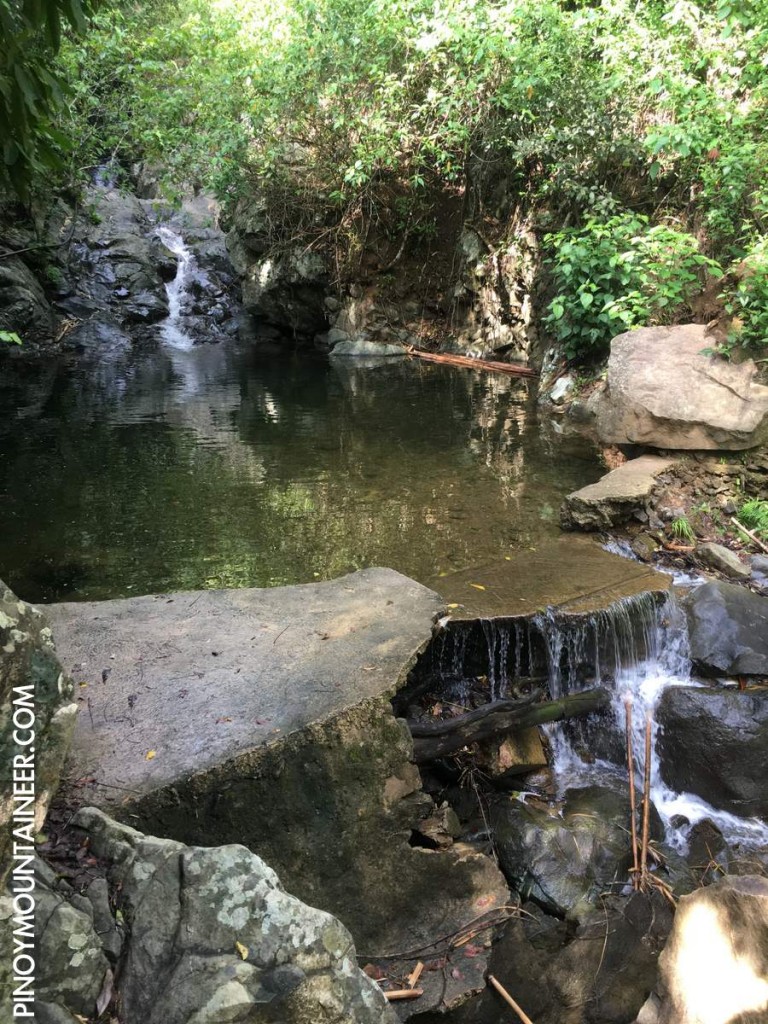
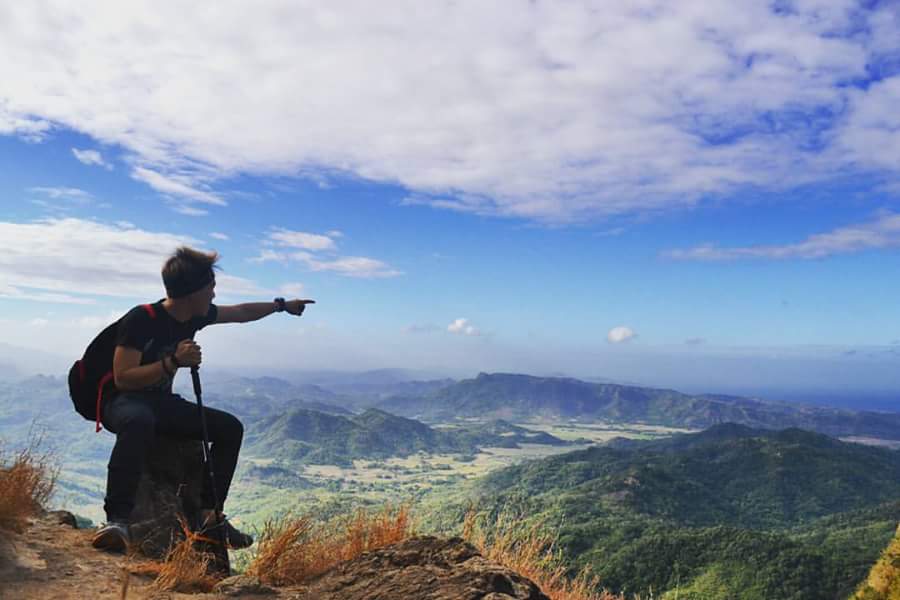
Arguably the mountain with the highest success rate of viewing the sea of clouds of all the Rizal mountains, Mt. Maynoba (pronounced may-noo-ba) was an instant hit from its opening as a hiking destination in early 2016. Easy enough to do in a few hours – and reachable from Metro Manila by private transport in an hour or two, this mountain at the foothills of the Sierra Madre in Tanay, Rizal offers breathtaking views of the Sierra Madre mountains, and enough variety in the trail to sustain one’s interest throughout the loop hike – from a steep, forested ascent up the so-called “Mt. Cayabu” (which is actually more of a subsidiary peak of Maynoba), a grassy, open trek at the higher reaches, and a descent through woodland that culminates in a small river system with a good number of waterfalls.
The trail to the summit, though steep at times, is straightforward, and merits a Maculot-like 3/9 difficulty classification. The hike down the waterfalls, however, has short sections of trekking on rocks, adding to the challenge and therefore increasing the difficulty to 4/9 if doing the entire hike. During the rainy season, muddiness is bound to be an additional consideration.
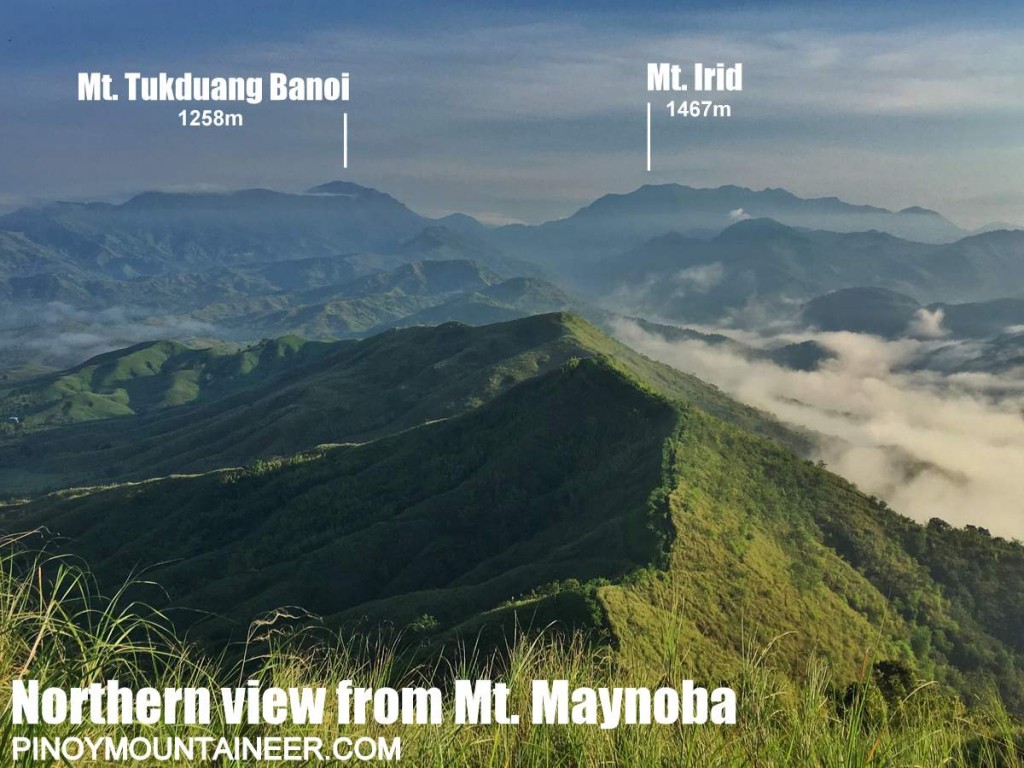
At the summit, there are beautiful northern views of Mts. Tukduang Banoi and Irid, with the valley of Sta. Ines in between them, and to the east, the Sierra Madre mountains bordering Tanay and the towns of Infanta and Gen. Nakar in Quezon Province. These mountains are scenic by themselves, but they are made much more so when viewing the sun rise above them, with the sea of clouds that for some reason found home in the valleys that surround beautiful Mt. Maynoba.
ITINERARIES
Note: Consider taking private transport to reach the summit of Maynoba in time for the sunrise. An overnight stay is also a possibility
DAYHIKE (PUBLIC TRANSPORT)
0300 Leave Manila for Antipolo (Cogeo Gate 2)*
0400 Take jeep from Antipolo to Batangasan junction
0500 ETA junction. Take tricycle to Brgy. Cayabu
0530 ETA Maynoba trailhead, Brgy. Cayabu. Register / secure guides
0600 Start trekking
0700 ETA “Mt. Cayabu”
0800 ETA “Mt. Maynoba” viewpoint.
0830 Continue with loop hike
0930 Pass through the eight waterfalls. Take a dip (optional)
1030 Continue trek back to trailhead
1200 Back at Brgy. Cayabu trailhead. Lunch / Tidy up.
1400 Head back to Manila
1630 ETA Manila
DAYHIKE (PRIVATE TRANSPORT)
0130 Leave Manila for Brgy. Cayabu via Marcos Highway
0330 ETA Brgy. Cayabu trailhead. Register / secure guides
0400 Start trekking
0500 ETA “Mt. Cayabu”
0545 ETA “Mt. Maynoba” viewpoint in time for sunrise
0630 Continue with loop hike
0730 Pass through the eight waterfalls. Take a dip (optional)
0830 Continue trek back to trailhead
1000 Back at Brgy. Cayabu trailhead. Tidy up.
1030 Head back to Manila
1230 ETA Manila / Lunch
OVERNIGHT (PUBLIC TRANSPORT)
Day 1
1100 Leave Manila for Antipolo (Cogeo Gate 2)*
1230 Take jeep from Antipolo to Batangasan junction
1200 ETA junction. Take tricycle to Brgy. Cayabu
1430 ETA Maynoba trailhead, Brgy. Cayabu. Register / secure guides
1500 Start trekking
1600 ETA “Mt. Cayabu”
1730 ETA “Mt. Maynoba” viewpoint. Set up camp (here or elsewhere)
1900 Dinner / socials
Day 2
0530 Wake up call / Await sunrise
0630 Breakfast / Break camp
0730 Resume trek
0830 Pass through the eight waterfalls. Take a dip (optional)
1030 Continue trek back to trailhead
1200 Back at Brgy. Cayabu trailhead. Lunch / Tidy up.
1400 Head back to Manila
1630 ETA Manila
PRACTICALITIES: MT. MAYNOBA
Transportation
Public (1) Jeep, Sampaloc to Cogeo [P20, 30-60 mins]
(2) Jeep, Cogeo to Batangasan [P40, 60-80 mins]
(3) Tricycle, Batangasan junction to trailhead [P25/15 mins]Note: Jeepney travel times are highly variable due to the traffic, but you are likely to get the lower end if you leave very early.Private: Marcos Highway > Brgy. Cuyambay – turn left – follow the road until you reach the trailhead
Exercise precaution on the rocky parts of the trail around the waterfalls area. Note that many parts of the trail can be muddy during the rainy season.
Sidetrips
Mt. Batulusong
Masungi Georeserve en route (reservation required).
Alternate trails
Trail to Brgy. San Andres and possibly Mt. Batolusong (not established). Some other trails are being planned to be opened in the same range.
The blogger at the peak of Mt. Maynoba (June 2016)Mts. Tukduang Banoi and Irid as viewed from Mt. MaynobaThe traverse to the waterfalls is forested, and at times surrounded with bambooOne of eight mini-waterfalls that serve as the culminating attraction of the loop hike
TRIVIA
According to the local guides, the word ‘Maynoba’ is derived from a plant called ‘toba’ or ‘tuba’ that used to grow in abundance in the forested part of the mountain that terminates in the waterfall system.
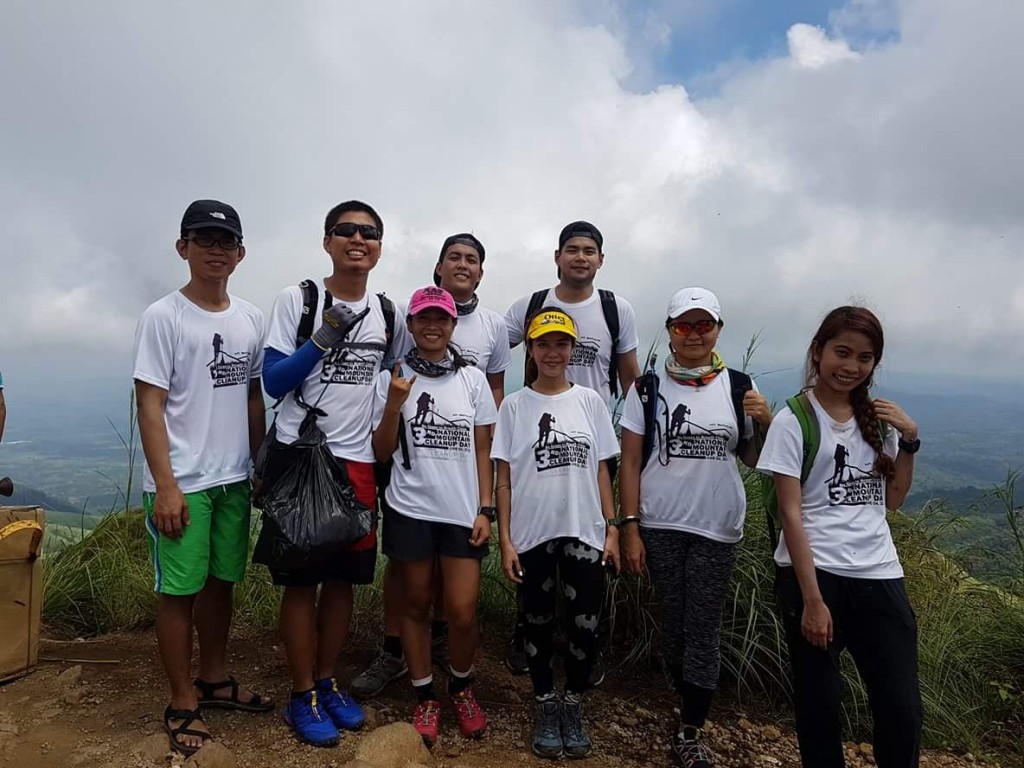
Mountaineers all over the country took part in the 3rd National Mountain Cleanup Day last June 4, with mountains from Narvacan, Ilocos Sur to Samal Island, Davao del Norte being cleaned up in the nationwide series of events. Held in cooperation with the DENR, each hiking club or group organized their own cleanup, with only a set of guidelines and a suggested logo unifying the entire initiative.
Check out the photo album of all the groups that joined the NMCD:
Partial and unofficial count: over 60 mountains cleaned up from Mindanao to Luzon!
Thank you to everyone who…
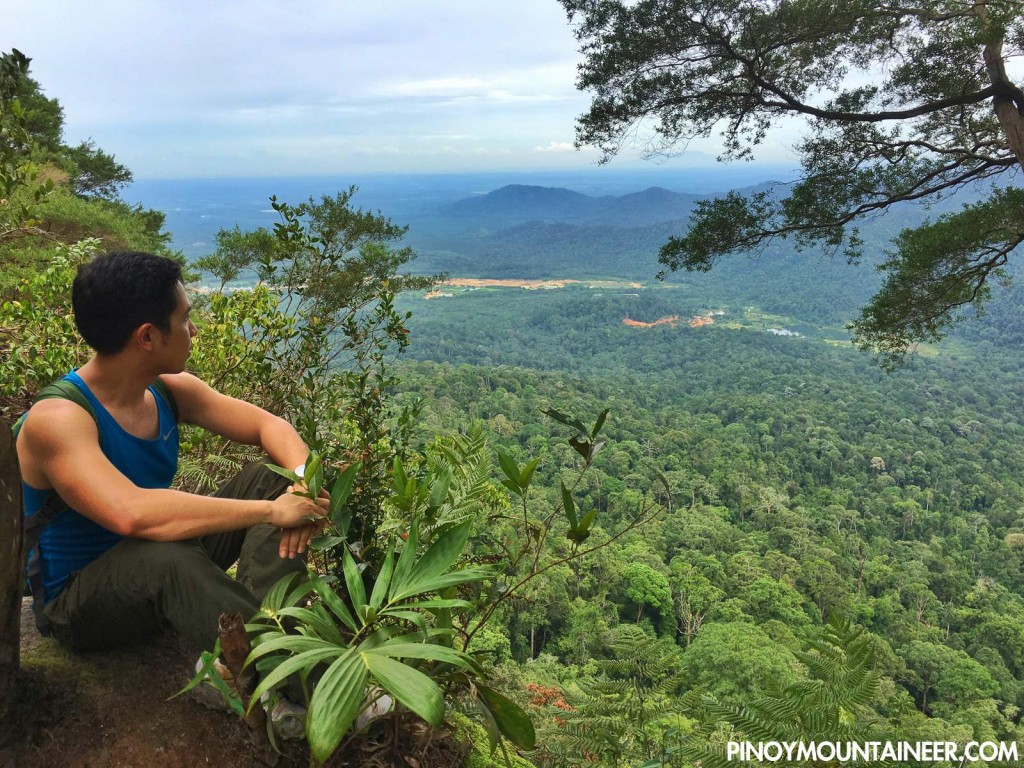
SINGAPORE – I am here in SG for a month and given that I can’t survive that long without hiking, I quickly got in touch with the Filipino hikers based here and we put together a group to go on a hiking weekend. Singapore itself, of course, has no mountains (Unless you will count Bukit Timah, which I hiked in 2012 – see Hiking matters #245) – but nearby Malaysia, especially the neighboring state of Johor, has a lot to offer. So we settled for two dayhikes within striking range of SG, starting with Gunung Panti in the town of Kota Tinggi.
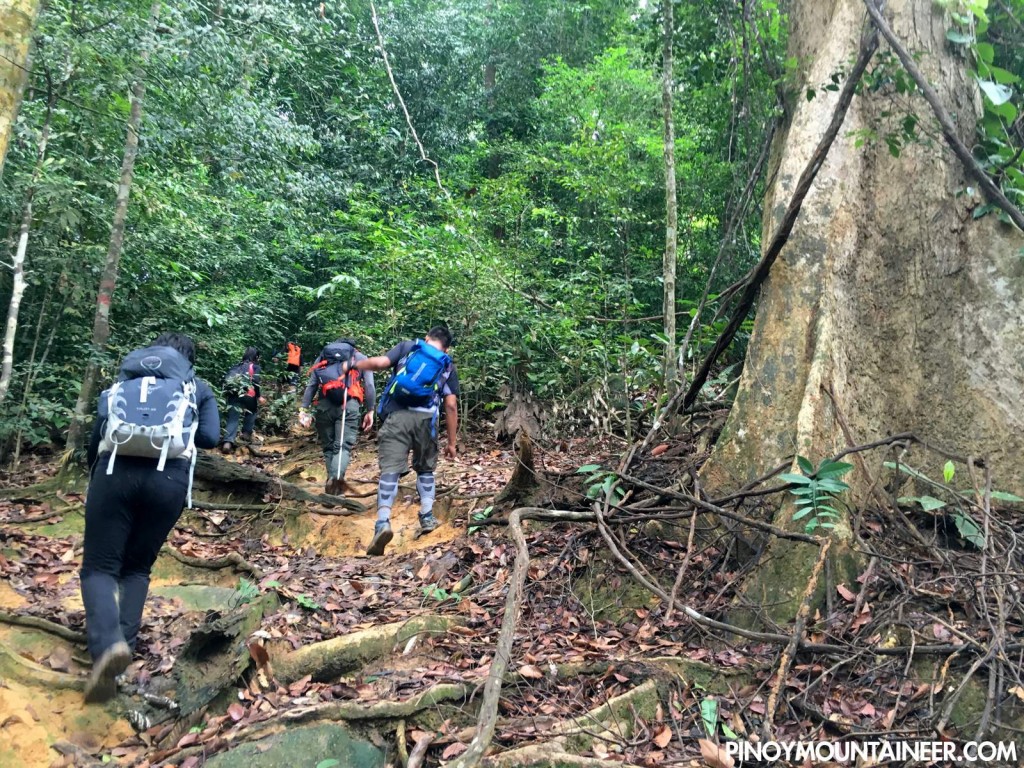
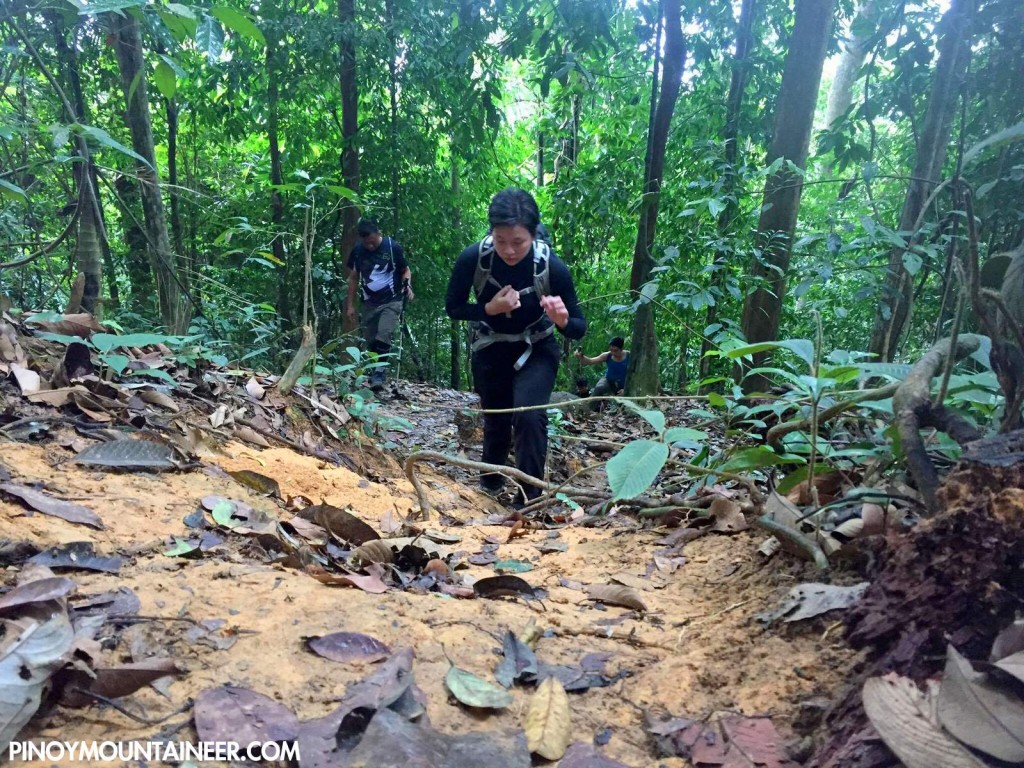
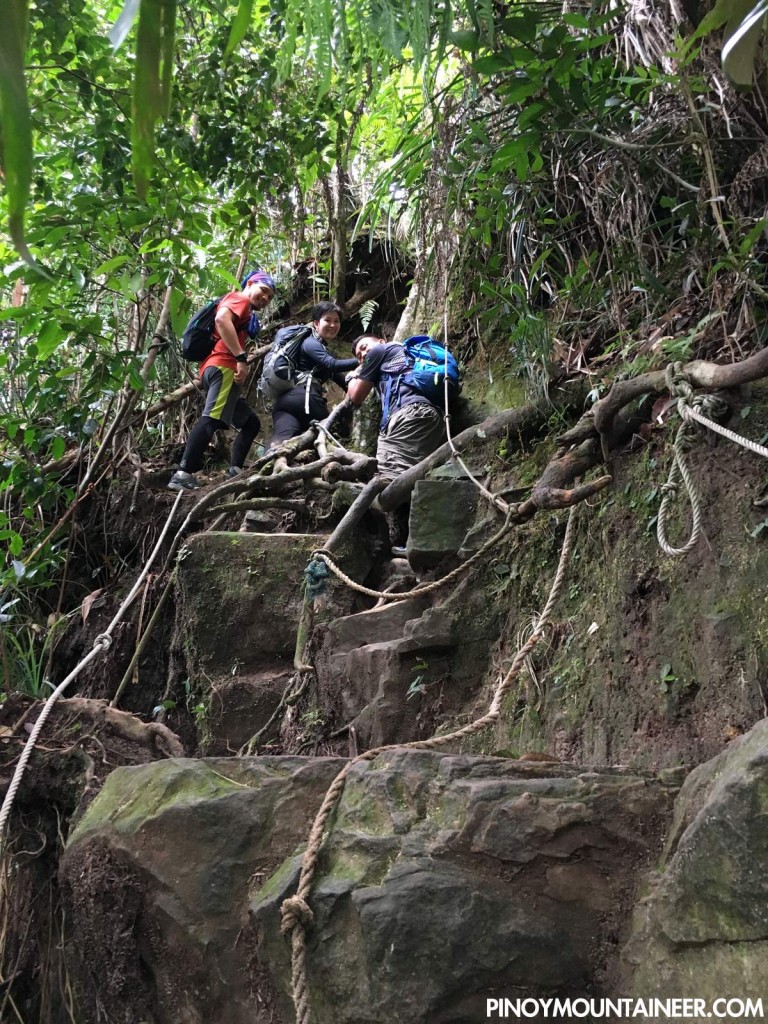
Gunung Panti may not be that high but it is quite fascinating – being at the heart of a Malaysian jungle that is home to elephants, leopards, and even the world’s largest dragonfly. We didn’t see the elephants but they did make their presence felt with their huge dung scattered on the trail, plus some occasional footprints, as we started our hike a few kilometers before the Kota Tinggi Waterfalls Resort, at around 1010 H.
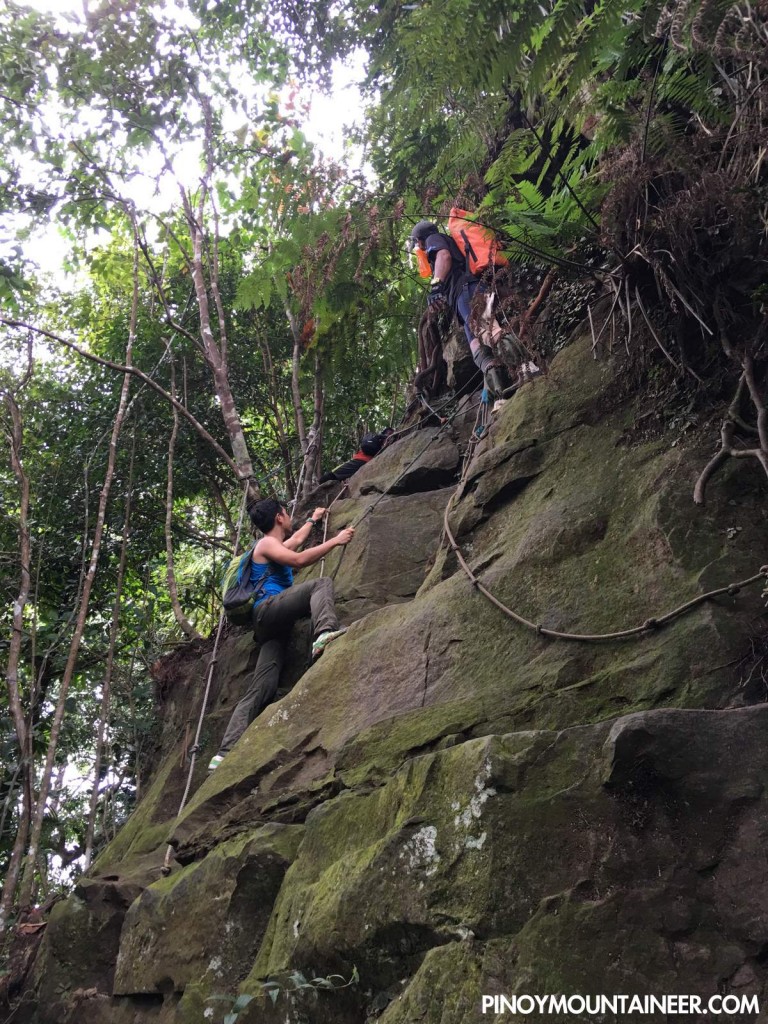
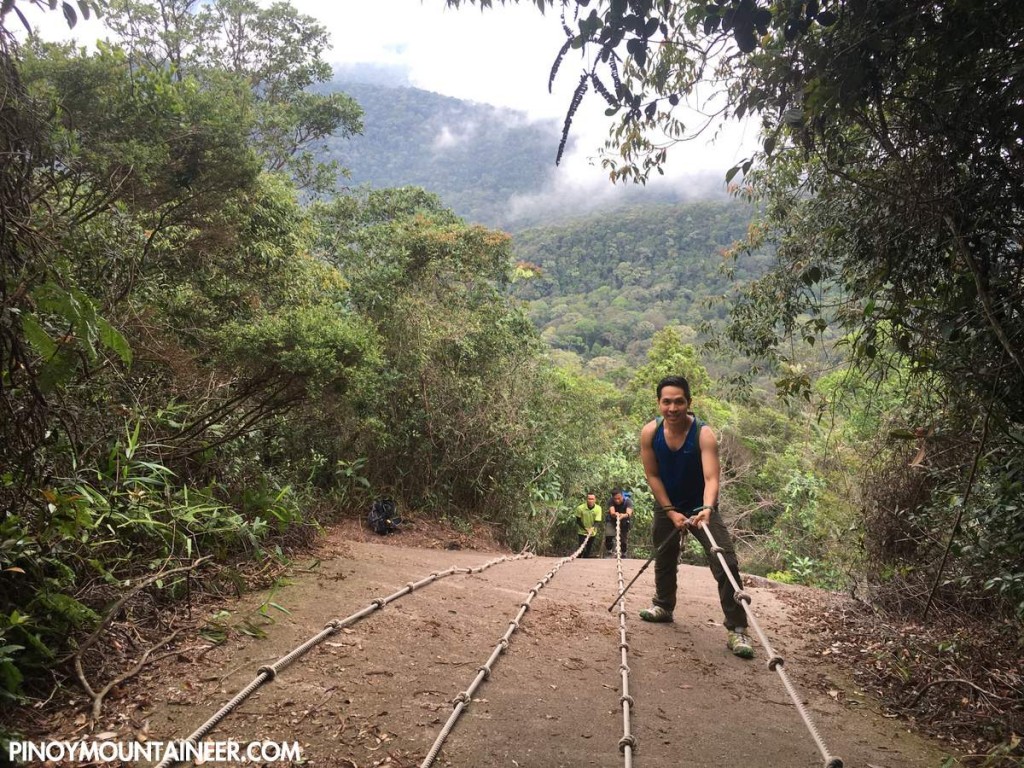
The trail was mostly forested, and reminded me of Pico de Loro’s Old Trail – the only difference is that there are loads of limatik in Gunung Panti. Moreover, a rocky face with roped segments provided excitement in the final section:
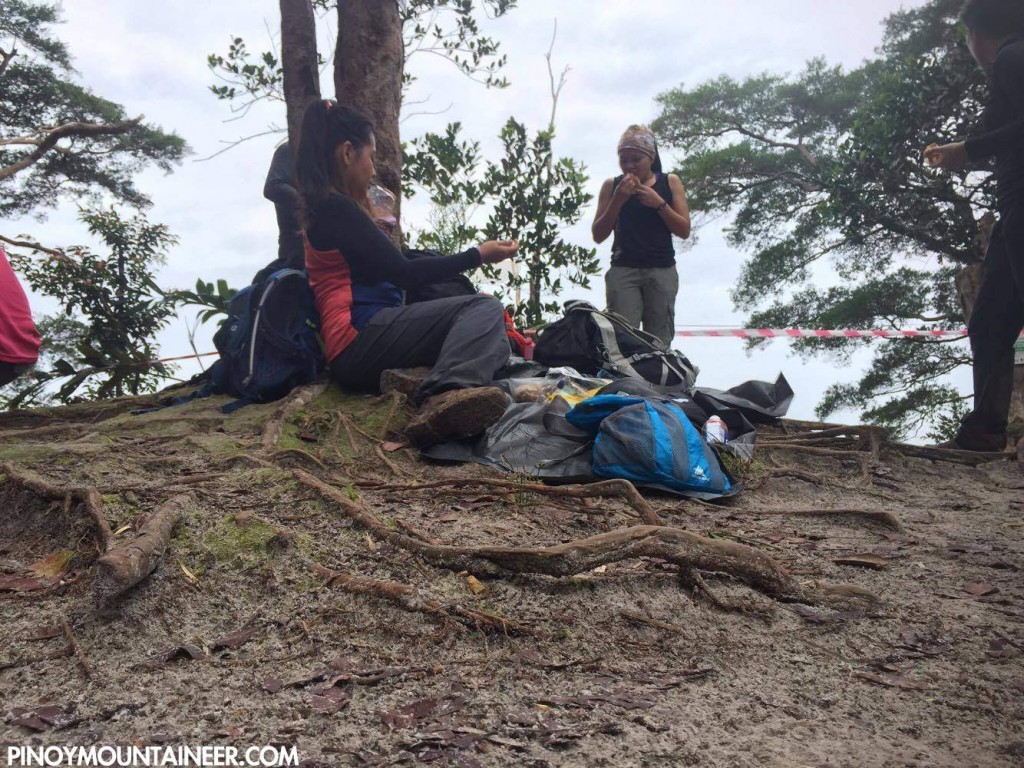
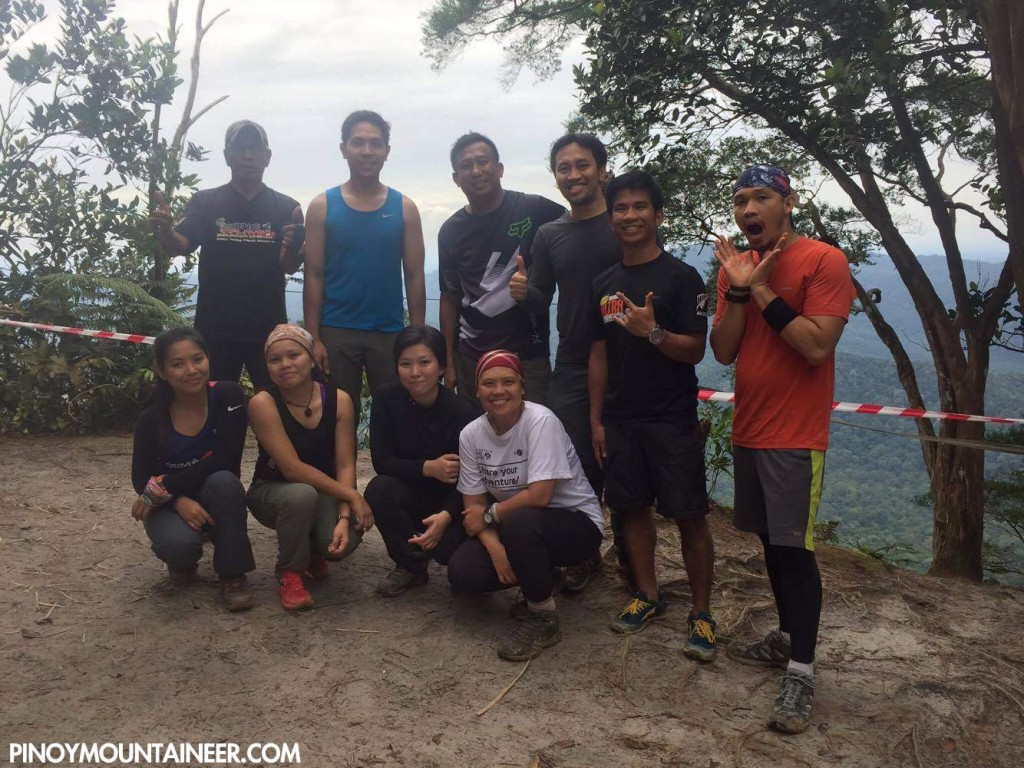
We reached the summit at 1140H, or after just 90 minutes of hiking. The vegetation was quite nice at the top, with coniferous-looking trees resembling those of temperate lands. Though the view is limited, it still opens up to some nice scenery: the northwestern plains of Johor and extending to a distant Gunung Lambak (510) in Kluang.
After taking a 45-minute break at the summit, we began to head down. The descent, especially past the roped segment, was fairly straightforward, taking just about an hour, and by 1430H we were back in the trailhead. We then made our way to the town of Tangkak further north in preparation for the more challenging hike up Gunung Ledang (Mt. Ophir) – the highest mountain in the whole state of Johor and one of the famous mountains of Malaysia. Thanks to Pip Maalihan for organizing the hike and all the SG-based Pinoy hikers for joining the hike!
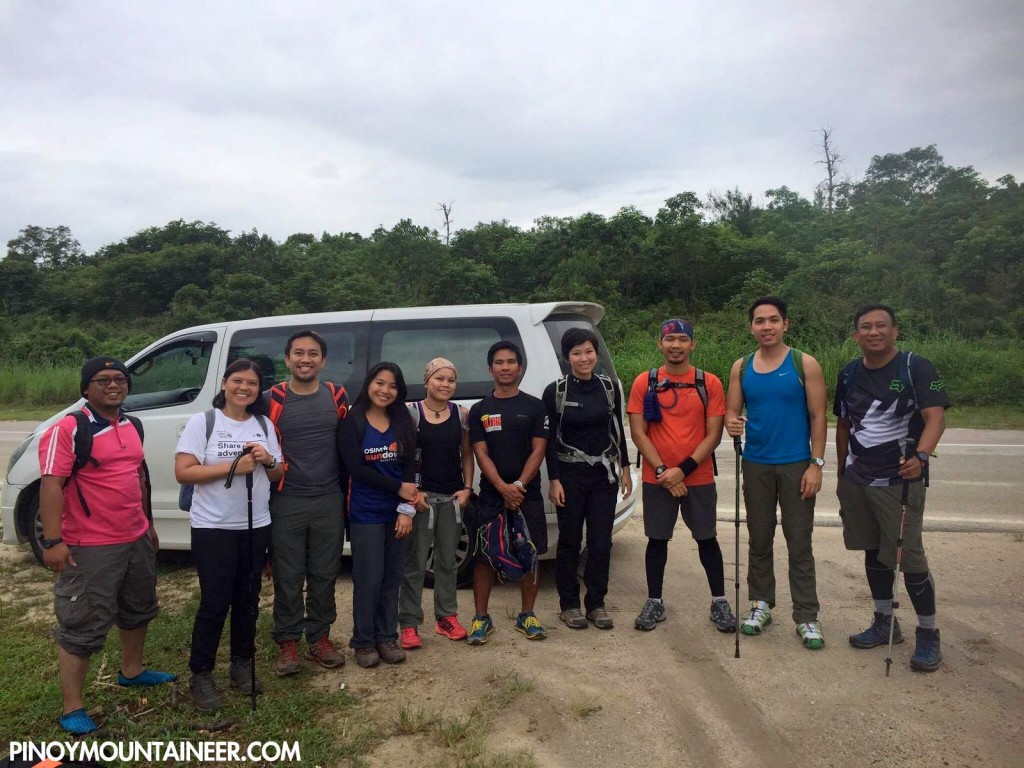
SINGAPORE – One day after the relaxing but very rewarding Mt. Panti dayhike, we proceeded to Gunung Ledang in the town of Tangkak, still in Johor but very near the state border with Malacca. This very popular mountain is legendary in Malaysian culture, with perhaps the same significance as Tagalogs have for Mt. Makiling. At 1276m (and with over 1200 m altitude gain), it is also a formidable hike.
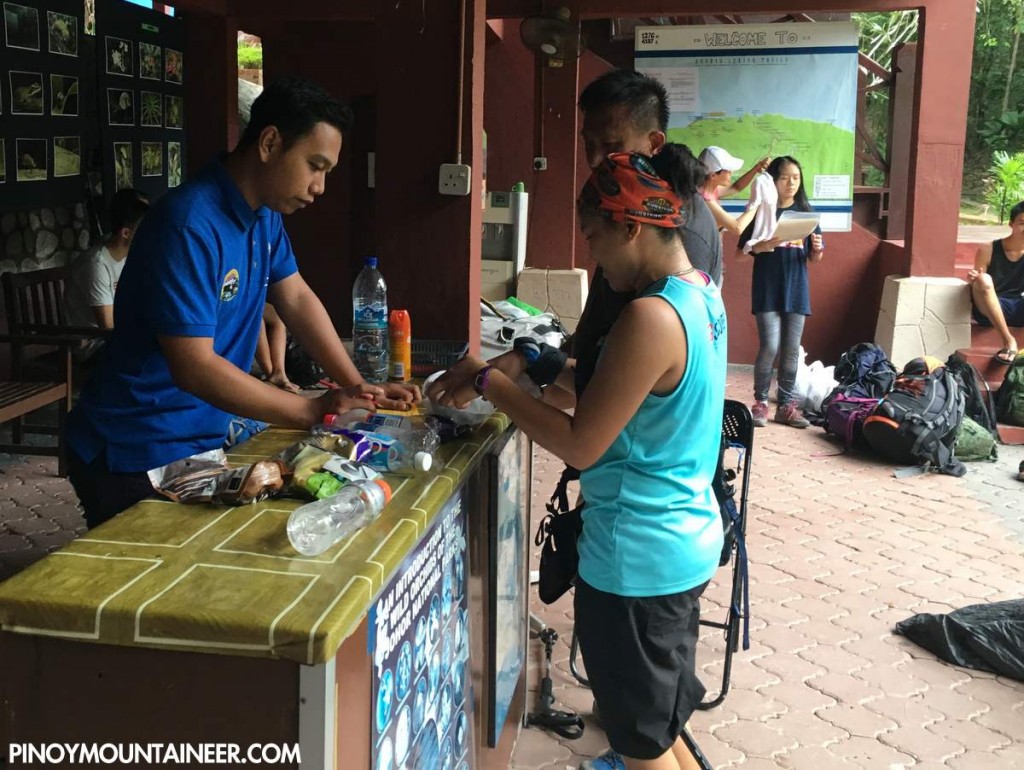
After breakfast of nasi ayam, we left the town of Tangkak at around 0730H, and arrived at the Gunung Ledang National Park headquarters just before 0800H. Impressively, as Gunung Ledang is a taman negara (national park), the rangers are very strict and you have to declare everything you’re going to bring up to the mountain – down to the last battery and plastic wrapper – and show them again when you get down, to ensure that Leave No Trace principles are followed – or else get a heavy fine!
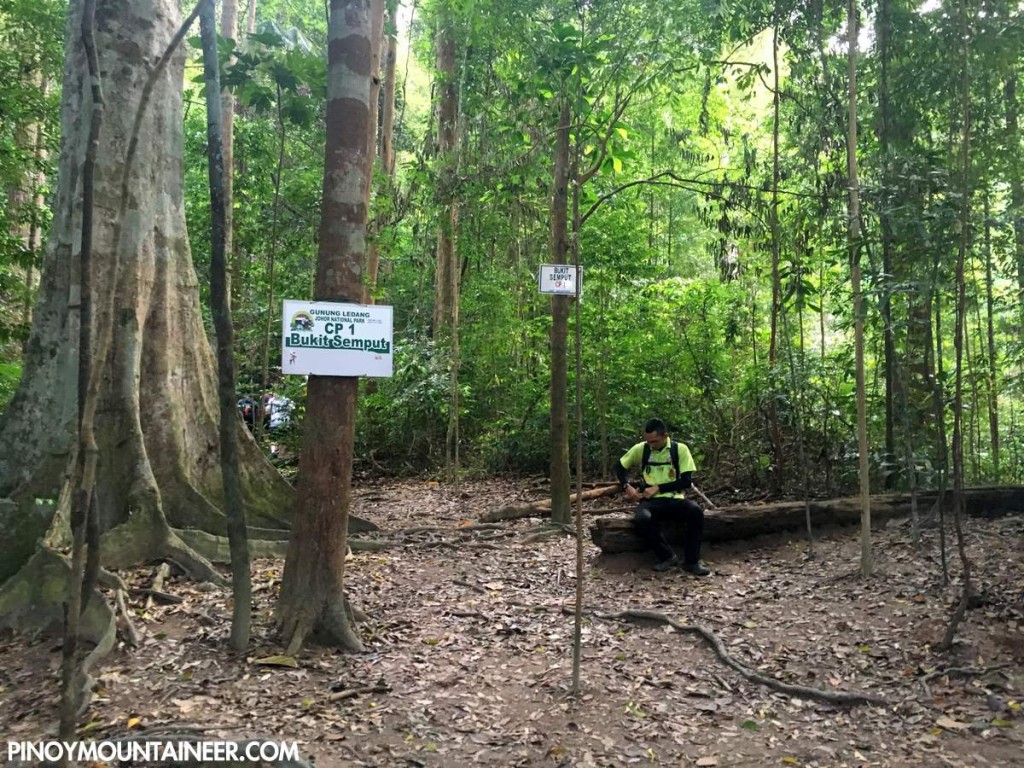
We started the trek at 0820H. Rather conveniently, the trail is divided into 8 ‘CPs’ or checkpoints. From the trailhead to until the junction past CP 3, the trail is straightforward and well established, gradually ascending into a forest reminiscent of Mt. Banahaw or Mt. Isarog. CP4 is completely bypassed. Past the junction, a right turn descends to C5, which has a water source is the traditional place for lunch.
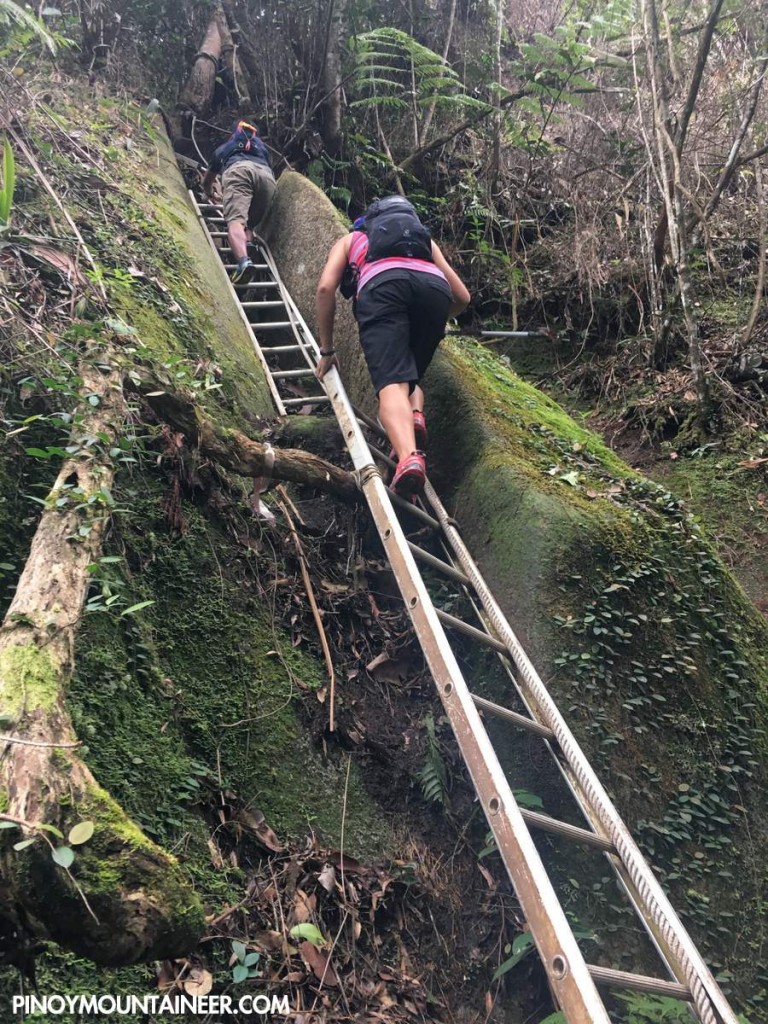
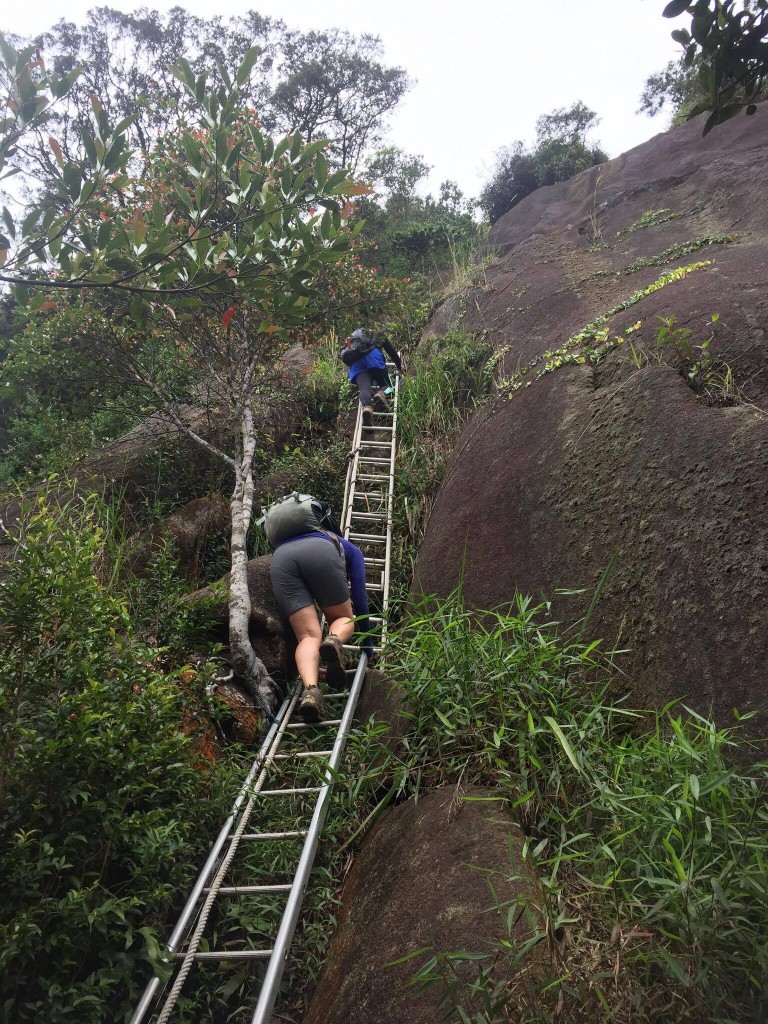
From there, the trail gets progressively more challenging and steep, and begins to feature steel ladders – and then the real highlight of the hike: the rock face that one has to negotiate with the aid of ropes.
Past this section, however, the hike is not yet over,with CPs 6 and 7, as well as 8 (the summit itself) still a bit of a distance. The trail this time, however, is considerably easier and does not pose further technical challenges (save for more ladders). Moreover, it offers rewards to the nature lover, like, in my case, a sighting of a group of Rhinoceros hornbills (Buceros rhinoceros) in flight! By 1230H we had reached the summit – after four hours of hiking.
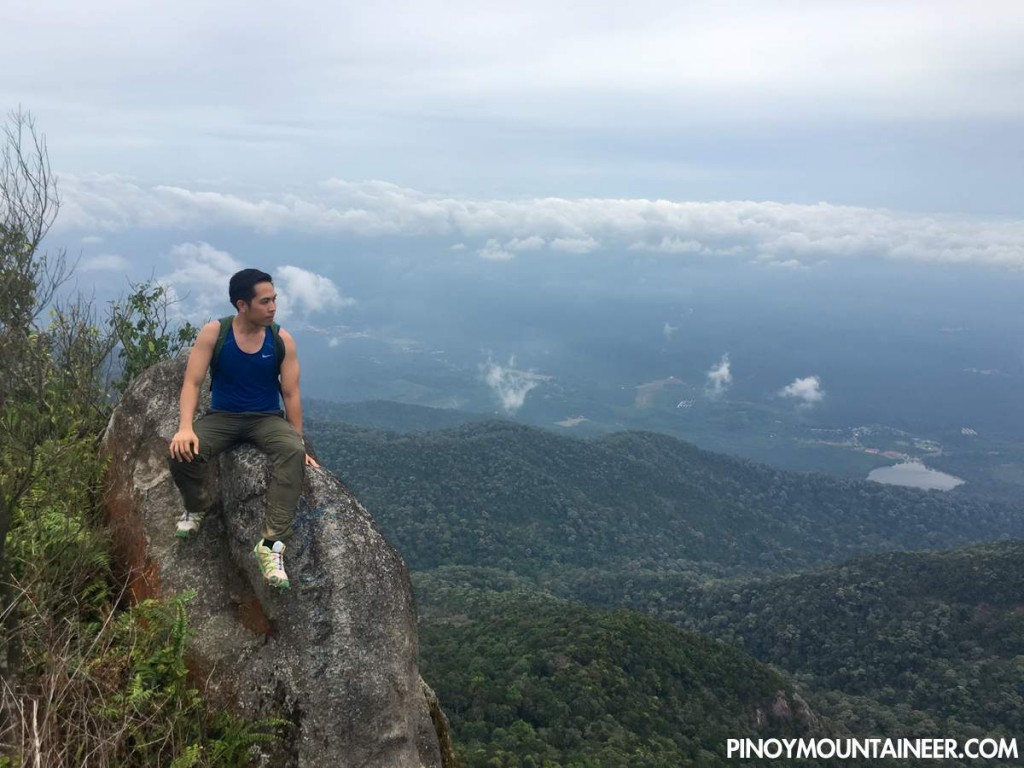
At the summit – which once again reminded me of Banahaw’s Durungawan I – there is a view of the other peaks of the Gunung Ledang range, which is actually at the southern tailend of the much-bigger Titiwangsa Range that extends all the way to Southern Thailand. Had the weather been clearer I’m sure we would have seen the other major mountains of Peninsular Malaysia, but given the time of the year and the recent weather, we already consider ourselves very lucky that it didn’t rain throughout the weekend.
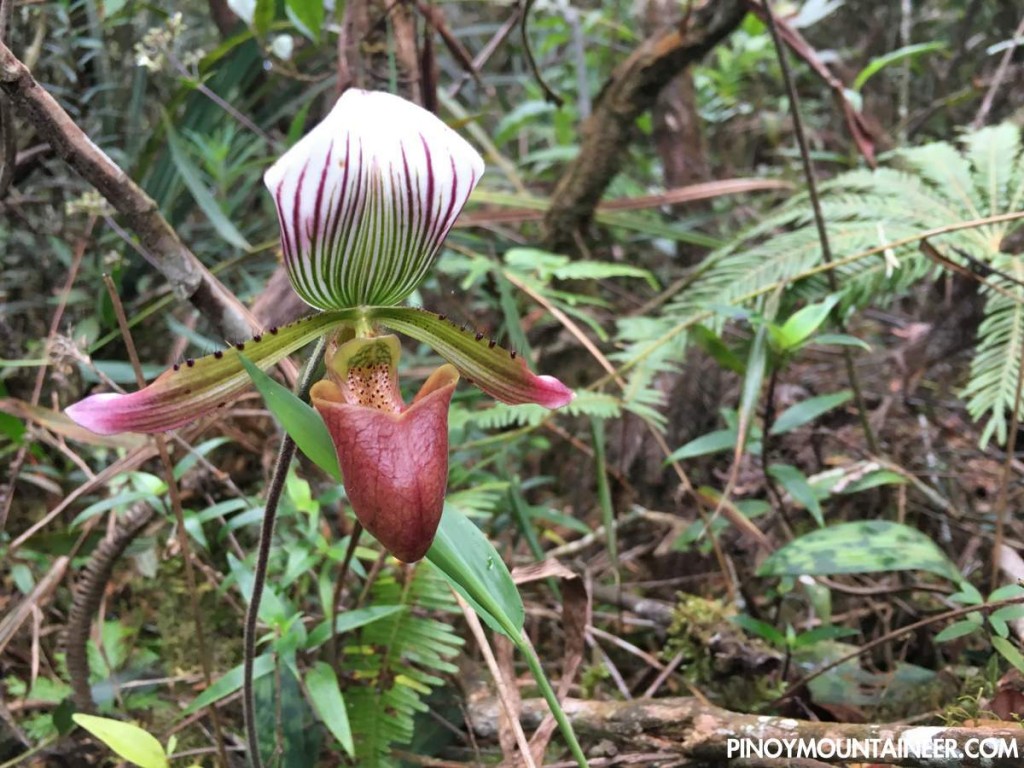
We didn’t stay too long at the summit, mindful that Sunday night will be horrible for crossing back to Singapore. Fortunately, since we took a different route from the summit, we no longer had to go to CP 5 which would have involved an ascent to go back to the junction. The descent, thus, was very straightforward, and it took us less than three hours to return to the trailhead. As a great bonus, we saw the rare slipper orchid endemic to Gunung Ledang – Paphiopdilum barbatum – which our guide claimed to never have seen in the two years he’s been guiding.
True enough the crossing back to SG was quite an ordeal because of so many people, but I wouldn’t trade our hiking weekend in Johor for anything in Singapore! Thanks to this trip my desire to climb the mountains of Malaysia has returned, and I will surely try to add to my 2/12 record of the G12, and, to use a sports metaphor, open my G7 account soon. Thanks, once again, to the SG-based Pinoys who joined us in this memorable adventure – and to Pip Maalihan for organizing!
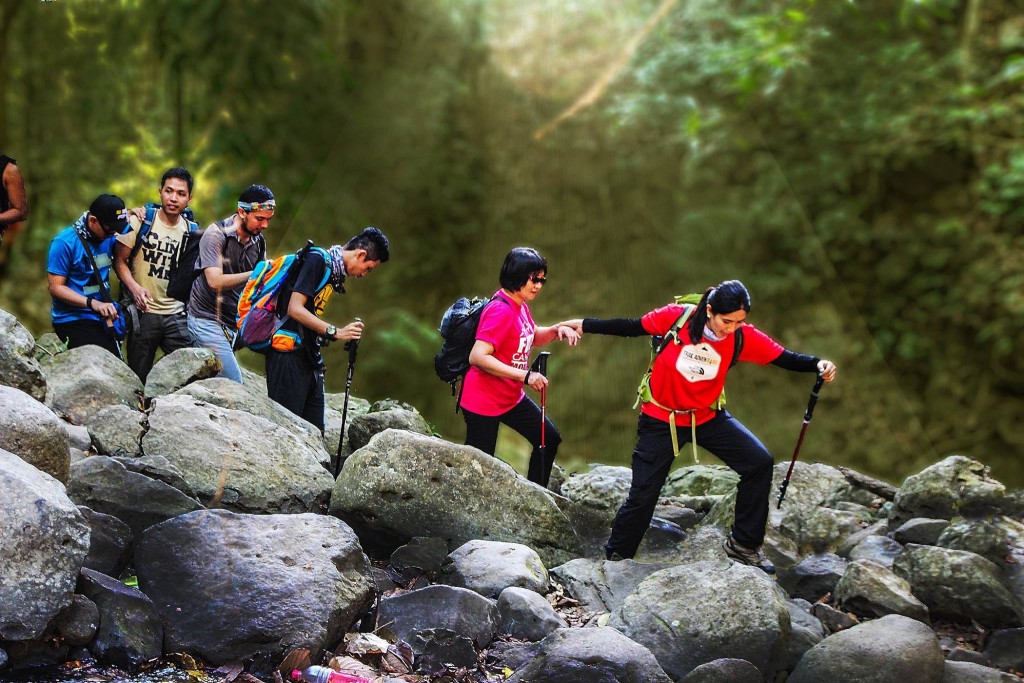
They may never see the view, but the mountain is more than what your eyes can see. The nine blind first-time hikers who joined us taught me to appreciate the mountain – and life itself – even with zero visibility. (Photo courtesy of Simon Adriano)
by Gideon Lasco
As a mountaineer and medical doctor, one of my advocacies has been to share the experience of the outdoors to others – especially to those who are in a position to inspire – and be inspired. More than a metaphor for life’s challenges, the mountain is a very real test of one’s body, mind, and spirit, and people can always gain something from the experience of climbing it and reaching for the peak. As William Blake once said: “Great things happen when men and mountains meet.”
In January 2016, together with Simon Adriano, an adventurer and documentary producer, I met with members of the Parent Advocates of Visually-Impaired Children (PAVIC) and Resources for the Blind Inc. (RBI) to discuss the idea of inviting youths with visual-impairment (which they customarily refer to as VIs) to climb a mountain. Our goals aligned: To open up for the youths a kind of activity that they probably never thought they can engage in, and to help fight stereotypes of PWDs as largely being helpless and mostly confined indoors. I was also interested in learning from the VIs what hiking can be without the sense of sight – which in our dominant ways of thinking is the “most privileged of the senses”.
We were pleasantly surprised that many VIs were excited about the activity, and we had seven sign-ups: together with Gerry Gonzalo, 48, a VI who had already climbed Mt. Batulao and Mt. Ulap. Eventually, “Tita” Baby Pasadas, a VI who works for the RBI, also decided to join. On the side of the mountaineers, guides from adventure company Trail Adventours, and individual hikers eagerly volunteered. Completing our team was Dr. Allan Larona, an ophthalmologist.
Gerry Gonzalo, 48, had already climbed two mountains and he was an inspiration to the blind teens – who will surely inspire many others to follow their lead.
The preparation
The orientation had to work both ways: We mountaineers had to orient the VIs about fundamental outdoor principles like not leaving one’s trash, the importance of staying hydrated, and so on. But we also had to be oriented about how to guide the VIs. The VIs, we learned, would hold your back or your arm with their non-dominant hand and with the other hand they would use a trekking pole to give them an idea about the surfaces you were trekking through. If the trail is narrow, you can say “in” so they will walk behind you, or “out” if it’s wide enough for them to walk beside you.
We learned that you cannot simply say, “There’s a bird!” because they wouldn’t know where you’re gesturing to. So you have to say “There’s a bird at 9 o’clock, about 20 meters away”. Also, you need to vividly describe the trail – not just so they can walk safely and properly, but also so they can have an idea of what your surroundings look like. In a way, you’re not just guiding them on the trail, you’re also guiding their imagination.
Moreover, the VIs should not be treated patronizingly. “It’s very important to respect their autonomy. They are not helpless. They will ask for your assistance if they need it,” as Tita Baby said.
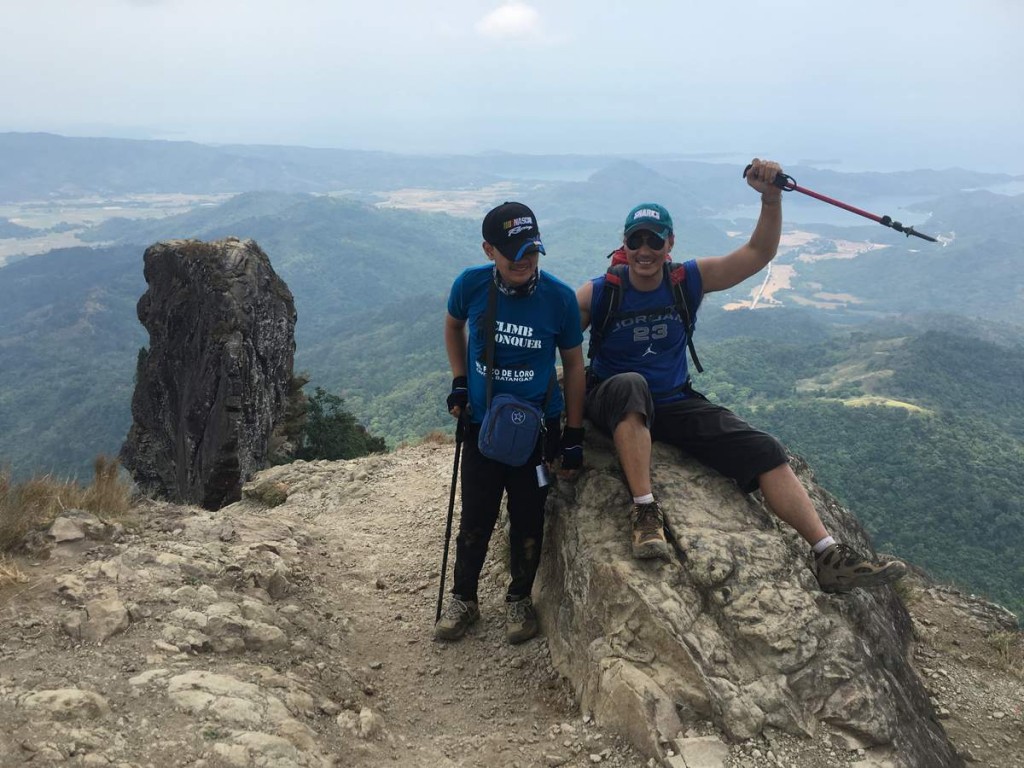
After factoring in the participants’ backgrounds and physical fitness, we decided to go for the challenge of hiking up Pico de Loro, at 664 meters the highest point in Cavite: easy enough to do in a day but hard enough to pose a challenge to any first-timer, blind or sighted.
Tim and his mountaineer-companion Daryl. Tim was the last VI to reach the summit, but he never gave up, and in the process moved Daryl and the others to tears. “All it takes for a person who is blind to climb a mountain is for person who is sighted to be willing to guide them.”
The hike
The team assembled at the trailhead in Maragondon early on Thursday, April 28, and the VIs were paired with their guides. My hiking buddy was 14-year old Jerald Polintan, who had travelled all the way from Santiago, Isabela together with his father to join the activity. A week before, his mother Belinda had written me to say that Jerald was “a bit shy” but “very eager” to join the activity, adding that Jerald loves to take pictures. Later, as we started trekking and talking, I would learn that the incoming Grade 8 student was also eager to try sports and physical activities like running. His motto? “Dream big…nothing is impossible”.
Through the years, I I have learned that the hiking trail is the best “way” to get to know people, since you get to walk (and talk) the whole time. During the hike, we got acquainted with the other VIs – each with their own unique personality. From their parents, we learned of the struggles of coping with their children’s disability but at the same time their resolve to make their kids live as full a life as possible. Their everyday struggles made me realise even more the importance of creating a PWD-friendly environment in our towns and cities, as well as the crucial role of screening for preventable vision-threatening illnesses early in childhood.
Erik Weihenmayer, the first and only blind person to climb Everest, once said: “Mountain climbing is a blind person’s nightmare.” Unlike city sidewalks where you can predict the each step, in the mountains, every step is different: the terrain, the incline, and the many obstacles. But Jerald proved to be very intuitive in adjusting to the different kinds of trail we walked through, and as we went higher, I needed fewer words to guide him, allowing us to talk about other things – like his interest in computers and my hiking adventures.
Even so, the hike was not easy, and Jerald – like any other first-timer – started to ask about how many more hours or minutes it will take before we reach the peak (the surest sign of a hiker’s fatigue). And like any other mountaineer, I found myself reassuring him with words like “It’s not so far!” and “We’re getting closer!” When he realised that we were actually ahead of the other pairs, his competitive spirit was stirred, giving him the final push for us to reach the top, after just 3 hours and 30 minutes.
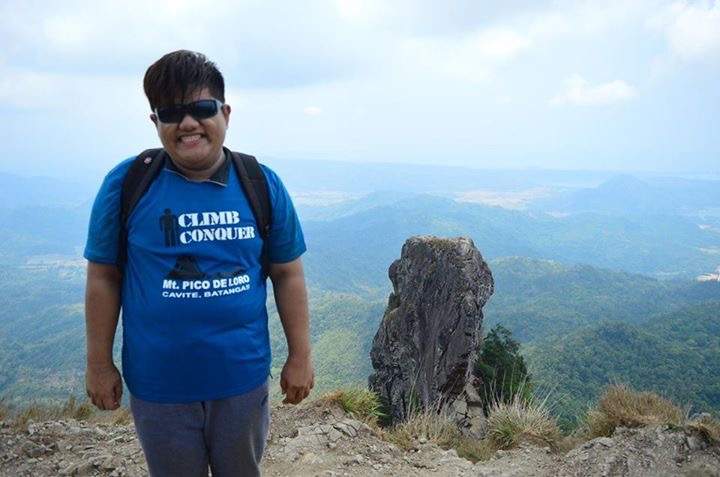
“I may be fat and blind, but I can climb a mountain!” Mark’s positive attitude and desire to inspire others kept him going, and he was one of the first to reach the top.
The summit
Jerald was delighted to reach the summit and I described to him the ‘Monolith’: the rocky spire that serves as Pico de Loro’s famous landmark – and how it formed the beak of what looked like a parrot from the old sailors’ vantage point (hence the name Pico de Loro, meaning “parrot’s peak”). He was very tired but still eager to hear more about the mountain.
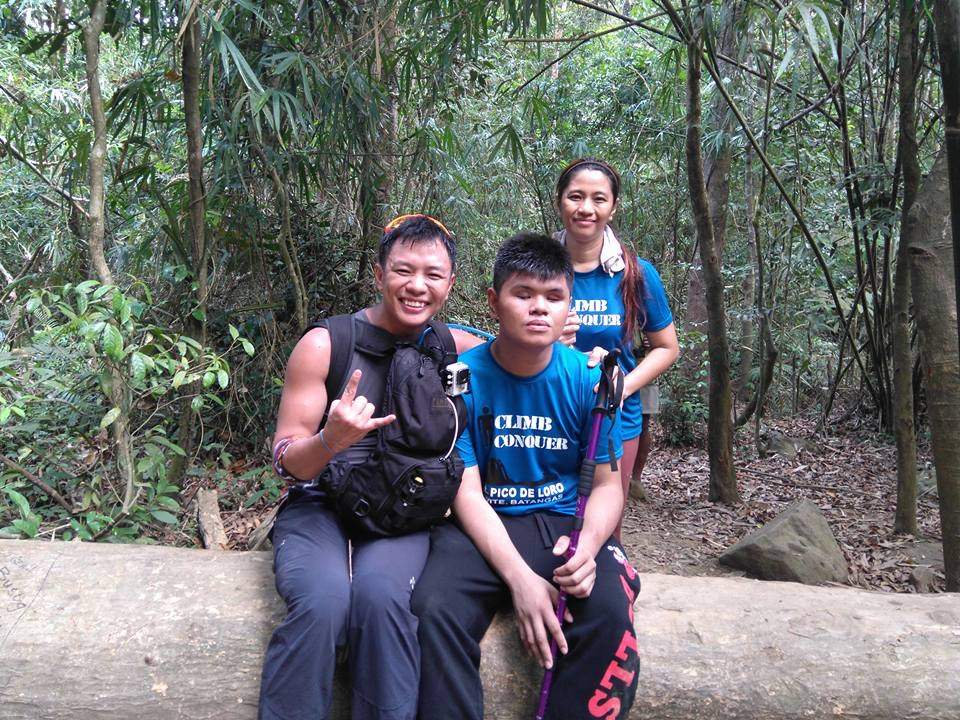
There was much joy at the top when the other pairs started arriving. Memorably, Mark, 17, declared: Kahit mataba ako, kaya kong umakyat ng bundok!” (Even if I’m fat, I can climb a mountain!). The parents who had accompanied their kids were also thrilled at reaching the summit, as it was also the first time for many of them. Like any other hike, soon came the picture-taking, which commenced as soon as Tita Baby – the 8th VI to reach the summit – arrived.
We were already on the way down when Timothy, the 9th VI, suddenly appeared with his guide Daryl: they were actually still making their way up the summit! Timothy was visibly struggling but you could sense his determination and he crawled his way up the top with bursts of strength – and many words of encouragement from his guide.
When he reached the summit, people who witnessed his ascent were moved to tears, marvelling at the power of the human spirit to keep going and overcome limitations.
“I want to keep climbing. I want to hike Pulag next!” Jerald is eager to pursue hiking as a hobby. Turning an extraordinary feat into an ordinary activity is what will truly make “Zero Visibility” live up to its dream of inclusive outdoor recreation.
The return
“Is going down easier than going up?” Jerald asked me. I told him that some people find it harder, others find it easier, but generally, the descent is easier when the slope is gentler, and harder if the slope is more inclined. The first part of the descent haxppened to be very inclined with nothing to hold on to, so I braced for a challenge. To my surprise, however, Jerald did very well, and I realised that being blind, his sense of balance was much better than the sighted hiker, since he has to rely solely on proprioception (feeling one’s body). Also, as his father explained, he does not have to worry about the “lula” or the vertigo induced by heights.
That was not the only time I was amazed by the VIs’ abilities. Once, when we were resting on the trail, young Stephen correctly identified how many of us were there; and Jerald himself was very sensitive in detecting the subtle changes in the trail and in the weather. Having focused on our sense of sight, I guess we have not learned to develop our other senses to their fullest potential.
The rest of the hike went smoothly, and I didn’t have to tell Jerald that we were almost done, as he heard the river that signalled the end of the trail way before I did. By the time the sun had set, everyone was safely back in the DENR station, and in the end we took just the same time it would have taken had we been guiding sighted hikers.
Only half of the people in this picture will ever be able to see it with their eyes. But the participants of Zero Visibility – guides and VIs alike – will never forget the day that will always be an inspiration to everyone – and the people they shared this adventure with.
Lessons learned
Some people ask me: “What’s the point of climbing the mountain when you can’t see the view?” But as our newfound friends showed during the hike, the mountain is more than a place with scenery; the forest has its music; the trail changes textures, and the wind and the sun gives different sensations to the body – they acutely felt all of these things. “I liked it how the cicadas gave way to the birds as we went higher,” Tita Baby remarked when we were at the summit. Hikers often say “zero visibility” to describe a summit without the expected beautiful views, but there is actually so much that we are taking for granted. This is a sobering reminder in our age of Instagram that we do have other senses, and if we engage them, we can have a deeper appreciation of the things we do, the places we visit, and the people we interact with.
To be honest, I initially thought it would be a much harder task to guide a person who is blind up a mountain. But as Jerald taught me, it was actually attainable. All it takes for a person who is blind to climb a mountain is for person who is sighted to be willing to guide them. This is a reminder for us that we cannot look at people as “disabled” – we have to look beyond their disability and work with them so they can maximize their abilities. And by extension, we too cannot look at ourselves as limited: we have to do our best – and help each other – to overcome our limitations.
For truly, the outdoors, like life itself, is for everyone. And there is so much that we can experience in this world even with zero visibility.
You were a beginner once, but now beginners are looking up to you for advice and inspiration. They ask you all kinds of questions and sometimes you complain to me about the way they have come to depend on you for information about the mountains they want to climb.
“Why are they asking me all these simple questions? They can easily get all these facts from the Internet!” you would say, adding: “I’ve written so much about these things – all they have to do is search for them!”
But let me ask you: Don’t you think there’s a difference between reading something from the Internet, and hearing the same thing from someone you look up to? When you answer these questions, no matter how simple, bear in mind that you not only inform, but inspire. To paraphrase Robert Frost, your role is not so much to teach, but to awaken. Thus, whenever you engage with novices, strive to awaken their passion for the outdoors; their love for learning more about it; and their sense of responsibility – to others, to the environment, and to their own selves.
And now that you are no longer a beginner, I want you to develop the art of mentoring the next generation. Not just because you need to pay forward whatever you’ve learned from people like me; not just because there’s so much at stake with the environment and thus we need people to care about it deeply – but because you still have much to learn about the outdoors. We all do. And many of these lessons can actually come from the beginners themselves.
First of all, beginners can teach us how to be patient with other people. Surely, when you were a kid, there was a time when you kept on asking your parents questions. Did they ever complain? I have memories of asking about transformers on electric posts, and where longicorns can be found, but I don’t remember ever being turned away, or told to shut up. It is only now that I’m beginning to realize how much patience it takes to be a parent – or be in a position of nurturing someone. When a newbie asks you questions about the mountains, exercise the same patience as a parent would towards their child.
This is not an easy thing to do. It can be very frustrating at times. Some people ask me how to get from their hometown in Bulacan to a mountain in Cavite, and I am always tempted to say: “How should I know? I don’t live in Bulacan!” To my mind, the only legitimate grounds to disregard these questions is to nudge them towards learning how to research themselves. To paraphrase the famous adage: “Give a man information and you guide him for a day. Teach a man how to research and you guide him for a lifetime.” Indeed, there are times when you cannot spoon-feed them with information that they can easily gather.
But what if a beginner is genuinely interested to know about something? What if he presents you a scenario and asks you how you would respond to it? For instance, I receive a lot of reports of people catching others in the act of leaving garbage on a campsite – or vandalizing some rocks. “Who can we complain them to?” they ask. I would also get letters from people living in various areas with lots of mountains – none of which have been documented. “How do we climb those mountains? How do we form a club?” You must not fail to see the genuine desire for them to learn; their genuine concern for the mountains – and give them a proper response.
And so, in these instances, the question becomes: How do you actually answer in a way that will satisfy, educate, and enlighten? This brings me to the second lesson you can learn from beginners: How to articulate the things you already know in a way that is easy for everyone to understand. In other words, they can teach you how to teach.
Experience will tell you what I am talking about, but just to give you an example, I have learned with my dealings with beginners that when you instruct them, you have to be very detailed. Don’t just tell them “bring gloves” – they might end up bringing garden gloves. Don’t just tell them to bring a tent – they might end up bringing a beach tent. Don’t just tell them to bring water – tell them how much water they should bring. For beginners, details matter.
Teaching also involves giving them space to grow, and at times, even make mistakes. In the mountain, there will be times when each hiker has to make decisions for himself, and you have prepare them for that – and these applies to ladies too, as I have told you in a previous letter. Painful though it might be, a parent will have to let a child ride a jeepney, then a bus, and then a plane on his own, and so must you allow the people under your aegis to develop wings of their own, and not only climb mountains – but to lead others in the future.
Also, when a hiker makes a mistake, sometimes you have to let the mountain be his teacher, even at your expense.
I experienced this once when a young hiker I was guiding committed a grave error that nearly cost me my own life – as we were on a precarious portion of a trail. I was so mad at him because I gave him clear instructions on what to do, but he still did not do it. What made it more painful for me was I took responsibility for him during that hike. For a long time, could not bring myself to forgive him. But later on, I realized that I could have been more patient, and that the experience itself would have taught him more than my anger ever could.
Beginners can also teach you a thing or two about humility and pride. The beginner will obviously be proud about his hiking accomplishments. He will boast about the things that you would consider to be too minor – and this may cause you to be annoyed. Don’t ever compete with them! Indeed, never harbor any competitive feelings towards the people you are mentoring. Let them be proud of the ten mountains they have climbed, even when you have climbed many more. Let them be proud of the altitude they have gained, even when you have reached far more than that. Like a father who allows himself to be beaten in chess by his five-year old son, let them think highly of themselves if that’s what will encourage them to keep going. Someday, they will learn to appreciate what you’ve done, when they begin to see your footsteps in the places they have struggled to reach. The mountain itself will teach them humility.
Still, while warning you not to feel competitive with beginners, you can tap on their spirit of adventure to take your own leaps of faith, and go beyond what you’ve already done. Like I said, you still have much to learn, and the world has infinite challenges. Let their high regard for you be part of your drive and inner strength, and climb the mountains you’ve always been dreaming of! To be inspiring, you must be inspired. Don’t be afraid to fail, because even in failure you can teach grace to those who are watching you. In fact, the only thing that is as valuable as teaching others how to succeed is teaching how to deal with failure.
Bear in mind, however, that there may truly come a point that a beginner will someday surpass your achievements. They may end up reaching higher peaks, or having more followers. Accept that moment with humility, but at the same time, with pride and joy in having been part of someone’s journey. Some of them will acknowledge your help, but many will simply forget. You must learn to move on, and not be discouraged. Never begrudge their feats – nor define them by their humble origins – or their weaknesses that you know too well. Never be jealous of the younger generation, because their success is also yours. I dream of seeing our flag in distant peaks and distant places, not knowing who will be the one to take it there. Yet I keep that dream alive, and you should keep yours too – even if their fulfilment lies in others’ hands.
Finally, beginners can remind you of the sense of wonder that first inspired you to discover the outdoors, and motivated you to keep climbing. As insatiable creatures of desire, we are wont to go higher, and aspire for more. This is both a blessing and a curse. It is a blessing because it can drive us to keep going. But it can also be a curse because it can take away the joy of being in places you used to only dream of. When I first climbed Mt. Apo, it was the fulfilment of a childhood dream, but the last time I climbed it, it had just become one of three mountains I climbed in Mindanao on that trip – and a dayhike at that. Reaching the summit that day still made me happy, but it was no longer the profound and very memorable moment when I was 19 and standing on top of the country’s highest peak, when everything seemed special.
Hiking with beginners can bring back that joy and novelty. Because when you see their faces light up with the littlest of surprises – be it a passing snake, a creeping leech or a fleeting rainbow – you cannot help but be reminded of your own journey’s beginnings. You cannot help but be reminded that you cannot climb the same mountain twice, because there’s something new and different each time – and that includes the people you are climbing with. If nothing else, they themselves – the young ones – should be the joy and the novelty that should give you reason to keep going back to the mountains you’ve already climbed.
And so when you bring someone on a hiking trip and she reaches a summit for the very first time, don’t mock her for being too excited, and being too mesmerized by the view.
She’s probably enjoying it more than you do.
Singapore
June 25, 2016
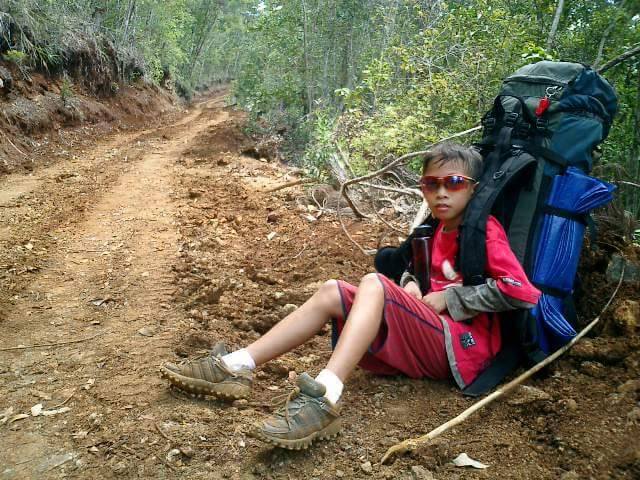
Photo at Mt. Hamiguitan courtesy of Peter Joshua Caiña who says his father brought him to this mountain at the age of 10.
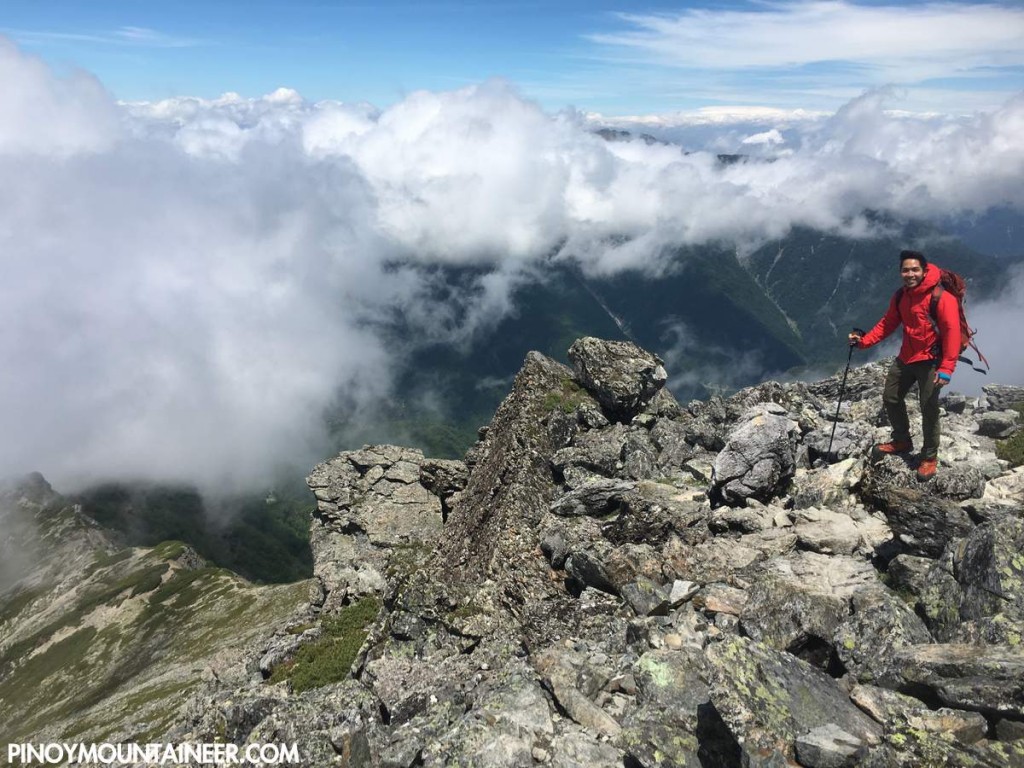
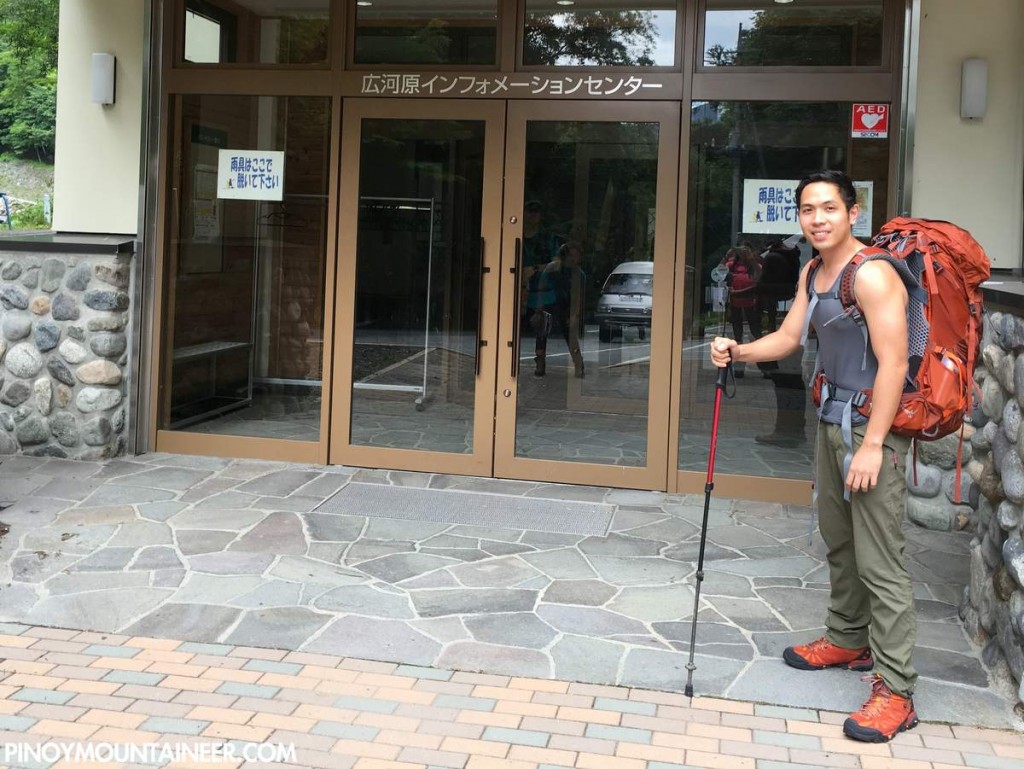
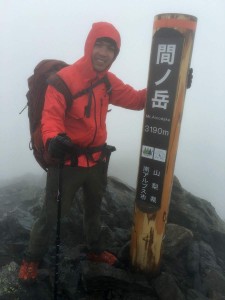
TOKYO, JAPAN – It’s been a while since I’ve hiked in Japan (the last one was in 2012 when I went to Hokkaido), and I am very happy to finally have done of my dream hikes here – a traverse in the Minami Alps from Kita-date (北岳) to Ai-no-dake (間ノ岳), at 3193m and 3189m the 2nd and 4th highest peaks in Japan, respectively.
For this particular hike I was joined by Coby Sarreal and Cynthia Sy. We started the journey from Nagoya, taking the train to Kofu via Shiojiri, and staying in Kofu overnight before taking the Hirogawara-bound bus from the Kofu Station. Arriving in Hirogawara at 1100H, we started the trek almost immediately.
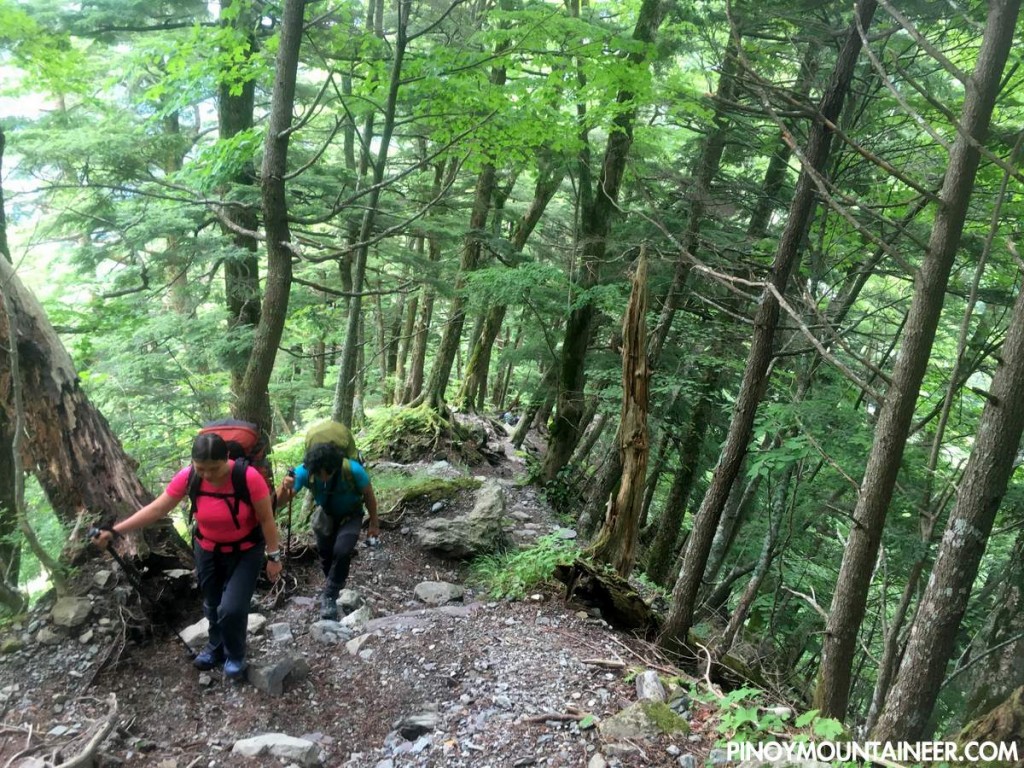
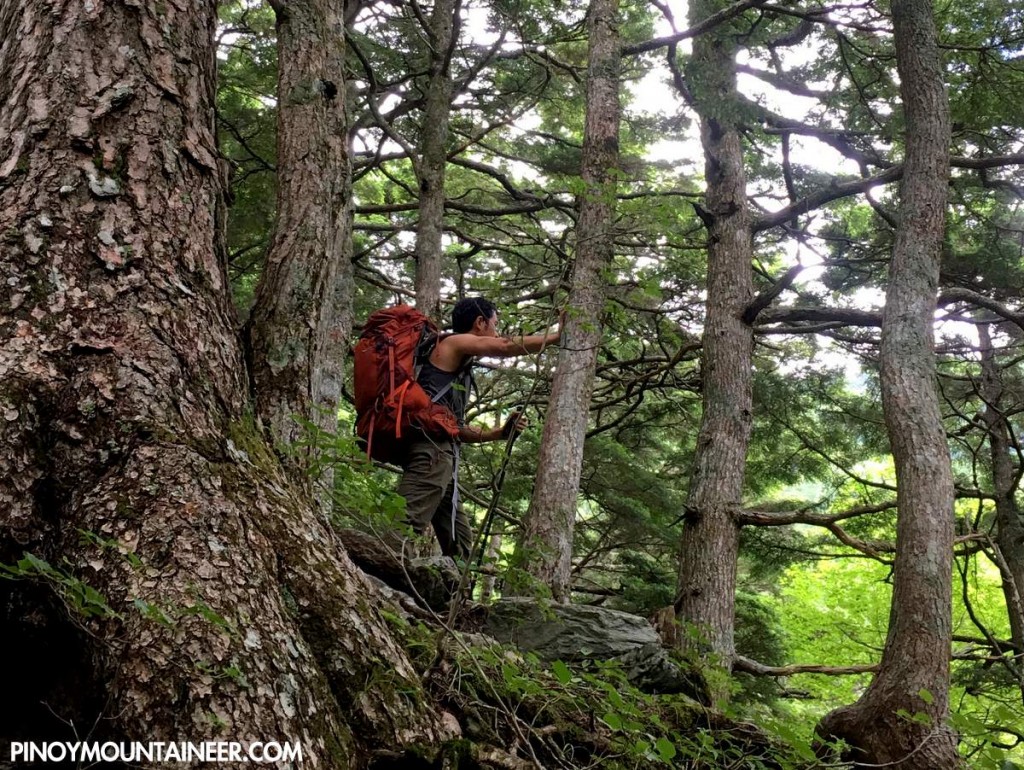
The trail coursed along a beautful temperate forest, moderately steep but with a well established trail with occasional wooden ladders.
There were two trail variants and we took the one that passed through the Shirane-oike-koya (白根御池小屋) hut, taking us 2 hours. From the hut, we ascended 3 hours to the Kita-dake kata-no-koya (北岳肩ノ小屋), where we spent the night (Y4000/person).
***
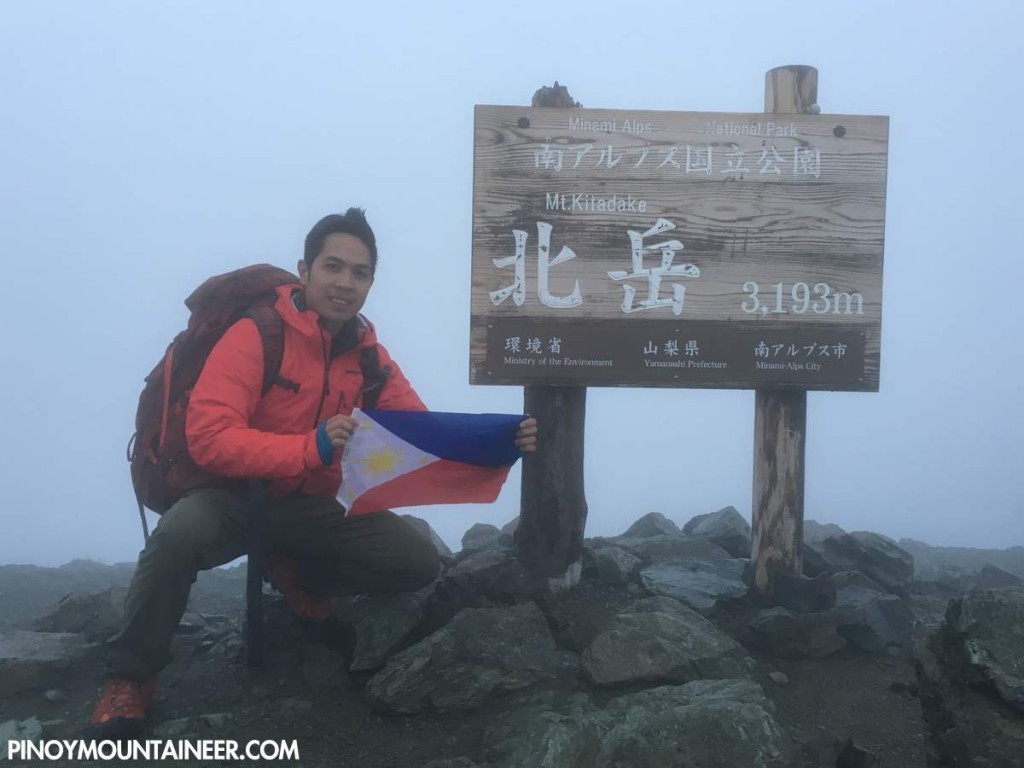
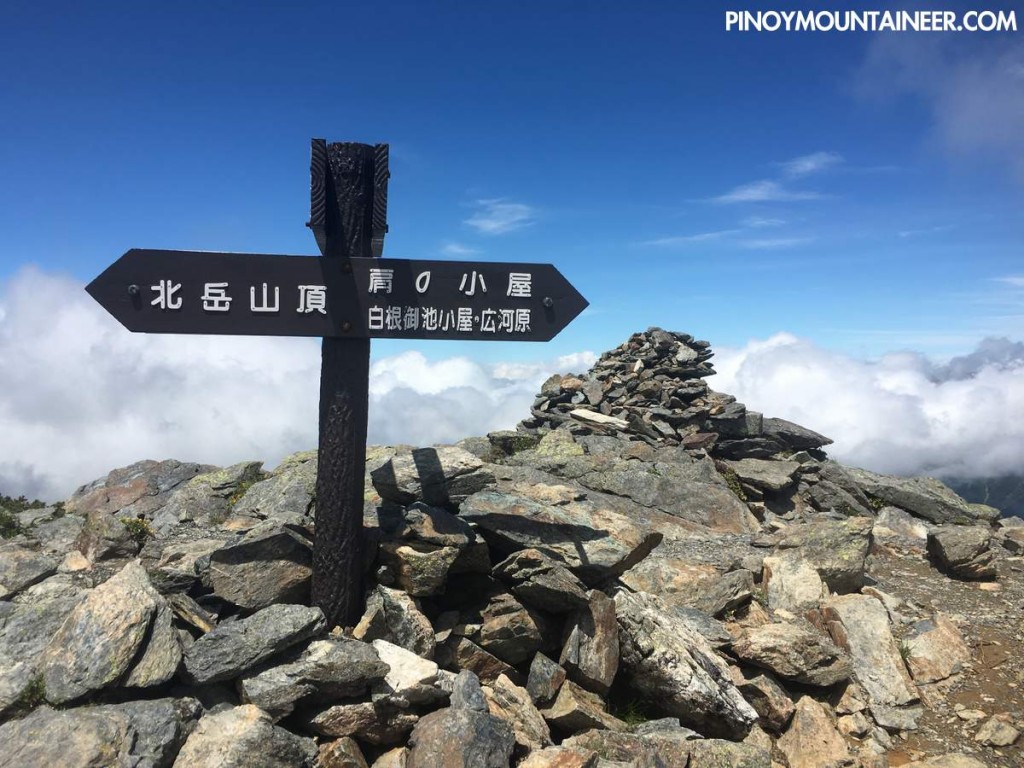
The next day, we woke up very early and started trekking at 0340H, in the hope of reaching the Kita-dake summit in time for sunrise. There was no sun, however, when we set out with our headlamps, and we were greeted instead by very poor visibility! Even so, however, we made our way past the steep, sometimes rope or chain-assisted, rocky trail, reaching the summit at 0430H. Even without the hoped-for views of Fuji, I was so glad to fulfil my dream of Japan’s 2nd highest peak!
The challenge, however, was just beginning. From Kita-dake we had to
trek to Ai-no-dake in spite of the fierce winds and very poor visibility – on a ridgeline that’s mostly 3000 meters above sea level! Still hopeful that we would soon have good weather, we pressed on, but found Ai-n0-dake even more inhospitable. It was so windy and cold that we only spent a few minutes at the summit! The poor visibility notwithstanding, we were thrilled at the thought of having done the 2nd and 4th highest summits of Japan in the same morning!
But the challenge did not end in that windy peak – we had to climb Kita-dake’s summit again, since it was the only way back to our mountain hut! For the last time, we went up a peak hoping that the fabled views will finally be made available to us.
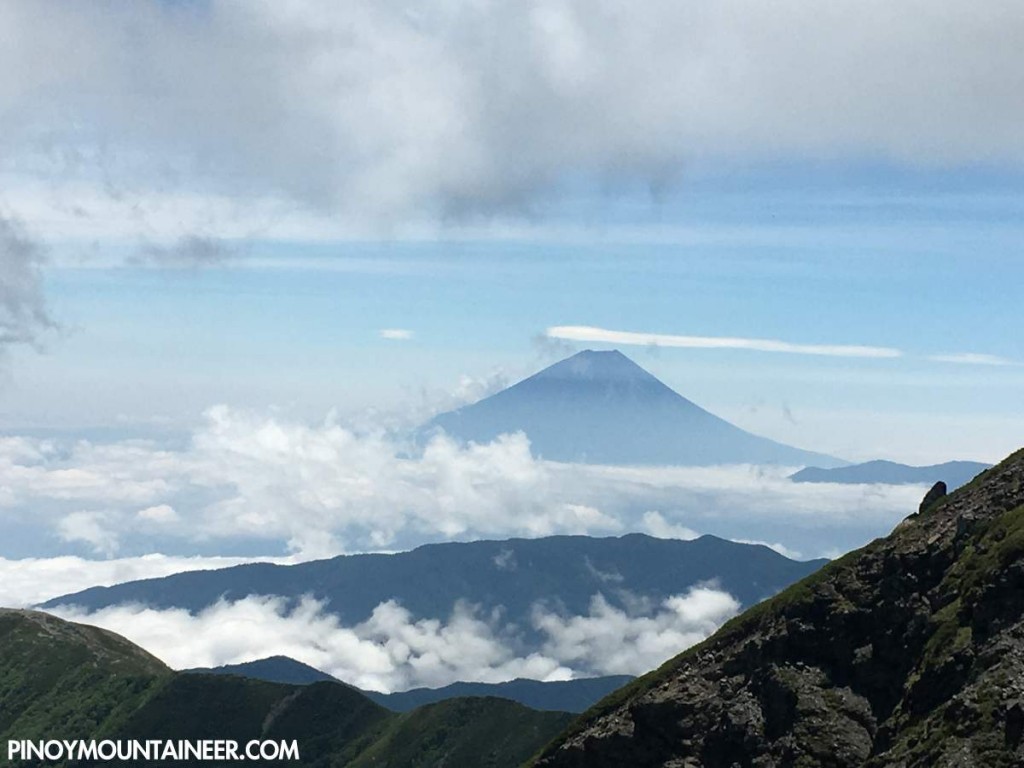
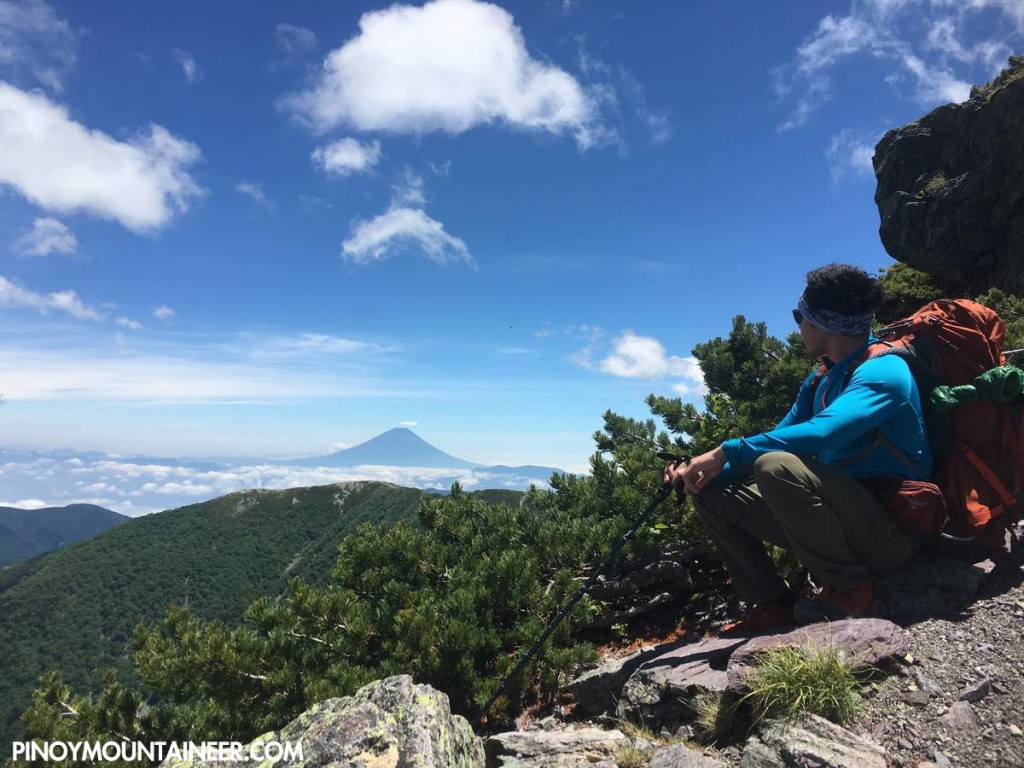
As it turned out, third time’s the charm! Just past the summit, as we were making our way back to the hut, the sky finally cleared, opening up stunning views not just of the Minami Alps, but of Fuji itself! We were very much torn between staying on to admire the mountain – and catching the 1640H bus to reach Tokyo the same day!
Fortunately, we managed to accomplish both. True to the estimated time indicated in the Japanese trail signs, the descent took just 4 hours (including a soft-serve ice cream break in the midway hut). The state of being transfixed by beautiful Mt. Fuji, however, took much longer.
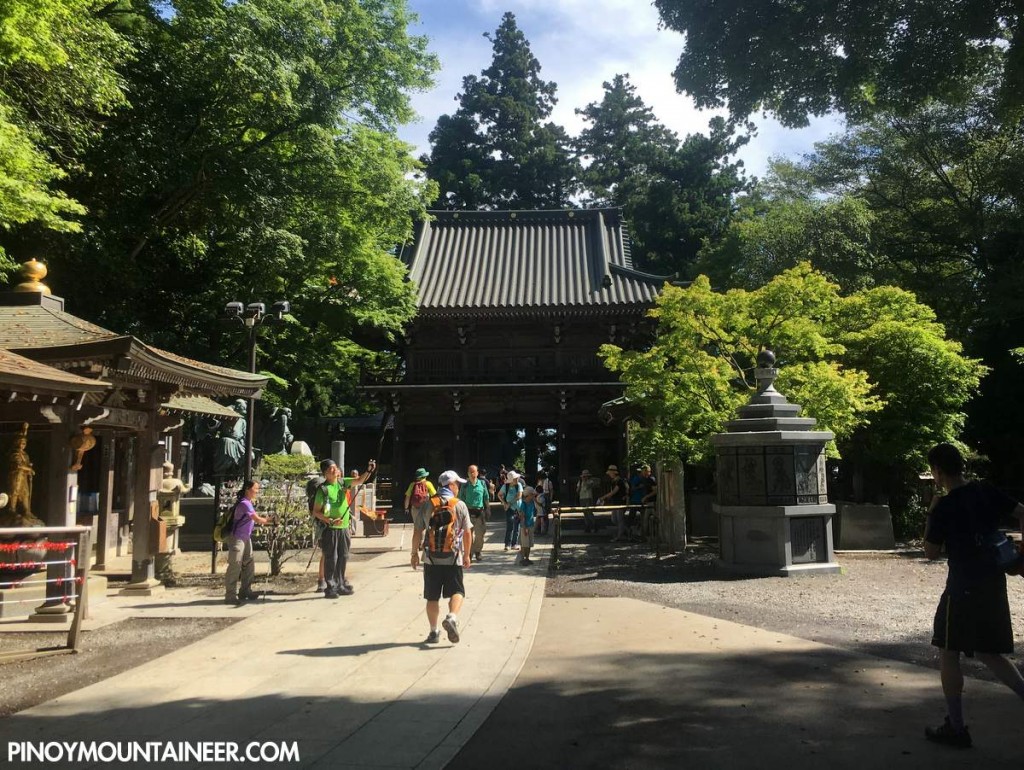
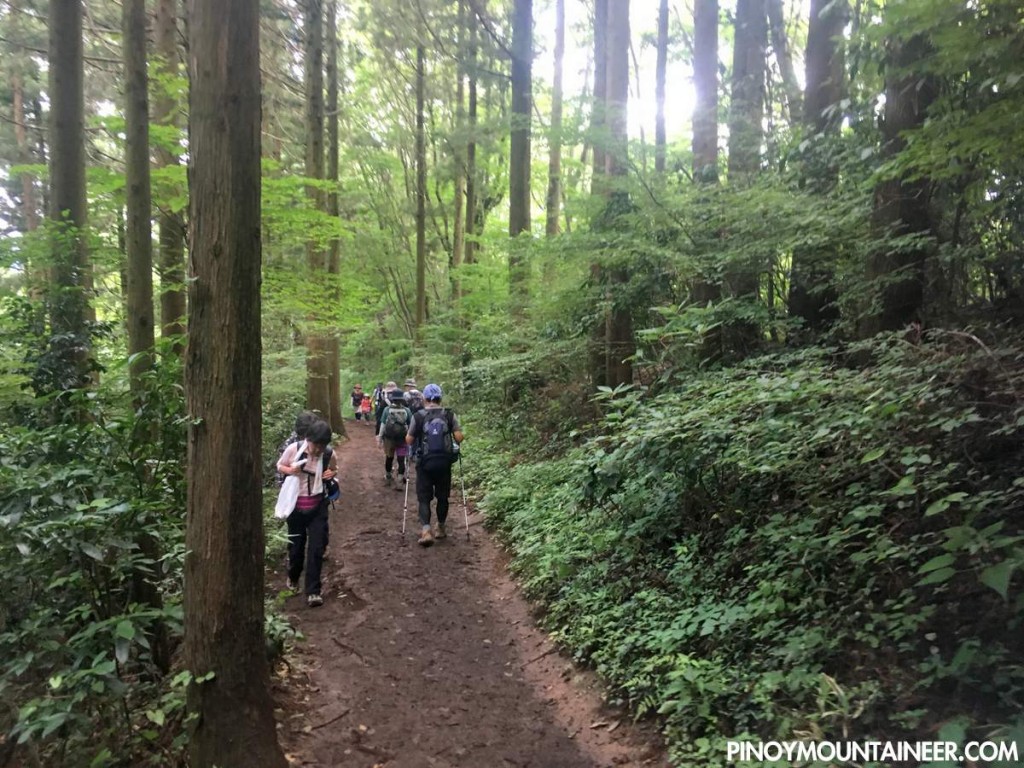
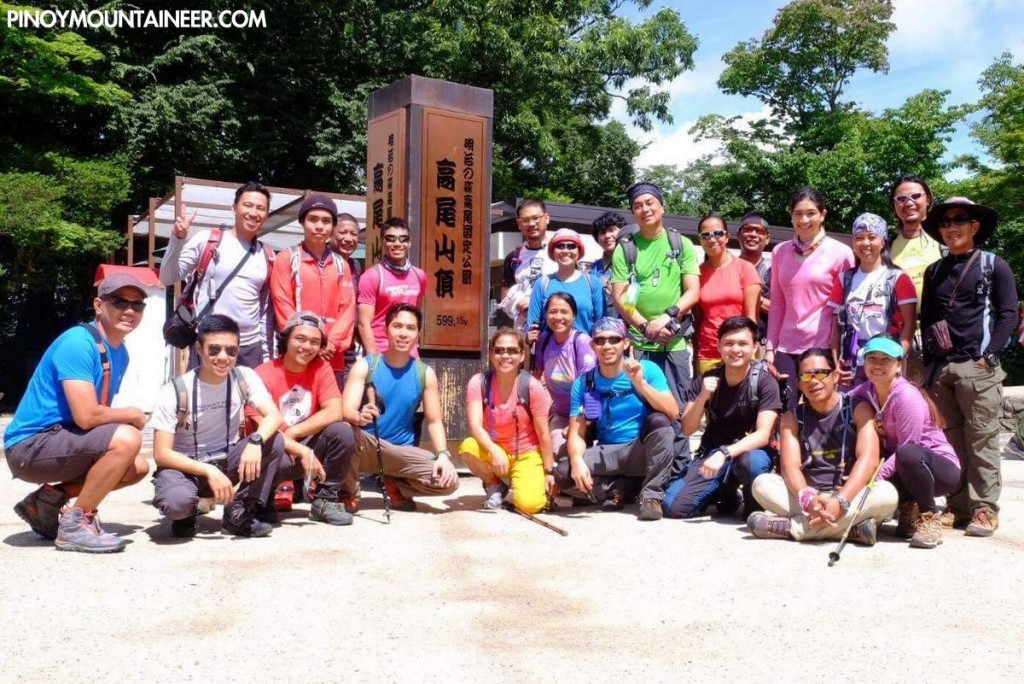
TOKYO – As the warmup hike for Mt. Fuji, we did a traverse from Mt. Takao (高尾山) to Mt. Jimba (陣馬山) – one of the challenging dayhikes within easy reach of Japan’s capital city. Takao, of course, is a popular hike in its own right and I hiked there myself in 2012 (Hiking matters #171) but I felt that my team members were itching for a more “solid” hike and thus we opted for the 20-kilometer traverse.
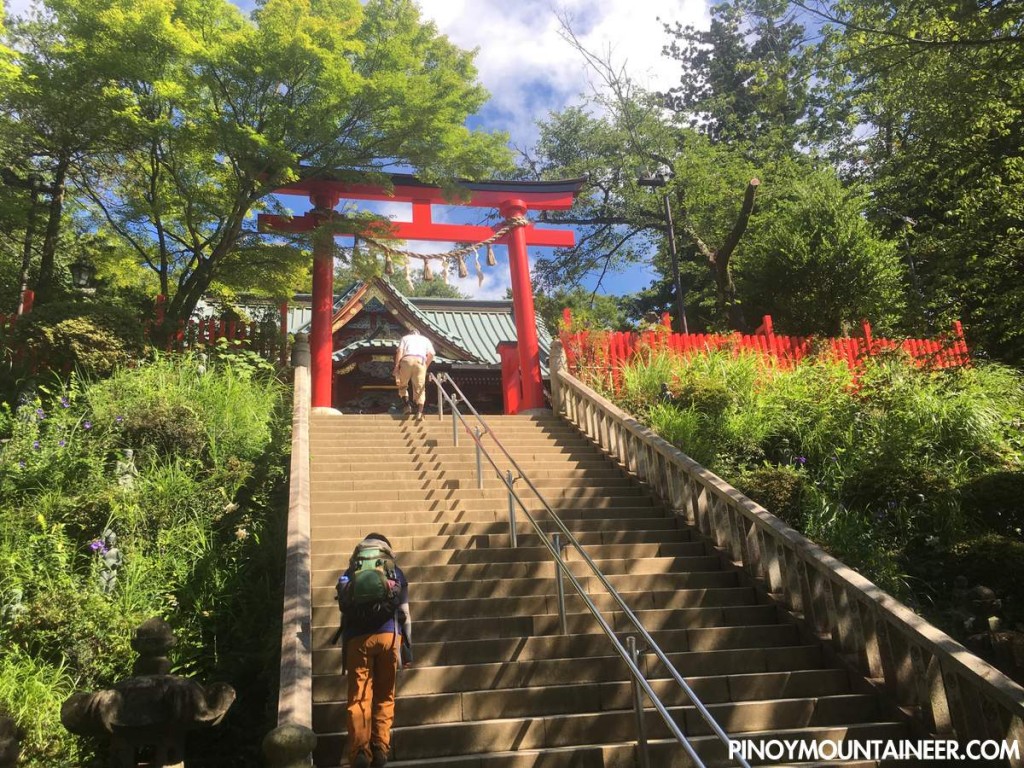
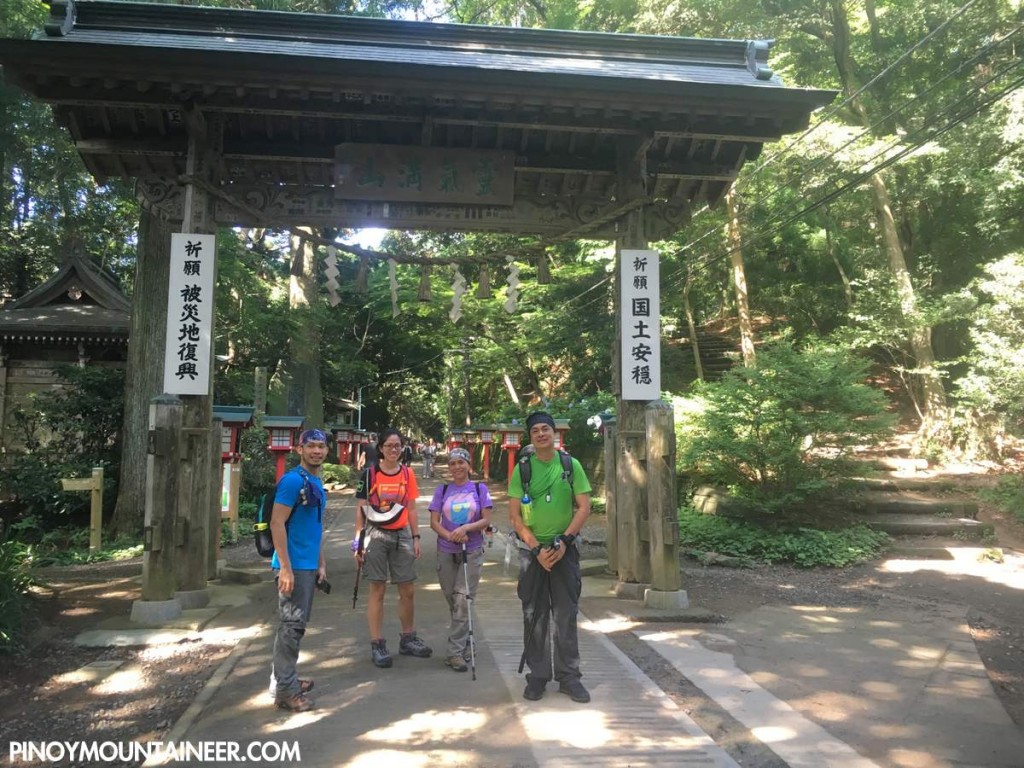
From Shinjuku Station, we took a train to Takaosanguchi, and from there took the easy Trail no. 1 to reach the summit of Mt. Takao. From a purely hiking perspective, there’s really nothing much to this trail, and in fact it is cemented most of the time, but it was culturally fascinated, with temples and torii, as well as some stately cedars.
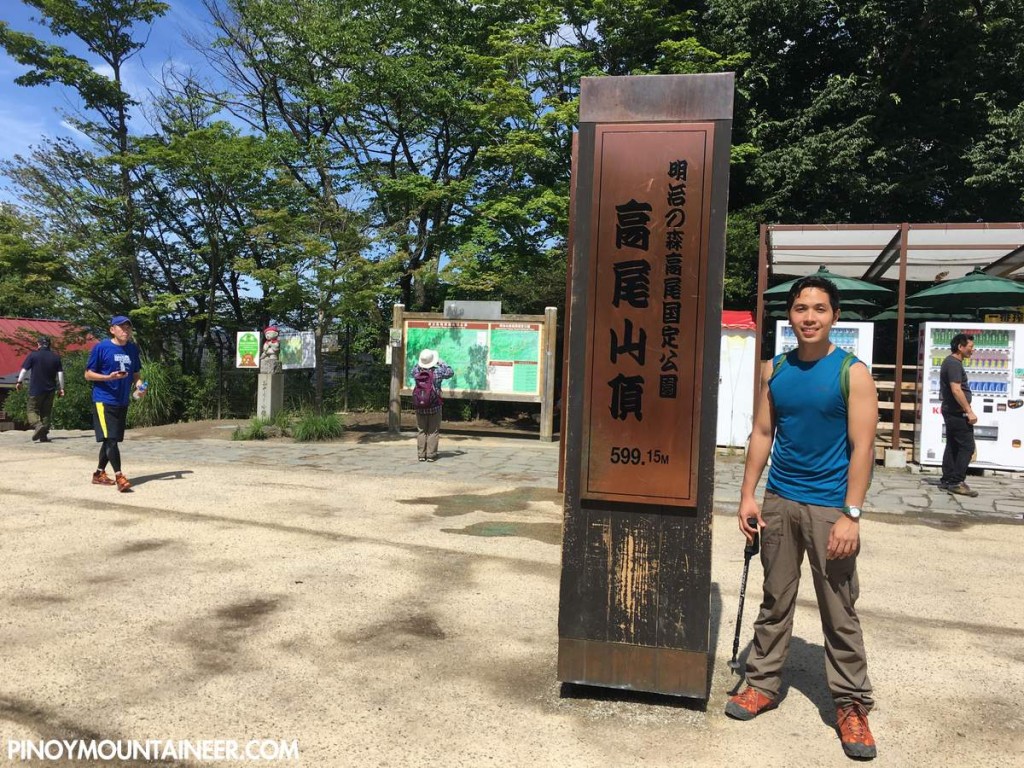
It only took us an hour or so to reach the summit, which, unlike any other summit, is filled with shops, structures, benches, vending machines even. What’s amazing, however, is despite this “commercialization”, the place is completely clean with nary a piece of trash.
While some of our team members descended via my favorite Inariyama trail back to Takaosanguchi, we proceeded to do the traverse to Jinba. Immediately after we left Takao summit, we knew that we were in different territory, with much fewer people, and much nicer forest trails.
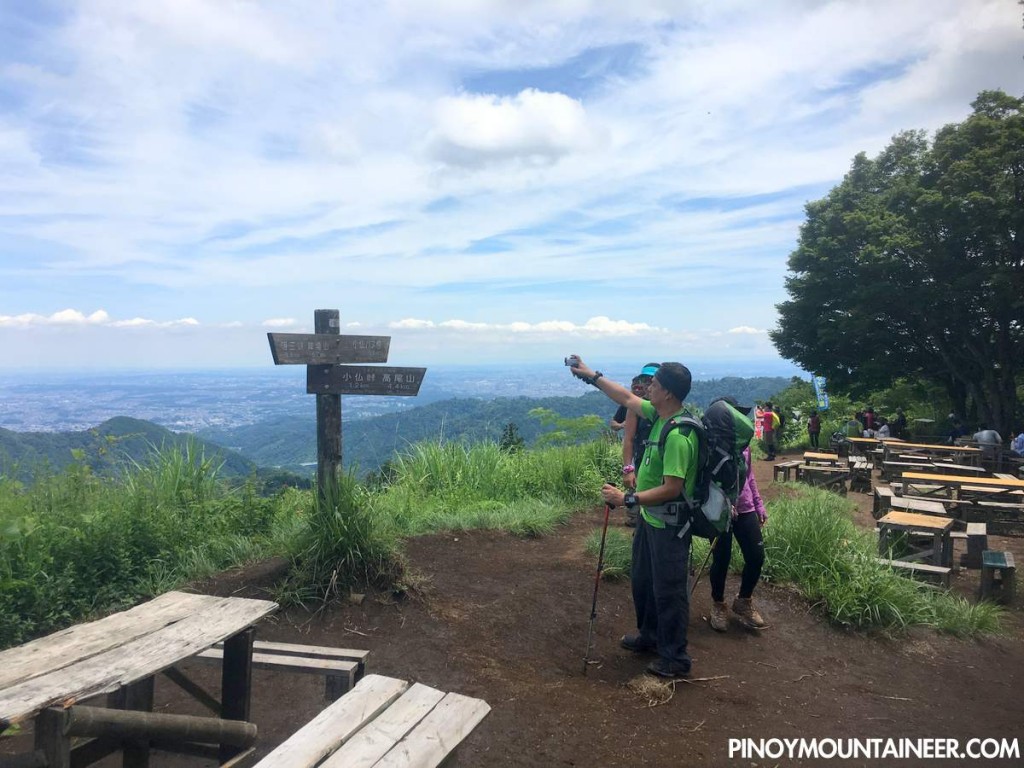
The first landmark we reached was the Kobotoke Shiroyama peak, and then Kagenobu, both of which offered some scenic views of the Kanto plain, including the vast metropolis of Tokyo. Along the way, Japanese trail runners of all ages breezed past us, and we noted, with great admiration, the number of elderly – but very strong hikers – and a lot of solo ones.
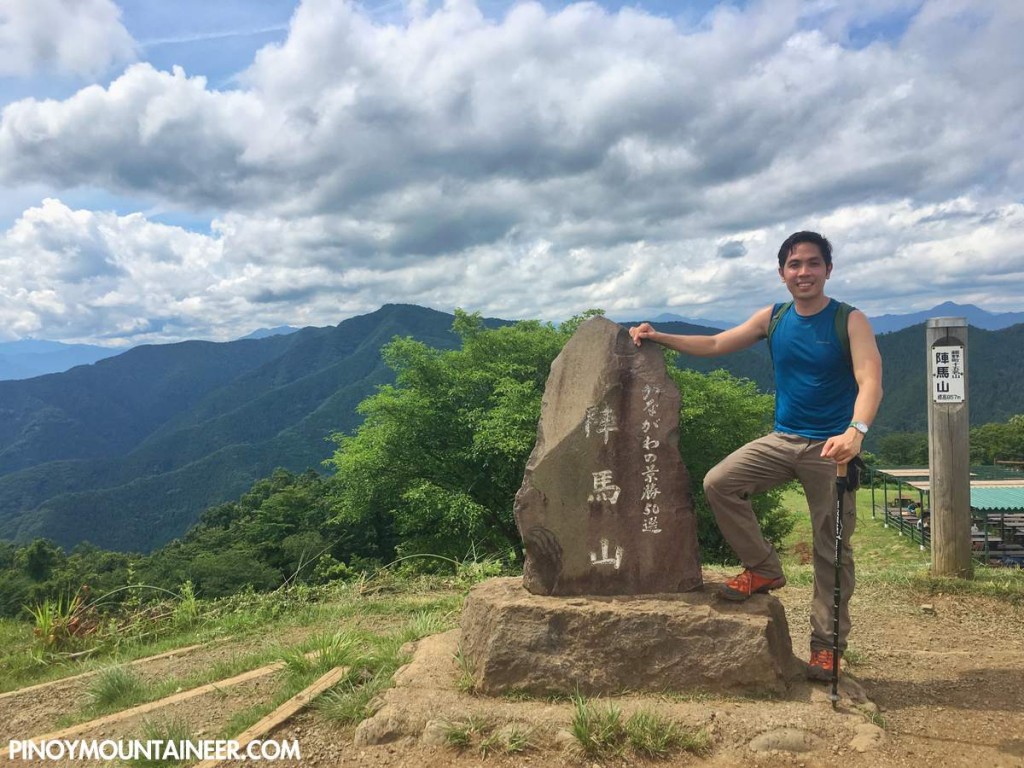
Although the trail length of 20 kms places the traverse in the league of Manila’s extended dayhikes, the well-established trails and gentle slopes made it feel easy – and our relaxed stops and the peaks’ picnic areas helped a lot, too. By 1336H we had reached the summit of Mt. Jinba.
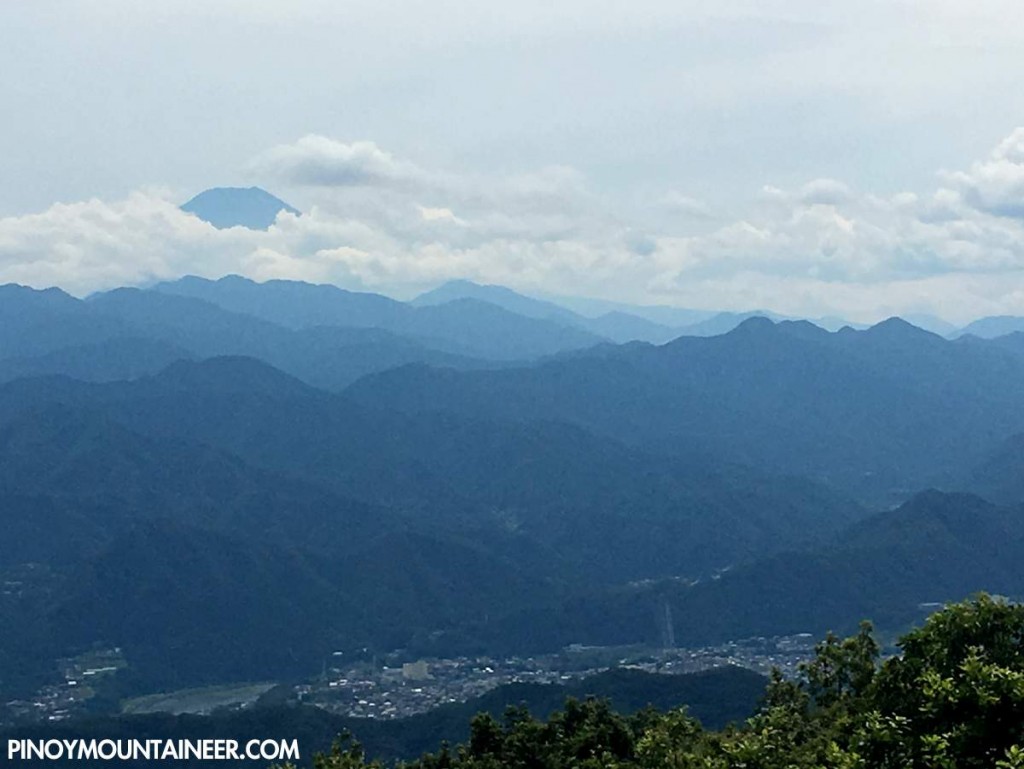
As a final bonus, we caught a glimpse of Mt. Fuji from Mt. Jinba. It was partially covered with clouds but its sheer tallness was still a sight to behold – especially since we were about the hike that mountain – Japan’ highest and one of the world’s most famous – the next day.
The descent was fairly straightforward, save for a final section that involves walking on the road to reach the bus stop. We caught the 1520H bus back to Takao station, and from there took a bus back to our base in Asakusa. Congrats to everyone who did the hike!
One commonly overlooked issue when hikers meet other people on the trail is the question of ‘right of way’. This is especially salient for mountains that receive a lot of traffic, including Mt. Pulag and the Rizal mountains (i.e. Pamitinan, Maynoba, et. al) – but it is also very pertinent to all kinds of trails, including those which hikers share with locals, mountain bikers, etc.
Fortunately, there are internationally-recognized rules on ‘right of way’ on the trails – as well as etiquette for overtaking – and they are actually actually very similar to driving rules. The general principle is to give way to those who have a greater burden (i.e. hikers with a heavier load), or those who have a fewer options to maneuver.
HIKERS VS. LOCALS
Hikers are expected to give way to locals who are going about their everyday lives in the mountains (i.e. transporting ). Hikers are particularly expected to give way to locals with horses or carabaos.
HIKERS VS. MOUNTAIN BIKERS
Bikers / cyclists are expected to give way to hikers. When they are on the same direction, bikers overtaking hikers should announce their approach way ahead.
ASCENDING VS. DESCENDING HIKERS
Hikers going uphill have the priority. Ascending up a steep trail requires more effort than going down, and thus it is more inconvenient for hikers going up to pause, change their speed, and/or find a spot to pause. Moreover, hikers going up have a more limited field of view compared to those going down, and thus they have less time and opportunity to think of a place to stop.
However, in many instances, ascending hikers who want to rest anyway can give way to those descending. There are also some instances when the descending hikers are in a more unstable position (i.e. when descending on a very steep trail). Furthermore, experienced hikers may also choose to give way to hikers who are clearly struggling regardless of their direction. The applicability of this rule, thus, can vary depending on the situation, but what’s important for both sides to recognize is that people going uphill generally have the right of way.
SLOW-MOVING VS. FAST-MOVING HIKERS
Slow-moving hikers are expected to give way to fast-moving hikers as long as it is safe and convenient for them to do so. In fact, hiking groups are expected to walk in single file and occupy as little of the trail as possible so as to give way to others who are passing through.
Needless to say, non-moving hikers should give way to those who are actually moving. Thus, people who are merely taking pictures on the trail should definitely give way to those who are hiking. Indeed, whenever a hiker will stop to rest or take pictures, s/he should move off the trail.
The important principle here is to be sensitive to the people behind on the trail and allow them to overtake you if it’s clear that they want to do so.
CULTURAL DIFFERENCES
Hiking conventions tend to follow road traffic ones: In Philippines, as in the US and other countries with right-hand traffic, hikers are expected to stay to the right, and pass on the left – just like in motor traffic (i.e. in the Philippines where faster vehicles overtake on the left).
BOTTOM LINE
Ultimately, all these principles boil down to the spirit of kindness. Actually, regardless of the rules, if you’re not in a hurry, you can always choose to give way to others. And even if you have the right of way, it won’t hurt to be courteous about asserting yourself. Remember, responsible outdoor recreation involves respecting other people, including their time and their right to enjoy the trail as much as you do.
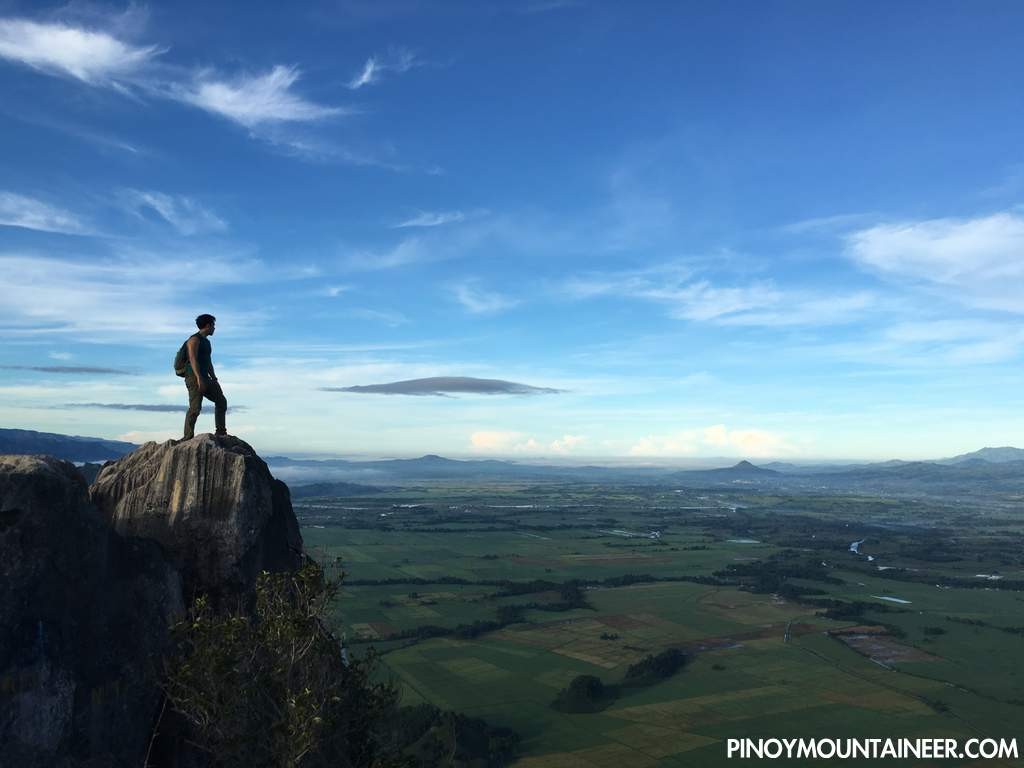
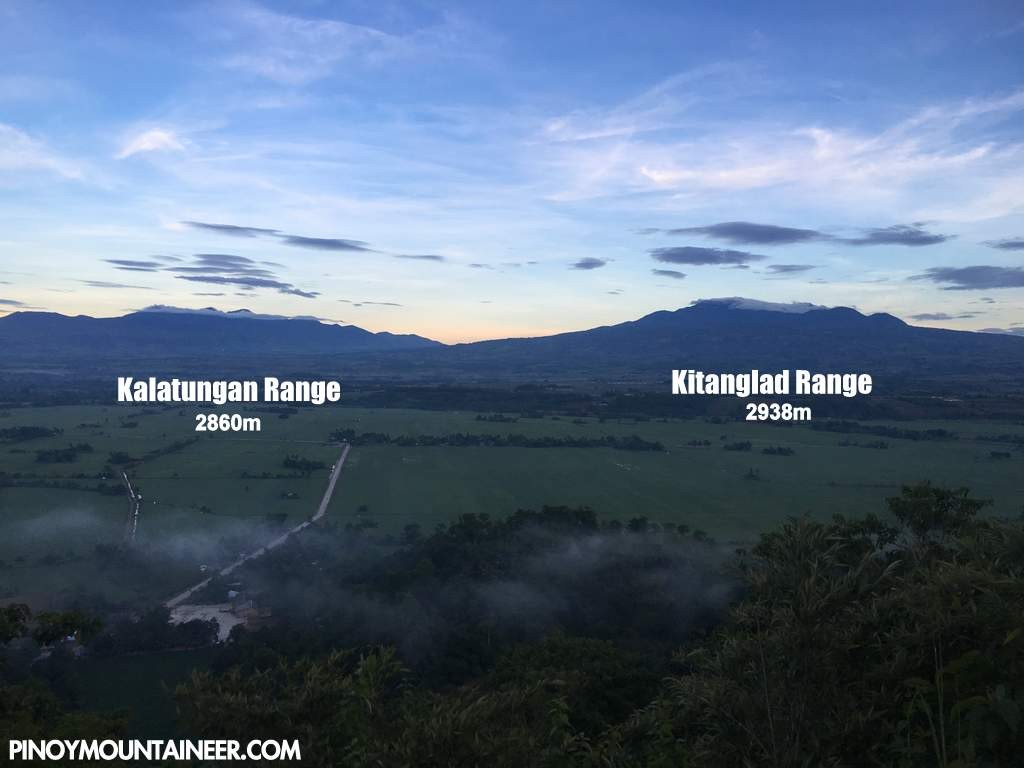
CAGAYAN DE ORO CITY – Guided by my good friend Mijan Pizarro – the Bukidnon explorer turned DENR officer – I finally visited Mt. Capistrano in Brgy. Simaya, Malaybalay City this morning. (For Mijan and I, it was a reunion hike, our first since I joined his Dulang-Dulang Kitanglad Traverse in 2007.)
This 793-meter mountain, a favorite workout hike of Malaybalay locals, is right at the middle of Bukidnon, offering awesome views of the three great ranges of Central Mindanao: the Kitanglad Range, the Kalatungan Range, and the Piapayungan Range.
Mijan picked me up from my lodging at 0505H and we traveled Davao-ward by motorbike for around 20 kilometres before reaching the trailhead, which has a registration house right in front of it (P20/hiker). Already, a group of six had gone ahead of us – highlighting the popularity of the mountain.
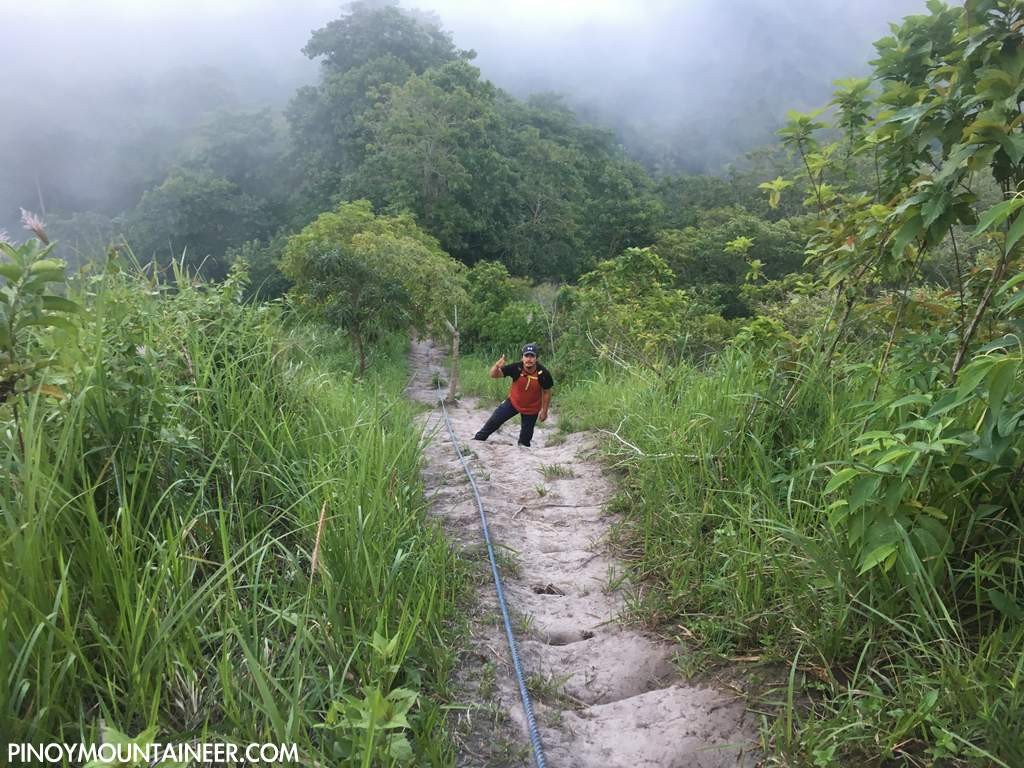
We started trekking at 0534H. The very-straightforward trek starts with a flight of cement stairs that leads into a rope-assisted sloped trail that I imagine gets very muddy during the rainy season. After a while limestone rocks begin to appear – a sign that the summit is at hand.
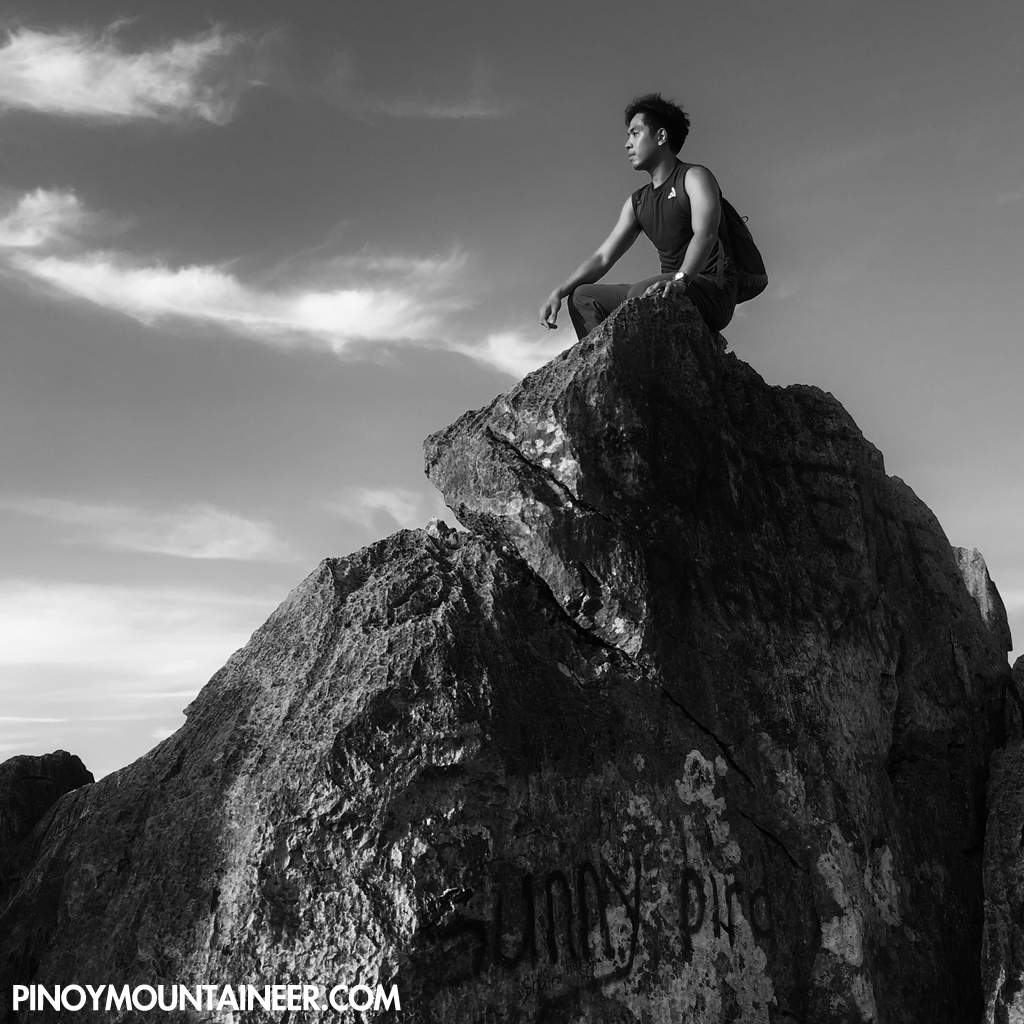
By 0630H, we reached the summit – it took us less than an hour at a moderate pace. By that elevation, the Piapayungan Range emerged more prominently behind the shadow of Pangantucan, and Valencia’s Mt. Musua. To the northeast lay Mt. Kiamo and the many other nameless mountains of Bukidnon. As with the Montalban mountains, the limestone formations made for a lot of photogenic vantage points.
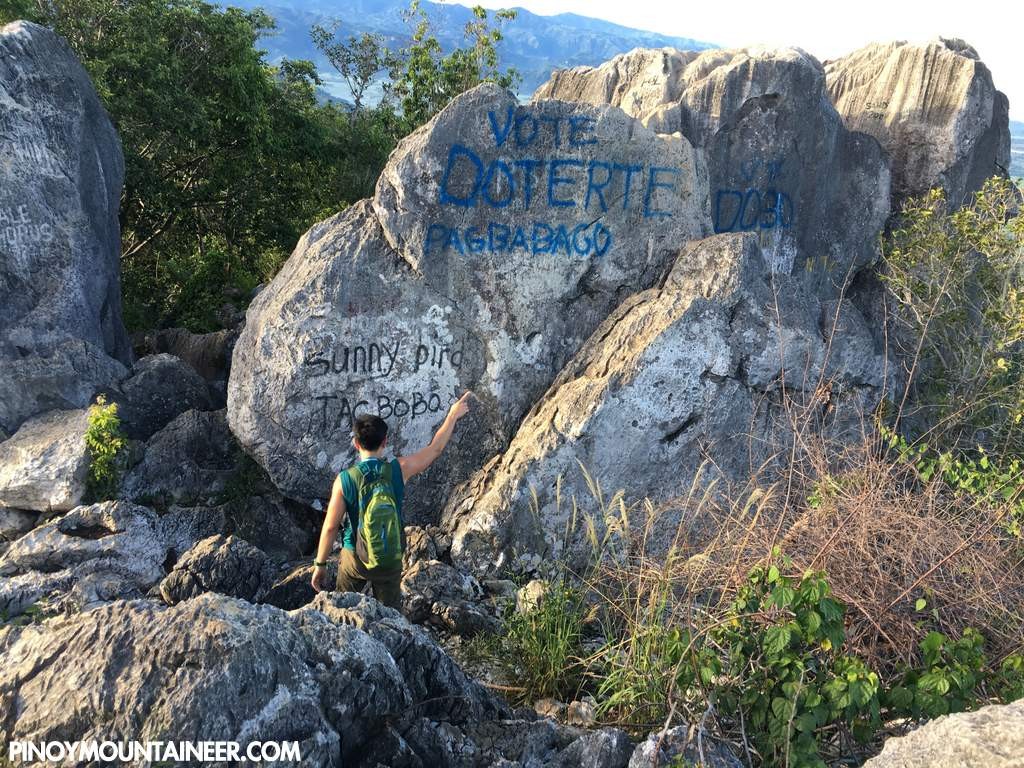
The only sad thing about Mt. Capistrano is the vandalism, which is really all over the summit area. Hopefully, the LGU can do something about it even though it’s really the responsibility of the hikers to practice Leave No Principles (more on my thoughts in my personal Facebook page). Anyway, I always tell myself that while being mindful of issues like this, focusing on ugliness can make us lose sight of the beauty of a place, and I still enjoyed the summit, with its grand mountain views, immensely.
The descent took us just half an hour, after which we quickly went back to Bukidnon – just in time for Mijan to go back to work. Yes, Capistrano is such an easy hike that people can make it their early morning, pre-work, exercise! How I wish Manila had something similar.
In any case, the sight of the Bukidnon mountains has reawakened my desire to go back (my last major hike in the province was Maagnaw in 2013) and I hope to do so soon!
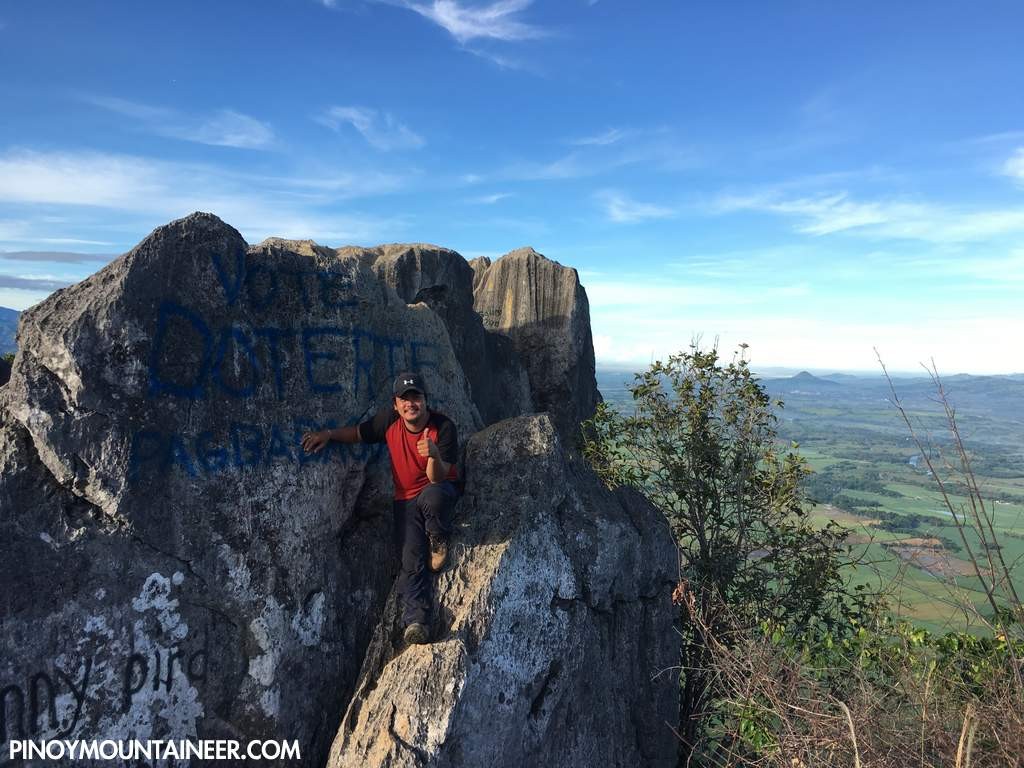
CAGAYAN DE ORO CITY – I was in Davao for work, but I don’t bring my hiking shoes everywhere for nothing – there’s always the possibility of an adventure. Faced with the closure of almost every mountain in the area (Apo, Matutum, Parker, Hamiguitan, White Peak), I realised that I was missing one possibility: that of heading to Balut island, south of Mindanao itself.
(Independent of the hiking, Balut island is fascinating in itself being a frontier island of the Philippines. There is a community of Indonesians (belonging to the Sangil / Sangire ethnolinguistic group) living in the island, and later we would meet locals who have been to Indonesia by boat – and have relatives who have literally drifted off to Indonesia, never to come back.)
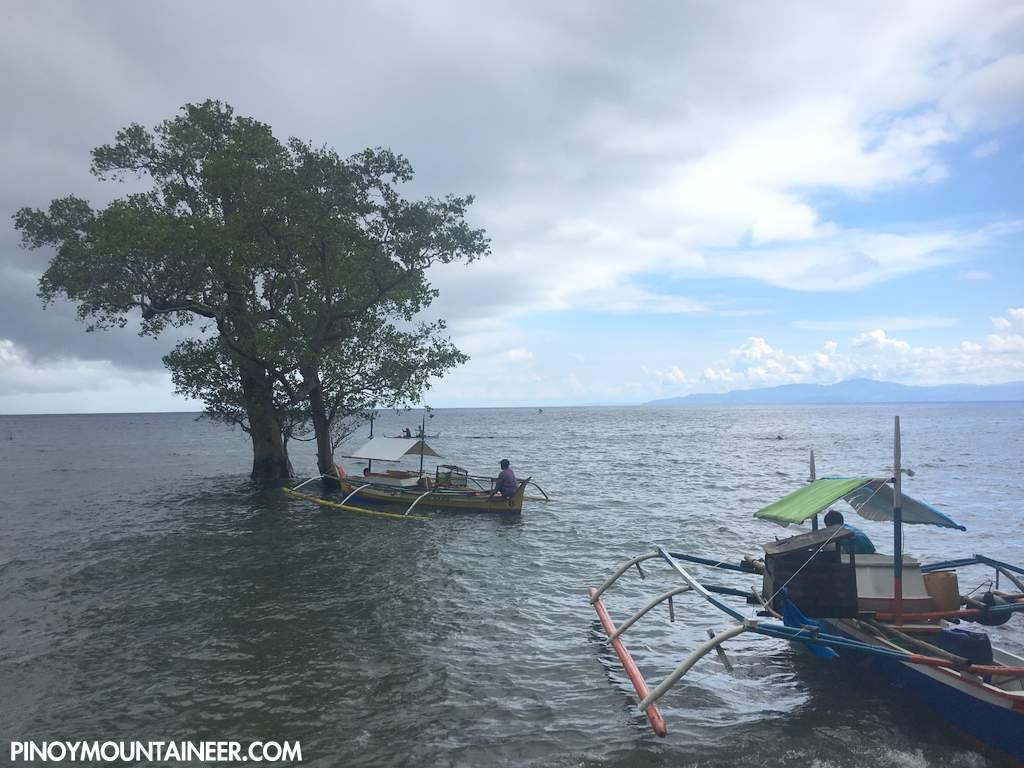
With Davao-based hikers Ian and Don and Francis from GenSan, we headed drove south through the western coast of Saranggani in the hope of catching a boat to the island (The alternative is to take the irregular midnight ferry from GenSan that takes 6-7 hours). Fortunately we managed to charter a fishing boat in Small Margus, Glan, Saranggani.
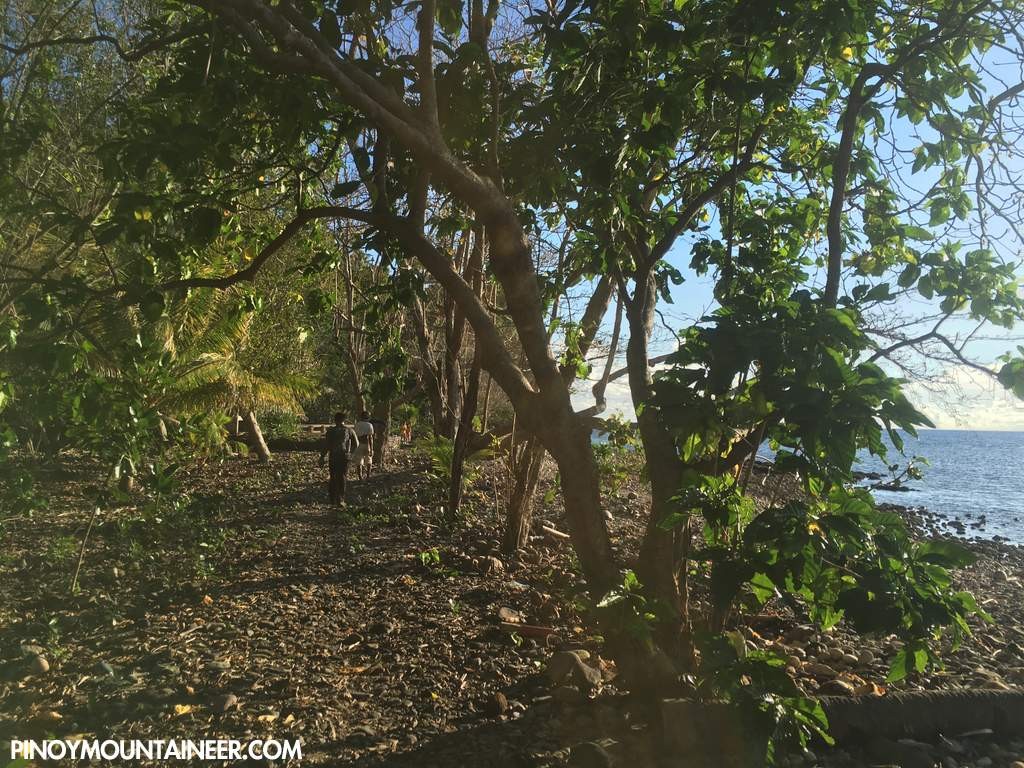
The winds and waves were favourable in the morning, allowing us to reach Brgy. Lipol in two hours. Luckily we easily found a guide willing to take us to the mountain and the Sabang hot springs in what we imagined to be a traverse or a loop hike.
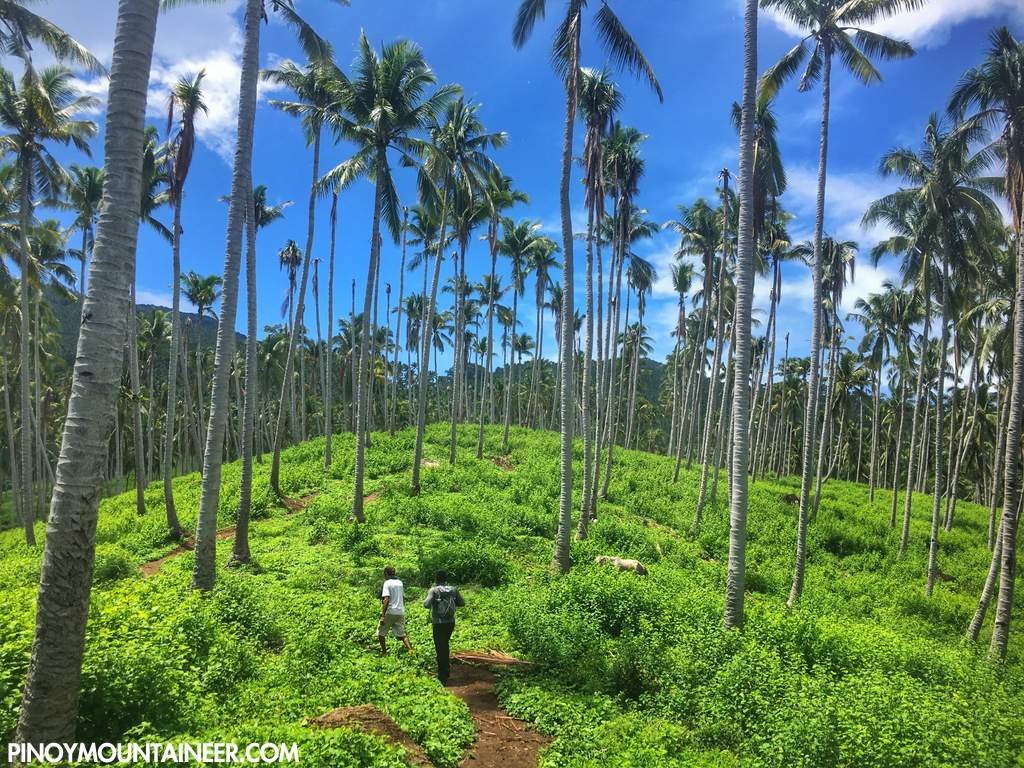
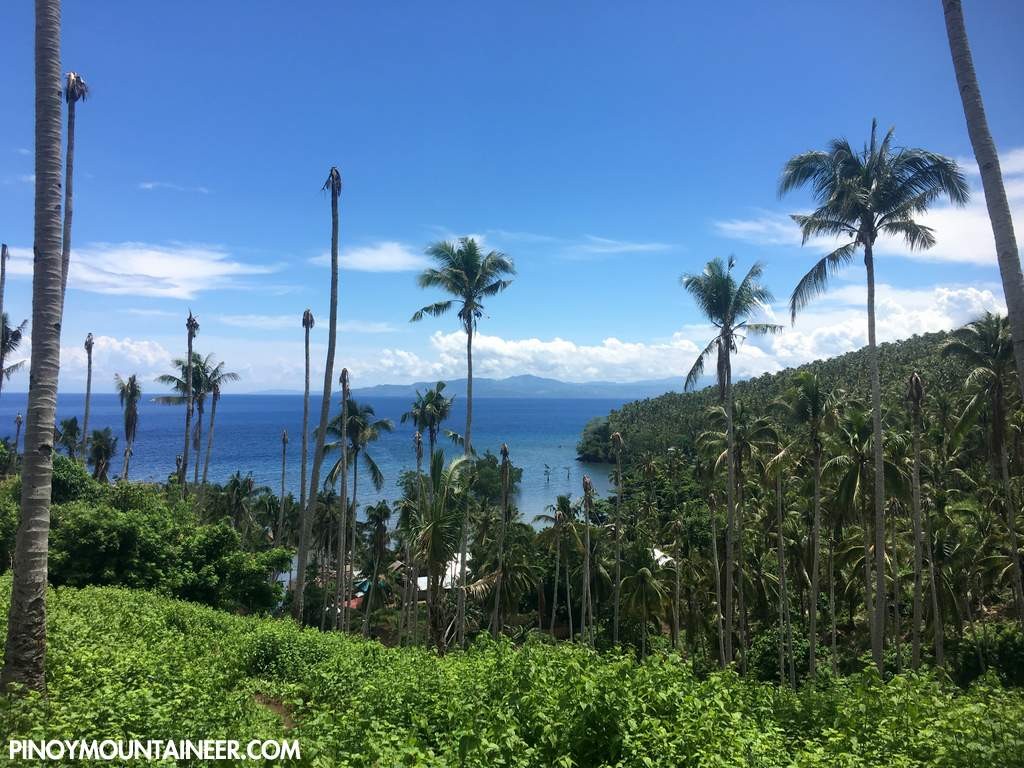
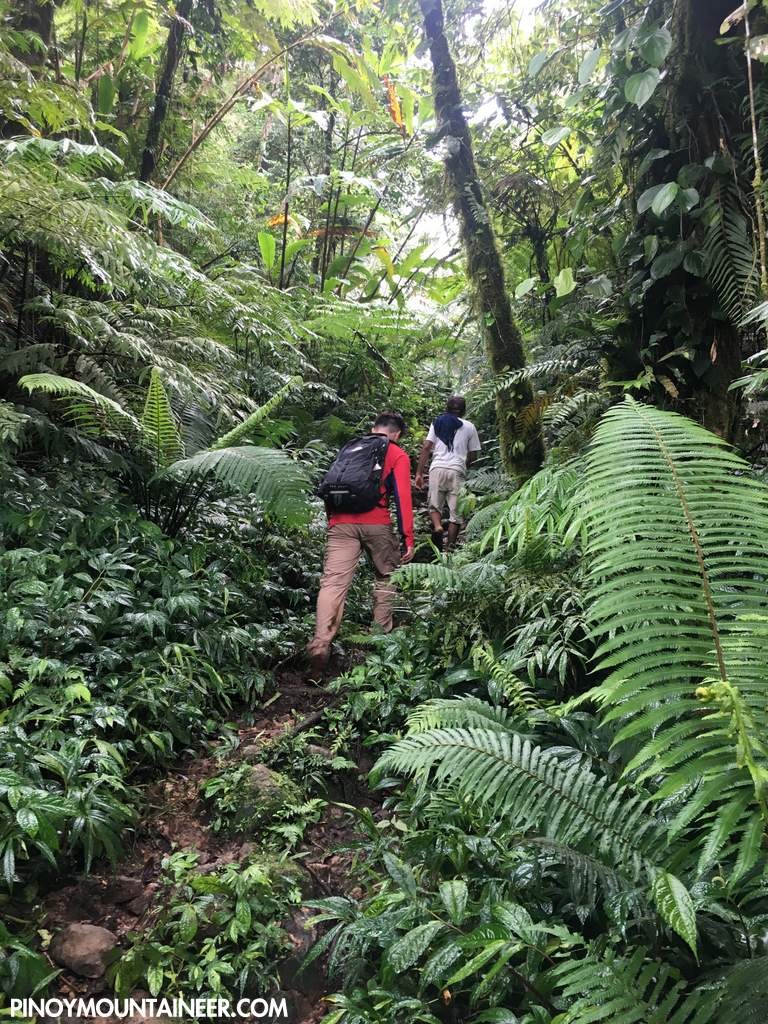
After a courtesy call with a barangay official, we proceeded with the hike starting from Brgy. Lipol. Immediately, the view was beautiful, with slopes of coconut trees winding down into a scenic coastal community, and behind the sea stood Mt. Busa, the highest mountain in Saranggani (It was hot and humid though – with numerous mosquitoes).
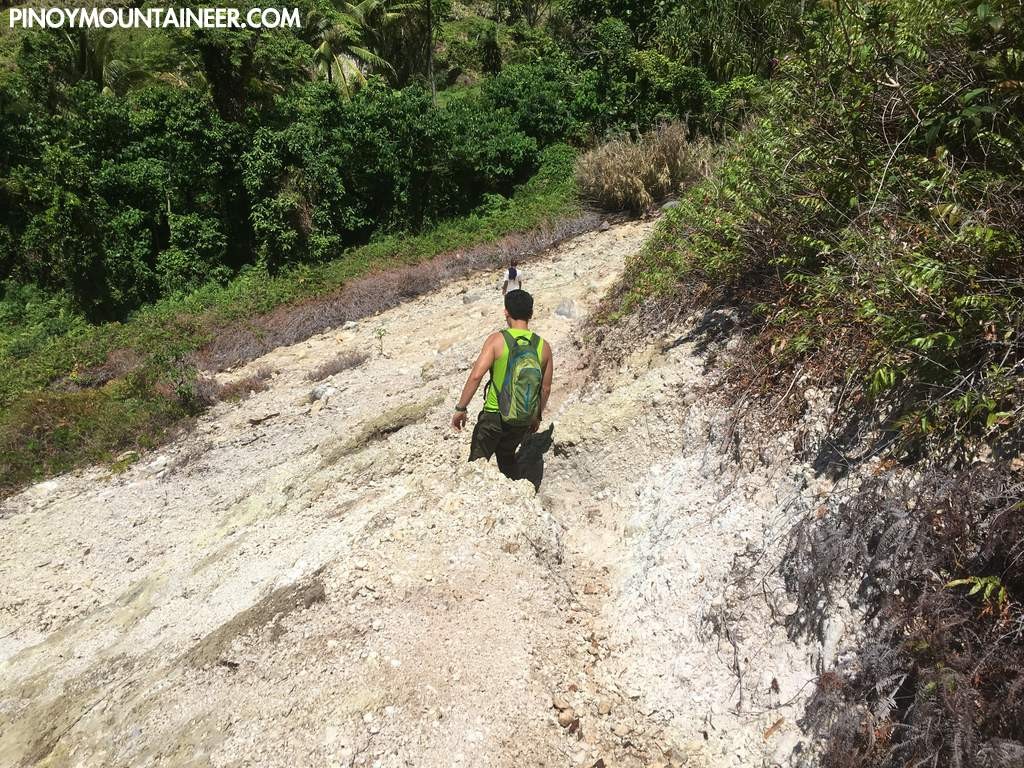
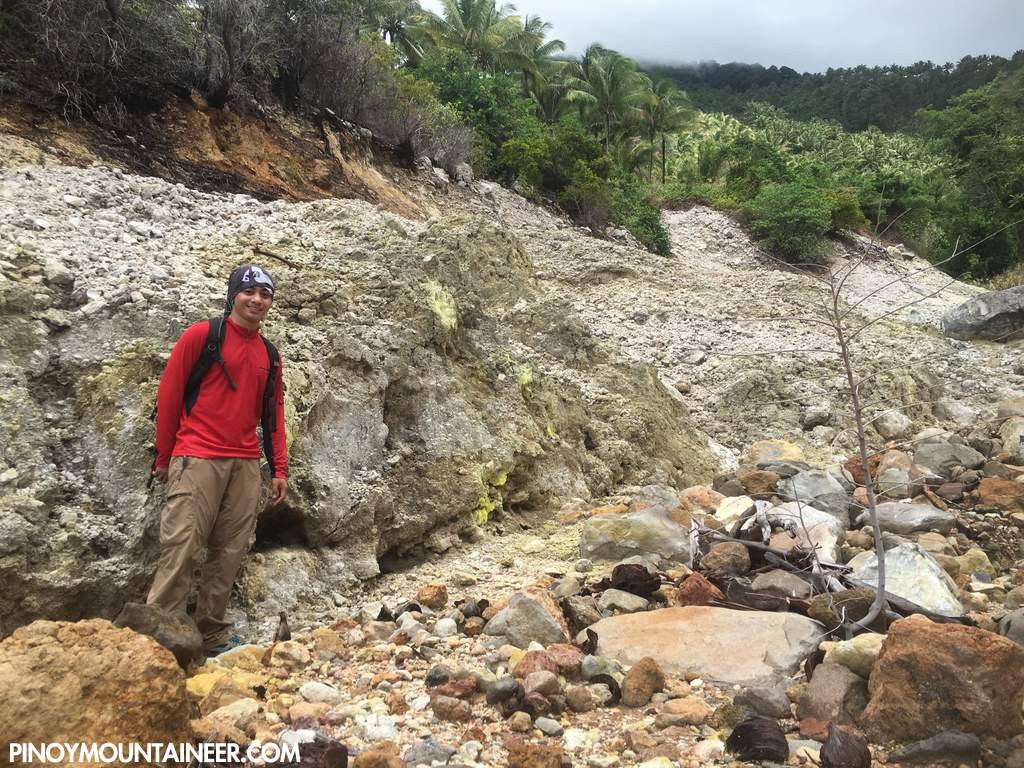
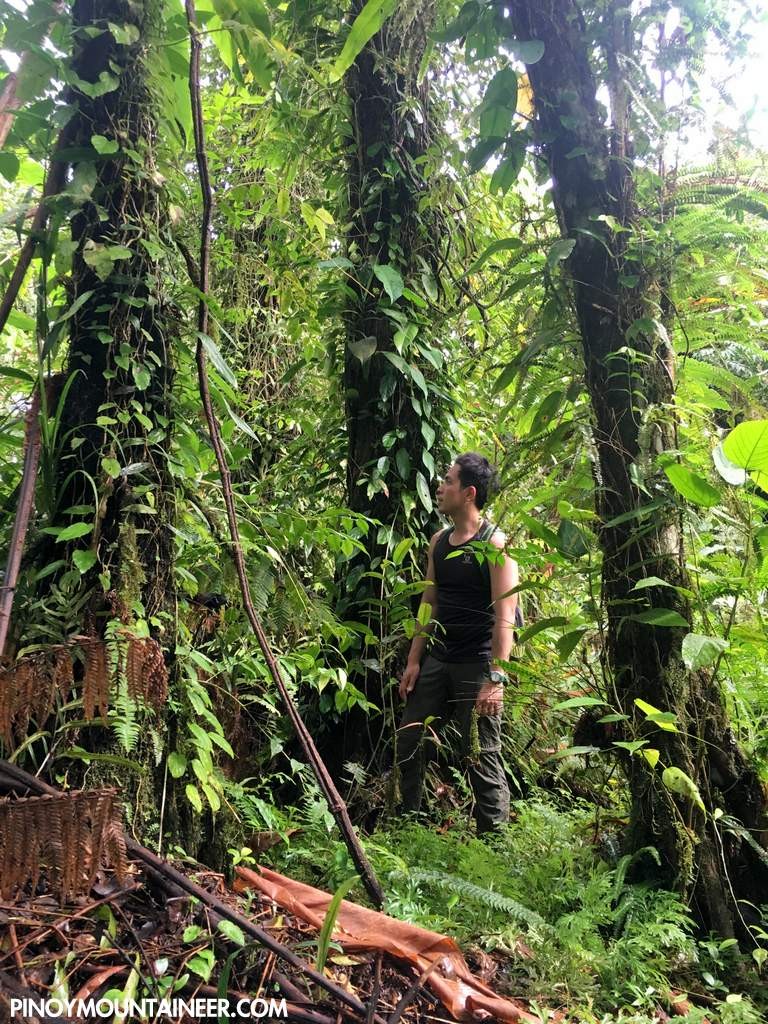
The ascent was continuous, and as the coconut trees transitioned into a more diverse woodland we soon encountered a small fumarole, followed by a much bigger sulphuric field with a relatively weak but still palpable activity; the smell of sulphur permeated much of the volcano.
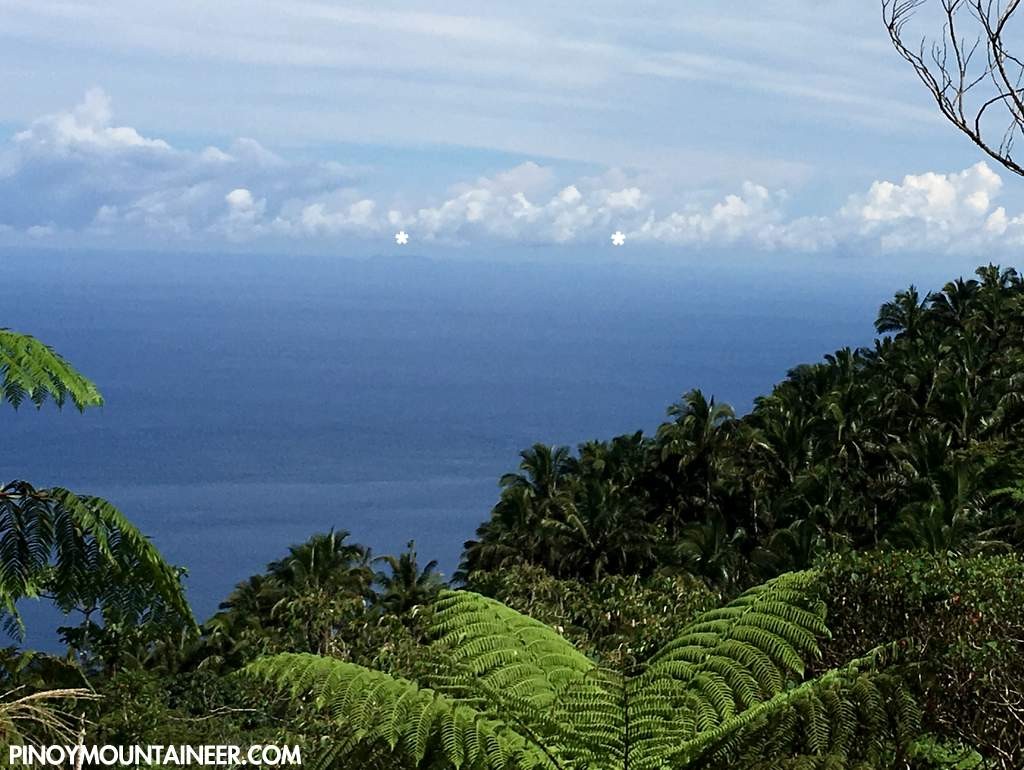
There were small hamlets throughout the trail, and the trail was never tough, although given the length of the trail,it made for a respectable dayhike. We were thrilled to finally arrive at a saddle where, at last, we saw the promised view of the Marore Islands.
Indeed, Balut volcano is the only mountain in the Philippines where you can see Indonesia! (In Bud Bongao in Tawi-Tawi, it is possible to see Sabah but you can’t see Taiwan from Batanes).
it is only past this saddle where a real forest emerges, partially mossy, and the summit itself is completely forested. Actually, in the saddle there is a rough road from the island’s commercial enter (Mabila Port) and one can actually abbreviate the hike – but you will not see the sulphuric vents and the workout.
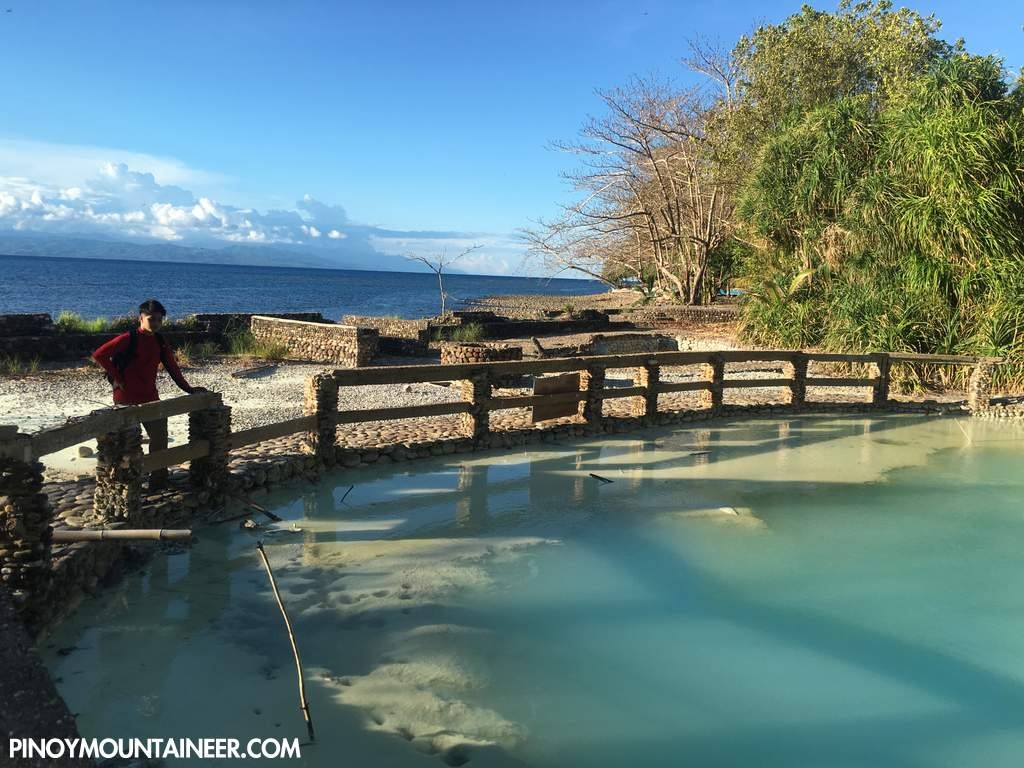
From the summit we retraced our steps back to one of the hamlets and our B’laan guide took us to some trail variants that led to Sabang Hot Spring, which, contrary to our expectations, is actually not for swimming – but for viewing only (the pool for swimming has failen into disrepair, and so has the entire place).
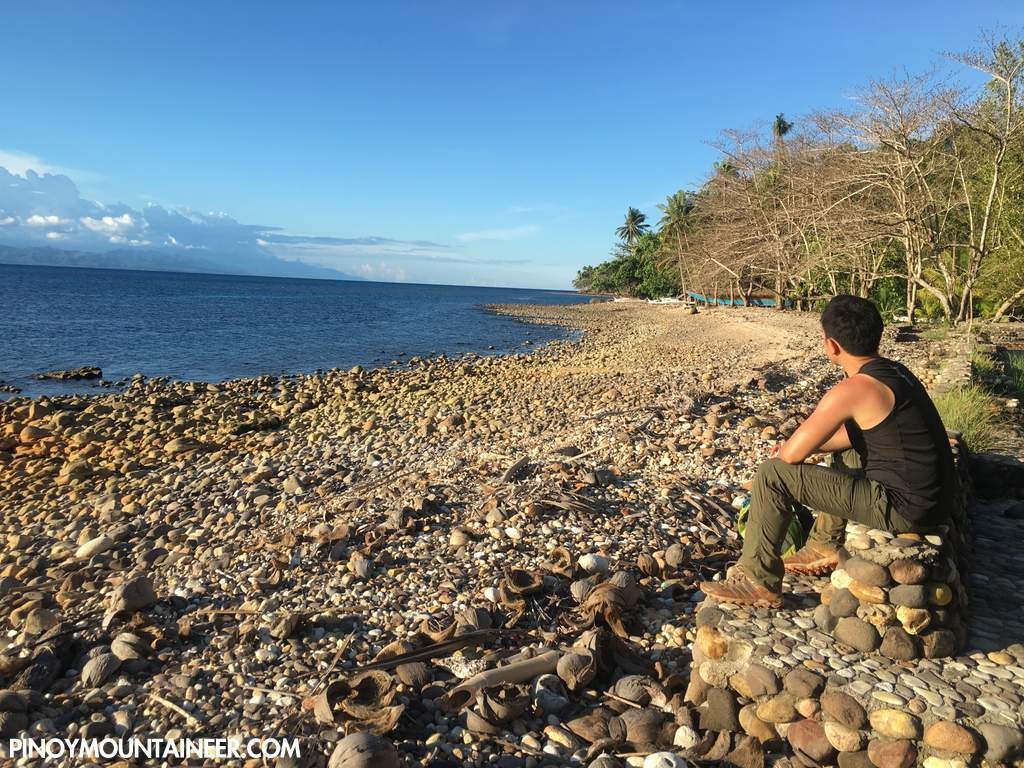
From Sabang Hot Springs we followed the coast to reach Brgy. Lipol, where the boatmen were waiting to take us back to mainland Mindanao. Due to the amihan, the sea was rough, and it took us almost four hours to get back to shore! Even so, we were delighted to visit Balut Island – definitely a worthy addition to our list of small volcanic islands (i.e. Camiguin, Biliran, Batan). Can’t wait to visit more of them!
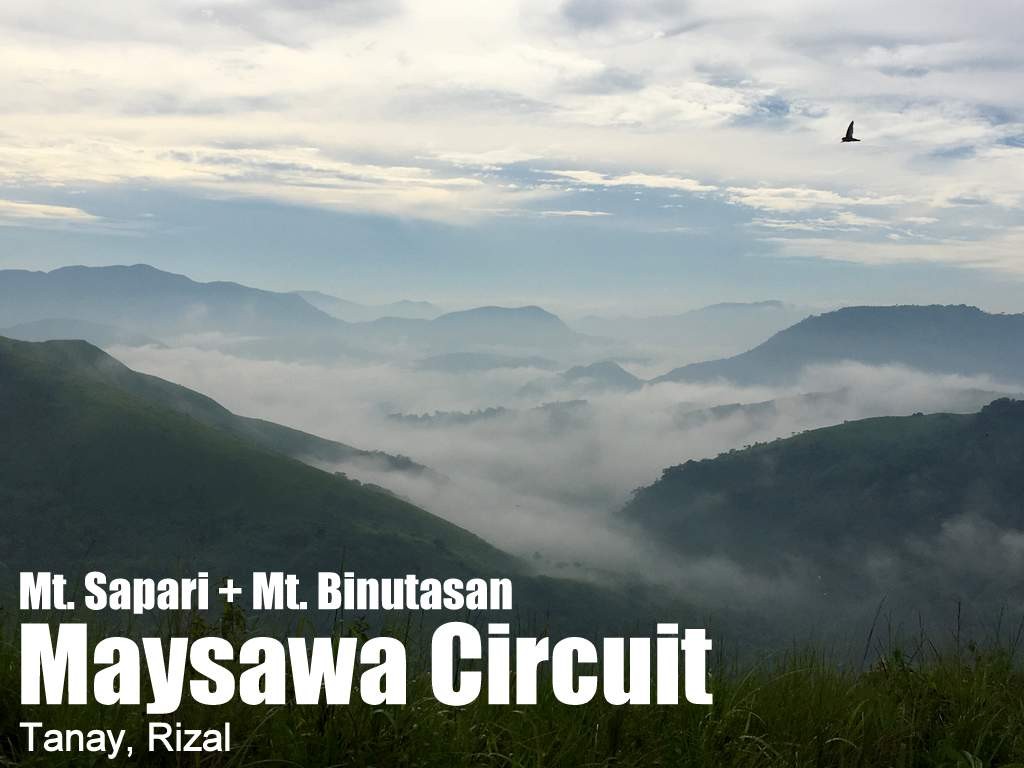
MAYSAWA CIRCUIT (MTS. SAPARI AND BINUTASAN) Tanay, Rizal
Trailhead: Sitio Maysawa, Brgy. Cuyambay, Tanay
LLA: 14°37′11.5′′N, 121°21′31.1′′ E, 592 MASL (Mt. Sapari); 14° 37′38.9′′N, 121°21′59.6′′ E 577 (Mt. Binutasan)
Days required / Hours to summit: 1 day / 1.5h (Sapari); 2.5 (Binutasan)
Specs: Minor climb, Difficulty 3/9, Trail class 1-3
Features: Scenic views of the Sierra Madre, sea of clouds, river
Article history: Created 31 July 2016 by Gideon Lasco
BACKGROUND
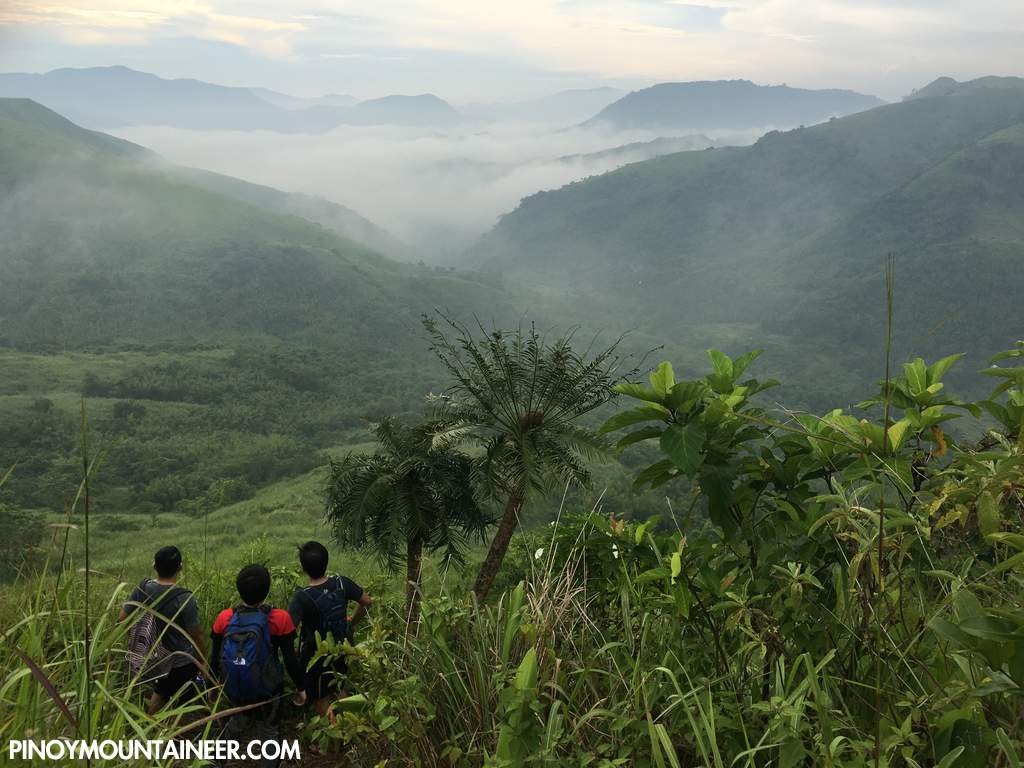
Yet another hiking destination in Tanay, Rizal is the Maysawa Circuit in Sitio Maysawa, Brgy. Cuyambay. Featuring two hills – Mt. Sapari and Mt. Binutasan – and an optional creek sidetrip – this circuit offers the same sea of clouds that one can see in nearby Mt. Maynoba.
Unlike Mt. Paliparan which is located in the west side of the Marcos Highway, the entrance to the trailhead of the Maysawa Circuit veers east (left) of it, making it closer to Mt. Batolusong and the other mountains that can be hiked from the Batangas junction. (As of July 2016, the barangay requires hikers to go to the barangay hall first before going to the trailhead – but we are asking them to make a satelite registration at the trailhead itself.)
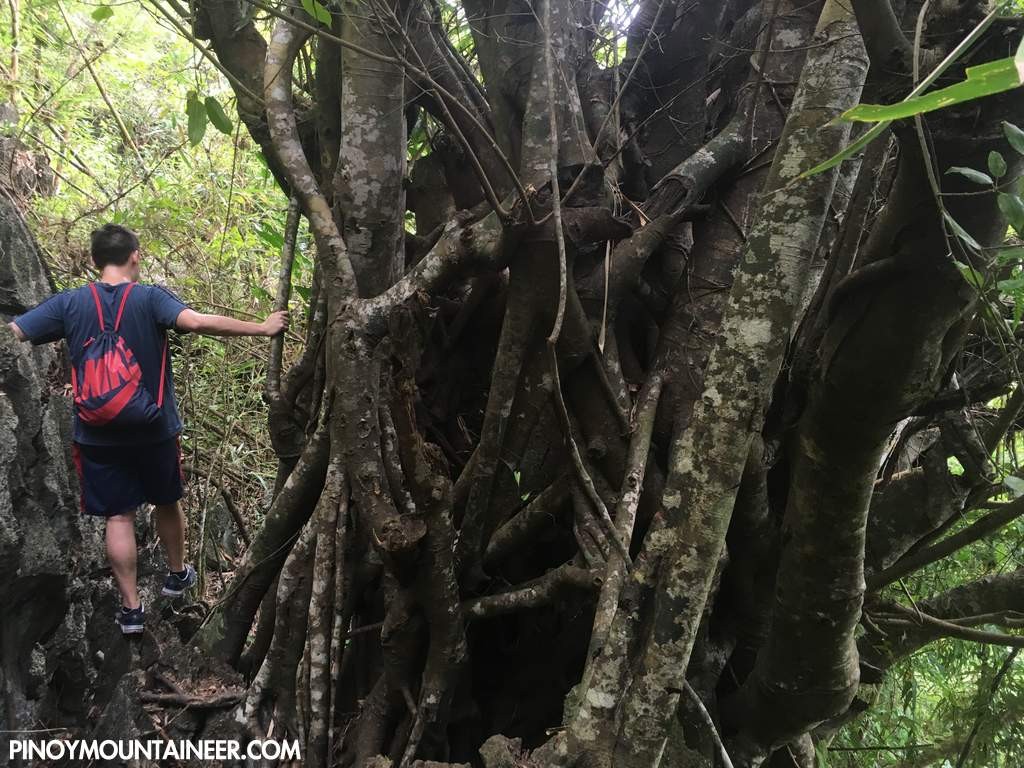
The hike is quite easy, with well-established trails gradually sloping upwards to reach the viewpoints in either of the two hills (Sapari – literally ‘of the priest’ after an old curate; and Binutasan – literally ‘where they made a hole’). Mostly exposed, save for occasional pockets of limestone forest, the trail is best hiked early in the morning, and for many, there is a more compelling reason: the chance to see the sea of clouds.
0400 Take jeep from Sampaloc to Cogeo
0500 ETA Cogeo. Take jeep to Cuyambay junction
0615 ETA Cuyambay. Take habal-habal to Brgy. Hall
0630 ETA Barangay Hall. Register / Secure guides. Proceed to trailhead.
0700 Start trekking
0830 ETA Mt. Sapari
1030 ETA Mt. Binutasan
1130 Arrival at ‘Batis’ as an optional sidetrip (one can also proceed directly to trailhead)
1300 Back at trailhead. Tidy up
1400 Return to Manila
1600 ETA Manila
Note: To catch the sea of clouds, private transport is recommended as the public transport schedule will not permit you to reach the trailhead on time. A very early departure from Manila (0200-0300H) is recommended. For van rentals contact 09269702947.
Transportation
Public (1) Jeep, Sampaloc to Cogeo [P20, 30-60 mins]
(2) Jeep, Cogeo to Cuyambay [P48, 60-80 mins]
(3) Habal-habal, Cuyambay junction to Brgy. Hall [P25/5 mins] and then to the trailhead in Sitio Maysawa (P50?/20 mins)Note: Jeepney travel times are highly variable due to the traffic, but you are likely to get the lower end of the estimate if you leave very early.Private: Marcos Highway > Brgy. Cuyambay – turn right – follow the road until you reach the barangay hall. Then follow the guides to the trailhead in Sitio Maysawa.
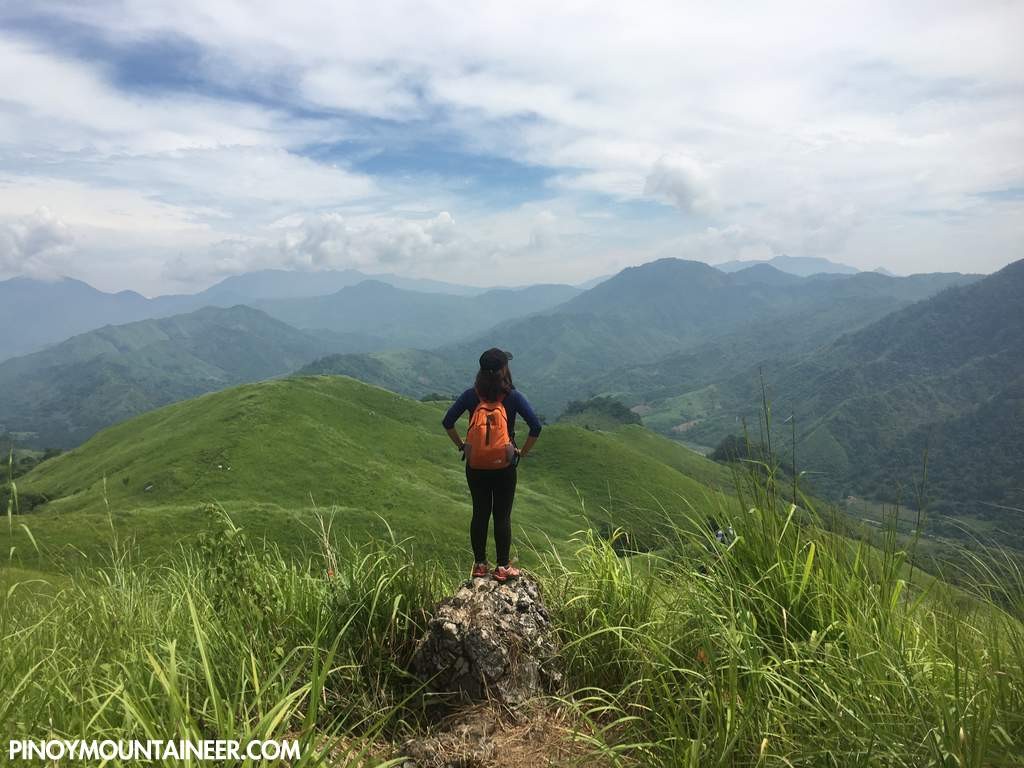
Occasional limestone forest portions add some variety of the trailView from the slopes of Mt. Sapari
The grassy slopes of Mt. BinutasanThe blogger with medical students during the ‘Medical Students’ Friendship Hike’ on July 30, 2016
TRIVIA This destination is part of the ‘Sierra Madre Wave’ of newly-opened hiking destinations in Rizal at the foothills of the Sierra Madre. Though largely a positive development, there are also concerns about the sustainability and impact of the activities.
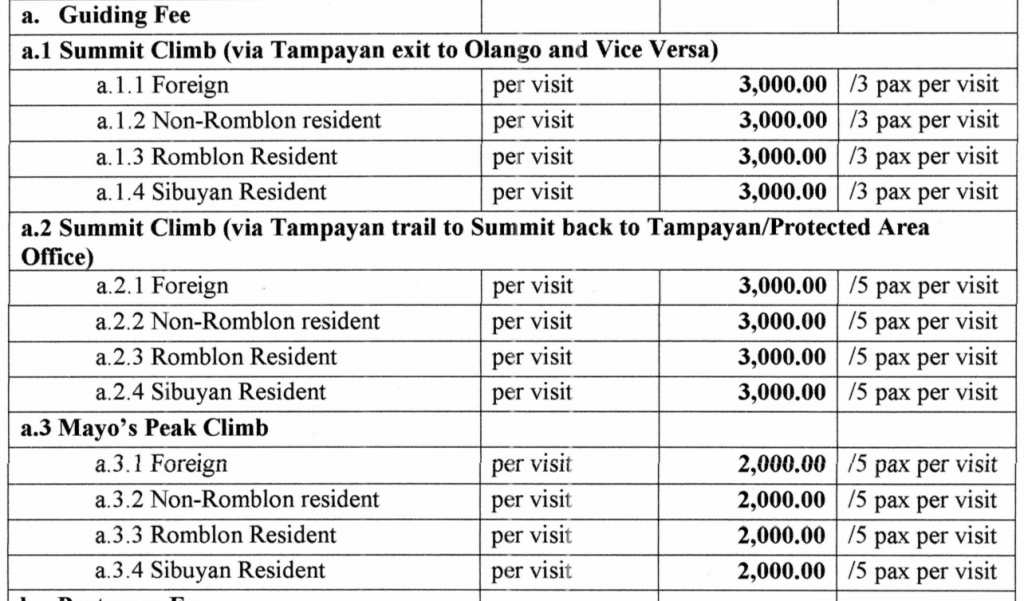
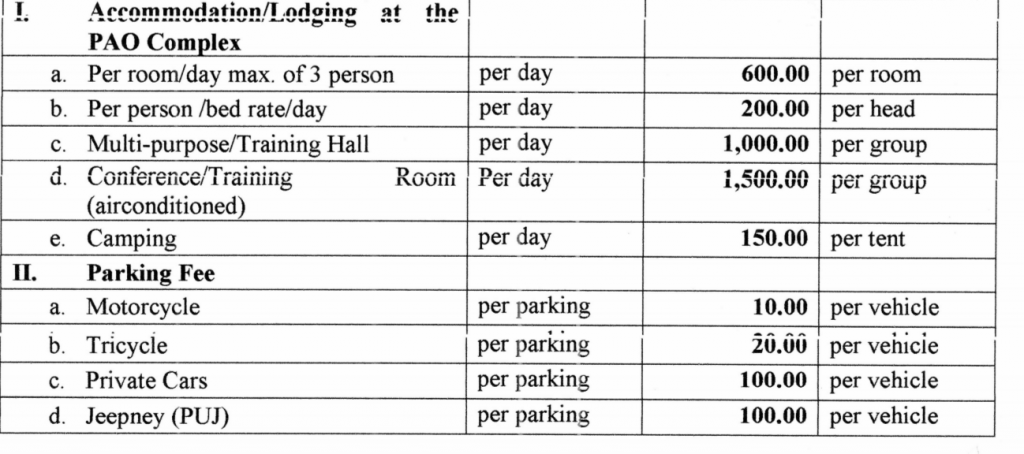
Mr. Andy Regla of the Mt. Guiting-Guiting National Park (MGGNP) office of the DENR has informed us of changes in the fee schedule of the park effective 1 January 2017.
He forwarded to us the entire document and I am sharing the relevant portions as screenshots below. Basically, the guiding fee has increased from 2400 to 3000 pesos regardless of trip duration (whether 1, 2, or 3 days) with a ratio of 1:3 if doing a traverse, and 1:5 if doing a regular hike from Tampayan.
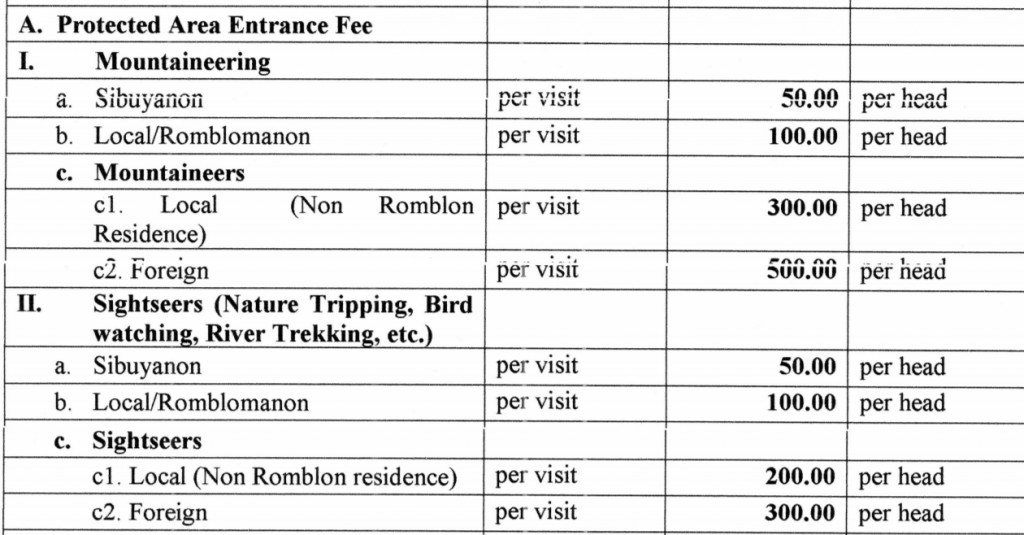
The entrance/registration fee remains unchanged at P300 per person for Filipinos and P500 for foreigners. See more below:
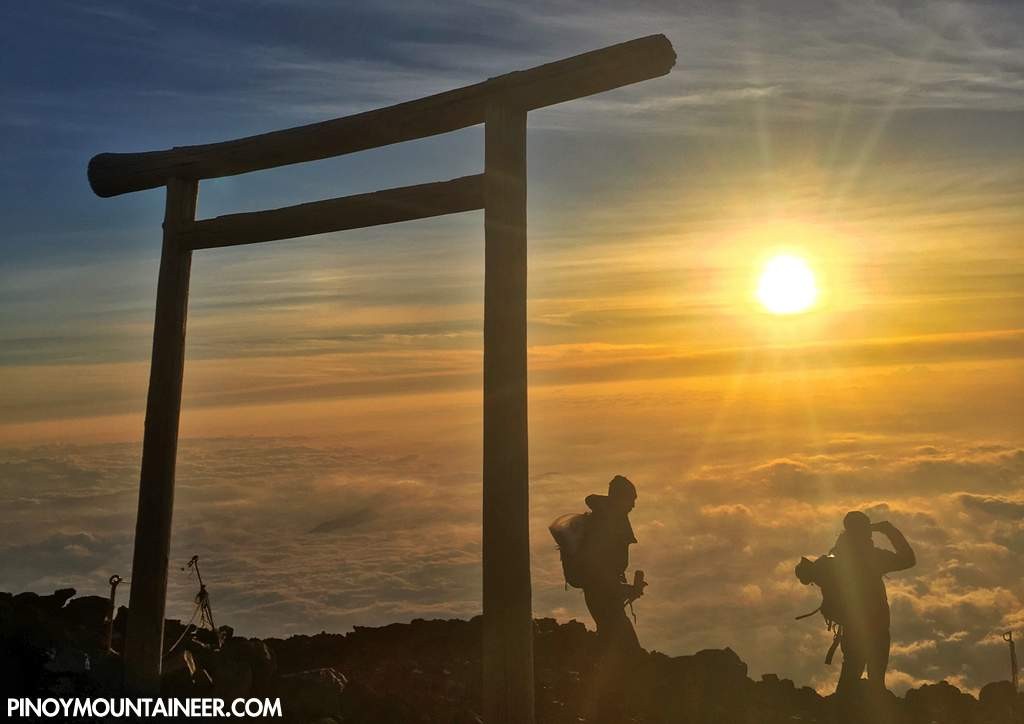
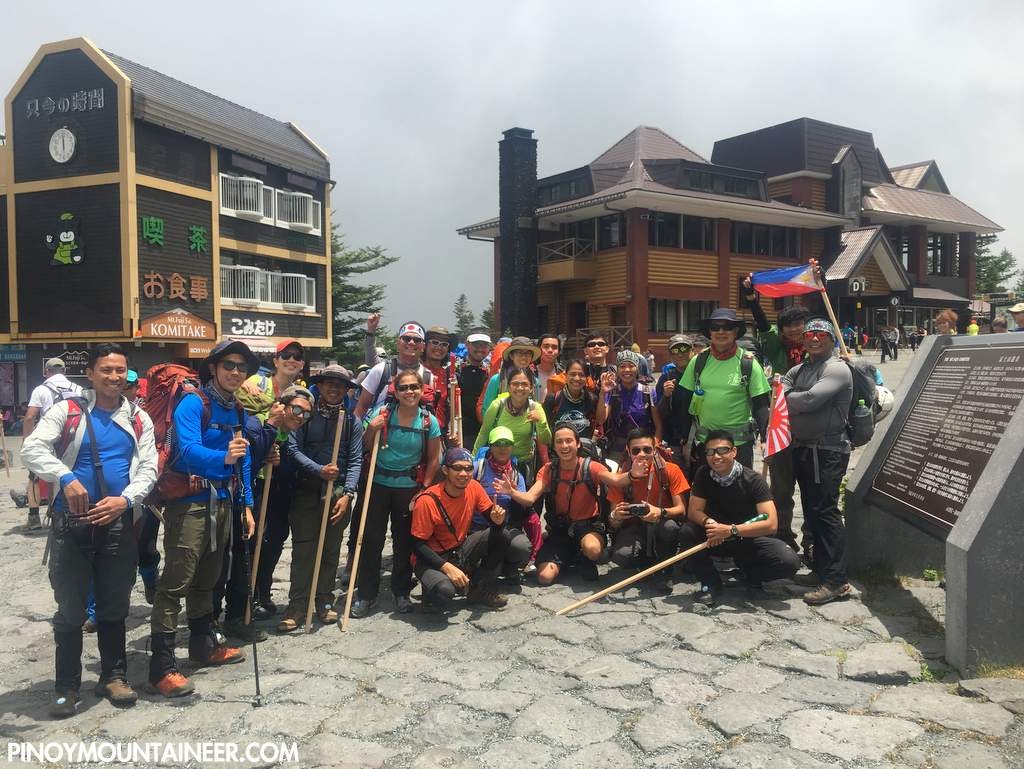
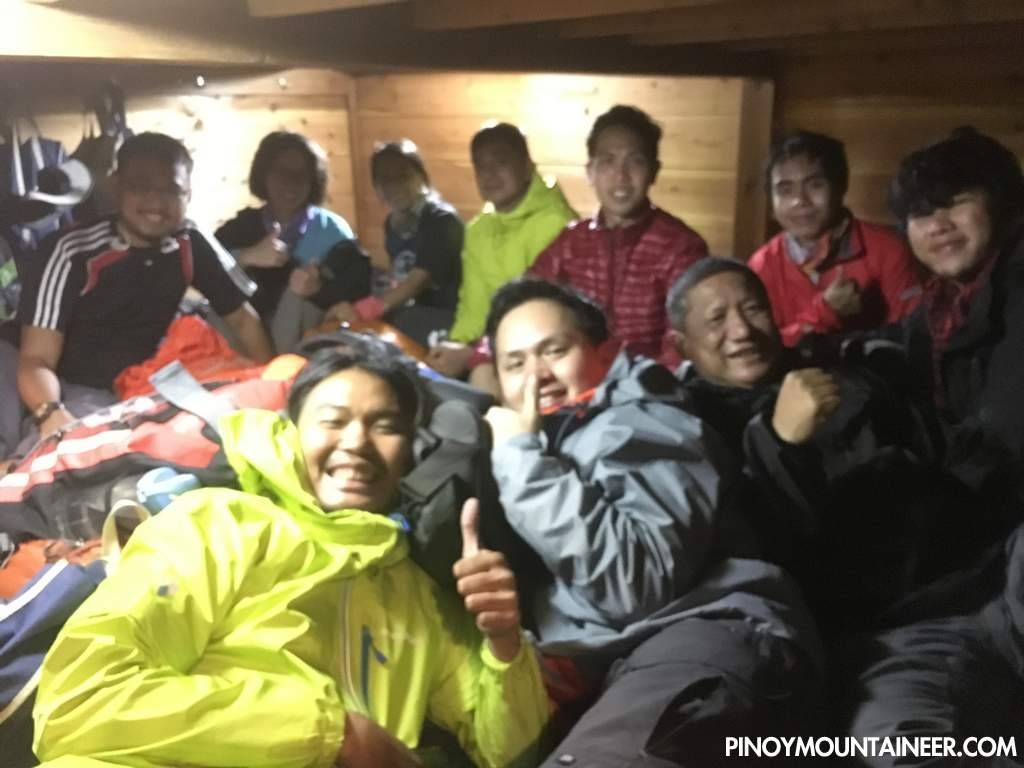
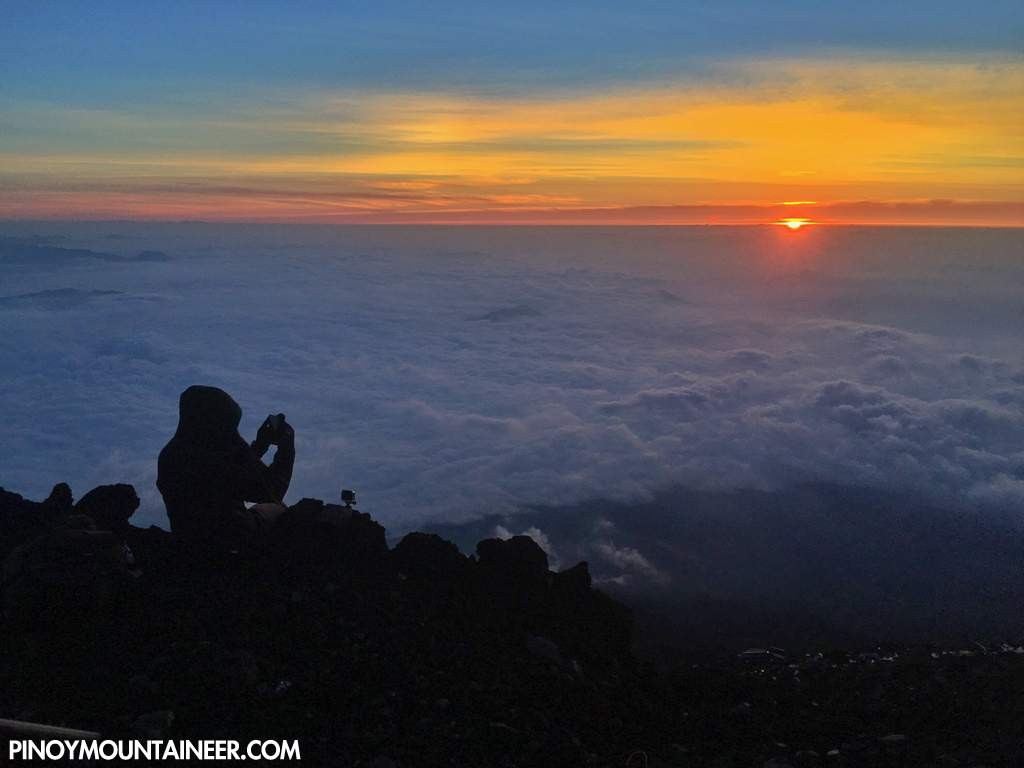
On July 12, 2016, 25 Filipinos belonging to the Pinoy Mountaineer Fuji Mt. Expedition 2016 reached the summit of Mt. Fuji in time for the goraiko, the glorious rising of the sun as viewed from Japan’s highest point.
Mt. Fuji, of course, requires no introduction as one of the most famous mountains of the world. Truth be told, this mountain was one of my motivations to do some medical training in Tokyo’s St. Luke’s Hospital way back in 2008, and back then I had a very successful ‘bullet climb’ on the first day of the climbing season (See Hiking matters #16: “Finally, Fuji!”)
There is a Japanese saying: “A wise man will climb Mt Fuji once; a fool will climb Mt Fuji twice.” This saying notwithstanding, I was excited to go back to Fuji as I wasn’t able to fully enjoy the first time around – with too much excitement and too little time. Besides, I stick to my personal proverb – based on Heraclitus – that “you cannot climb the same mountain twice”.
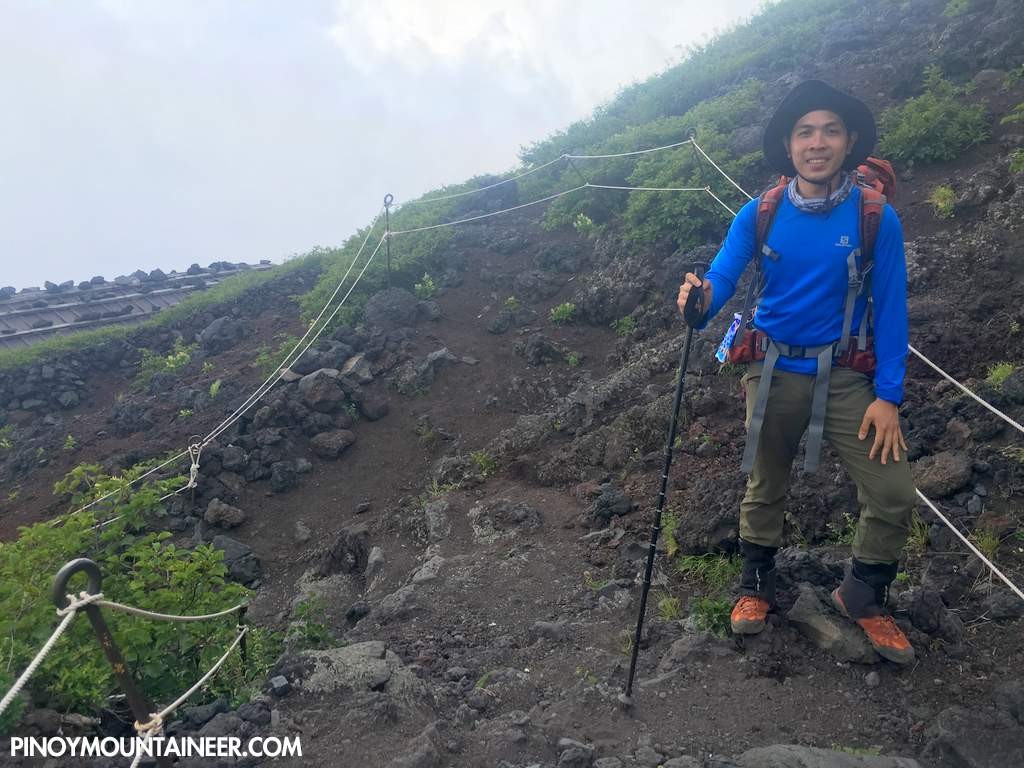
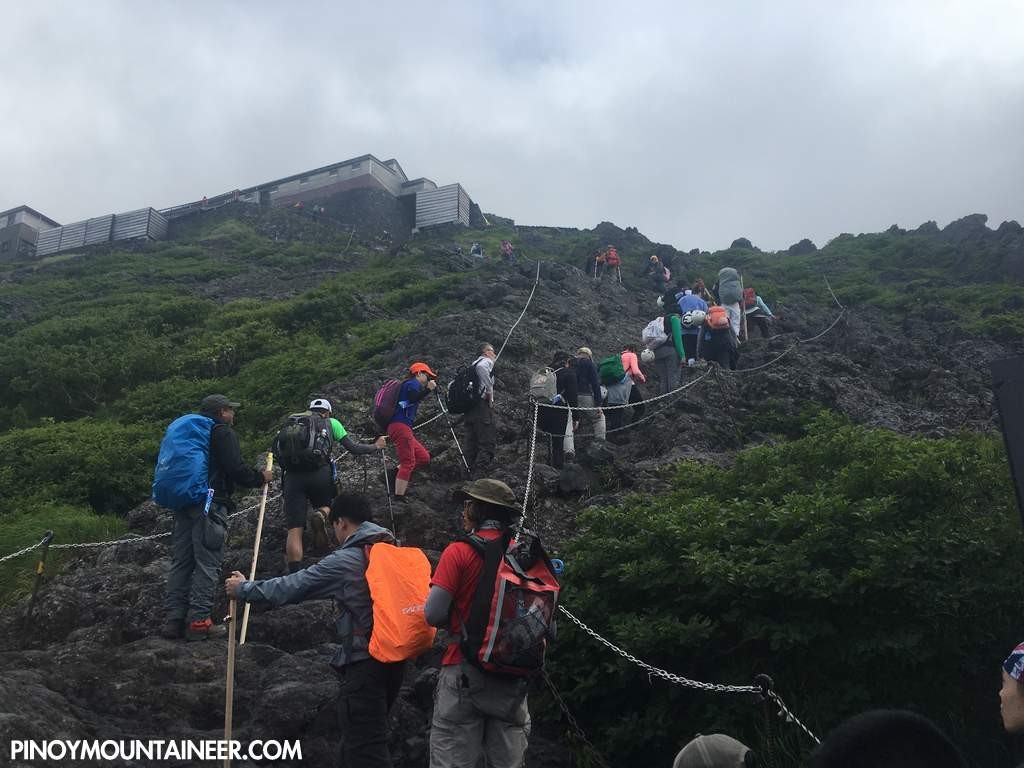
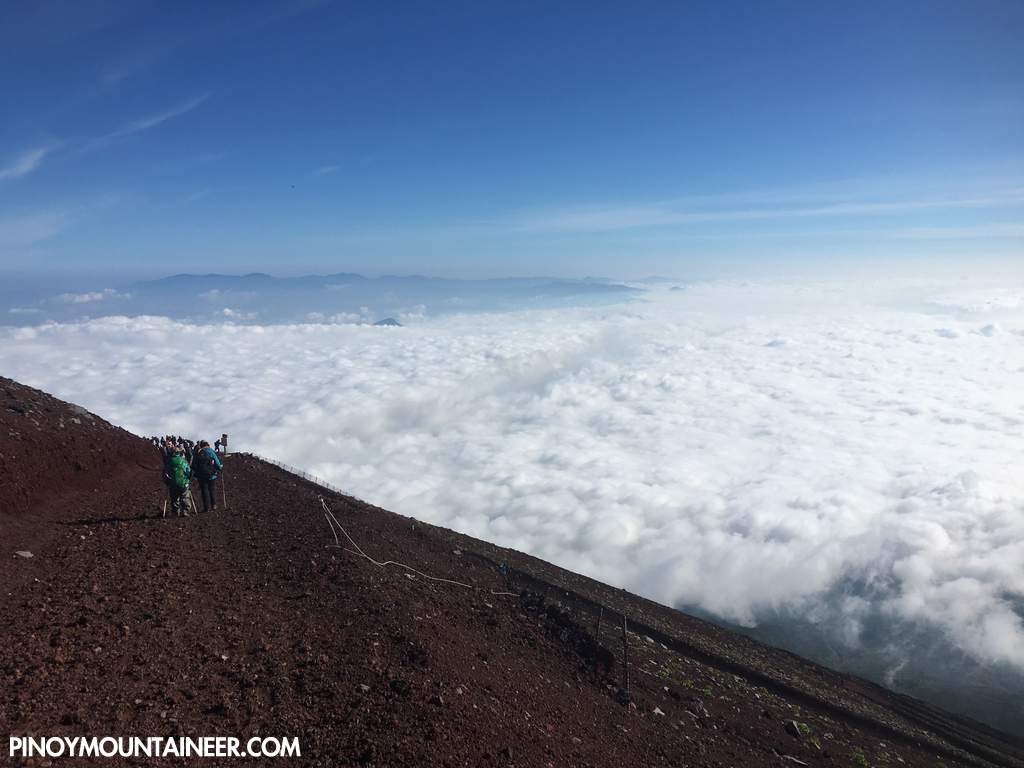
So on the 11th of July, after warming up with a Takao-Jinba Traverse (see Hiking matters #515), we found ourselves in Shinjuku waiting for the bus that would take us to Suburu Line 5th Station (also known as the Kawaguchiko 5th Station). It was already past noontime when we managed to start trekking, taking the Yoshida Trail with its initial forested section (to 6th station) and the never-ending slopes of volcanic sand.
The trail was really easy, the only challenge was the moderate altitude (the trailhead was at 2400m and we had to reach the level of 3400m for our lodging for the night). Fortunately, the weather cooperated and the entire team was able to reach the hut (Tomoe Kan) in time for dinnertime.
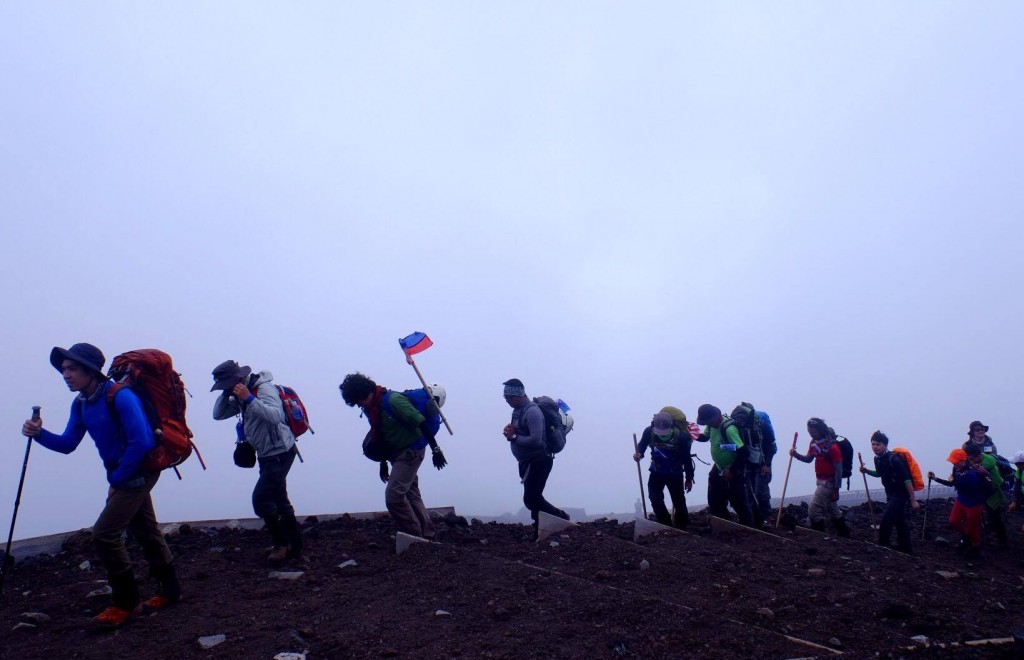
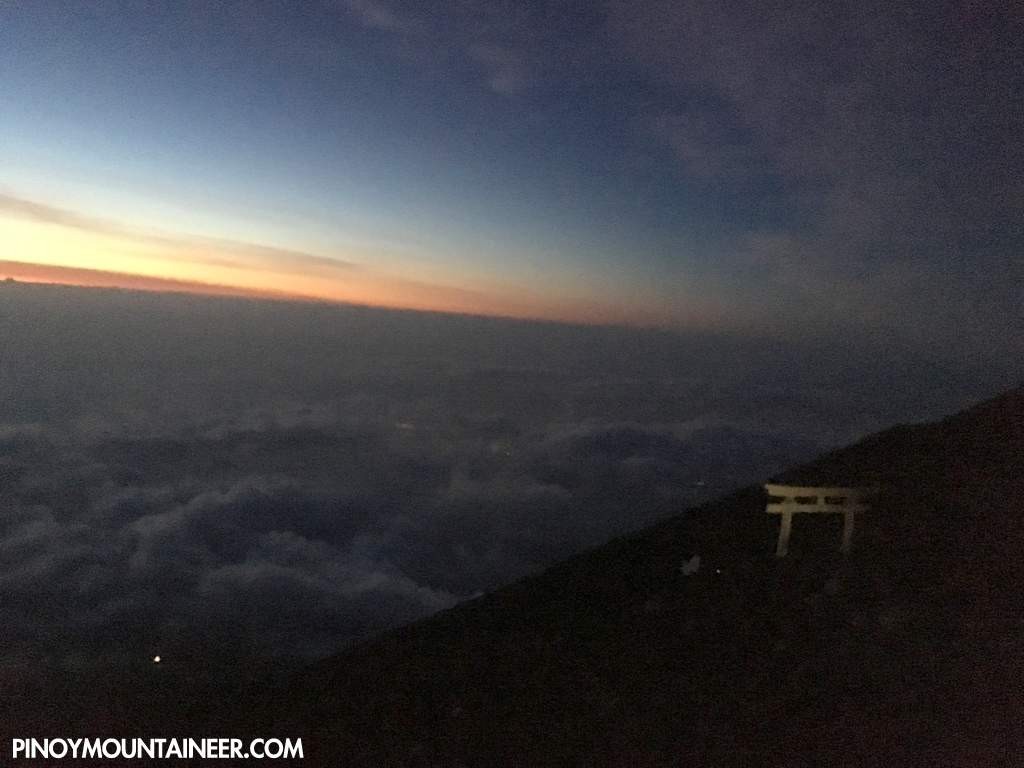
We only had a few hours to sleep, as we had to start trekking at 0230H in the hope of reaching the summit before the sun rose at around 0420H. Pacing us more briskly compared to the previous day, our guide was confident that we would have a great sunrise, given the multitude of stars we could see on the way up.
Some of my teammates experienced mild symptoms of altitude sickness, but the few hours of sleep helped a lot and everyone did very well on final assault, and out of the 1000 people reported to have been on the mountain that day, we were one of the first groups to reach the summit – a good half-hour before the sunrise.
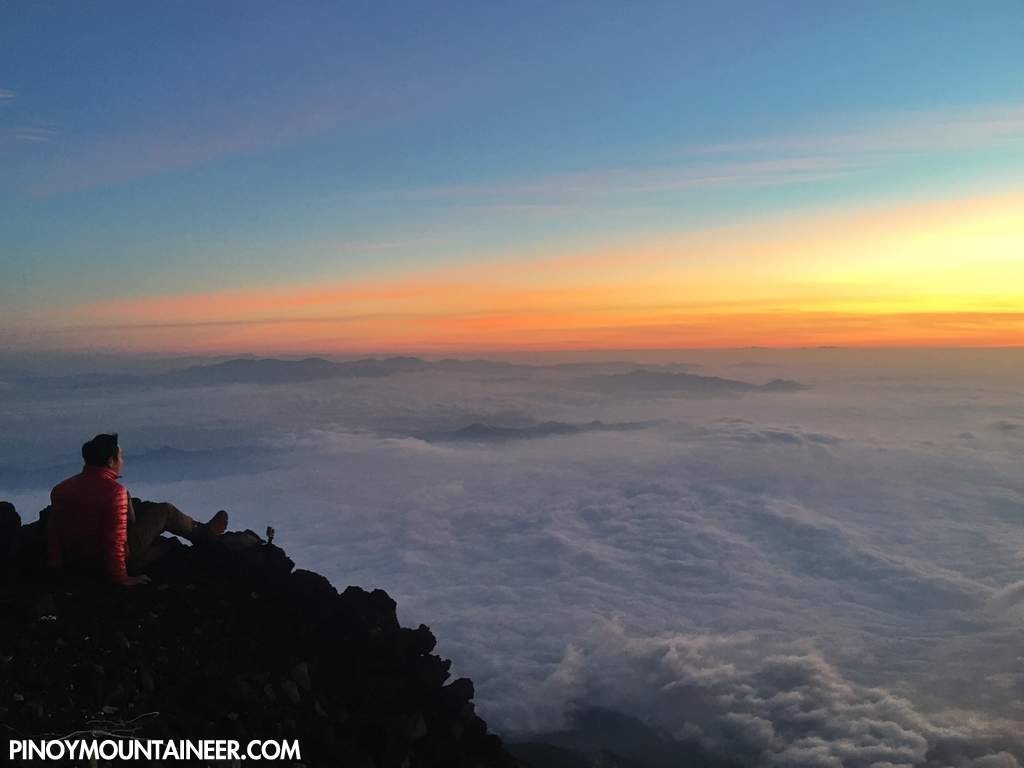
When the sun rose, it was truly rewarding, and much more beautiful than I remembered.
After the sunrise viewing we made our way down this time taking the much more straightforward descending trail back to the Subaru Line 5th station, taking just two hours from our hut. The brisk descent was made even more joyous by the beautiful views all over – including some of the mountains north of Fuji.
The hike ended quite abruptly, and perhaps so should this blogpost. But before I say ja mata ne, I would like to thank all the participants of the team that turned out be known as ‘Team Kampai’ – and the three teams – Team Gido, Team Javi, and Team Coby – for this unforgettable adventure!
Contrary to rumors, Pico de Loro remains open, Pinoy Mountaineer learned from DENR and Maragondon tourism officials today. Only the Monolith is closed.
“We cut off the ropes and put some barbed wire fences around the Monolith so that hikers will no longer go up,” Sir Bay of the local DENR in a text message that he wanted to disseminate in social media.
The ‘ban’ on the climbing up the Monolith has actually been enacted for several months now, with the DENR citing safety concerns. With the physical barriers in place, the ban will likely have more force.
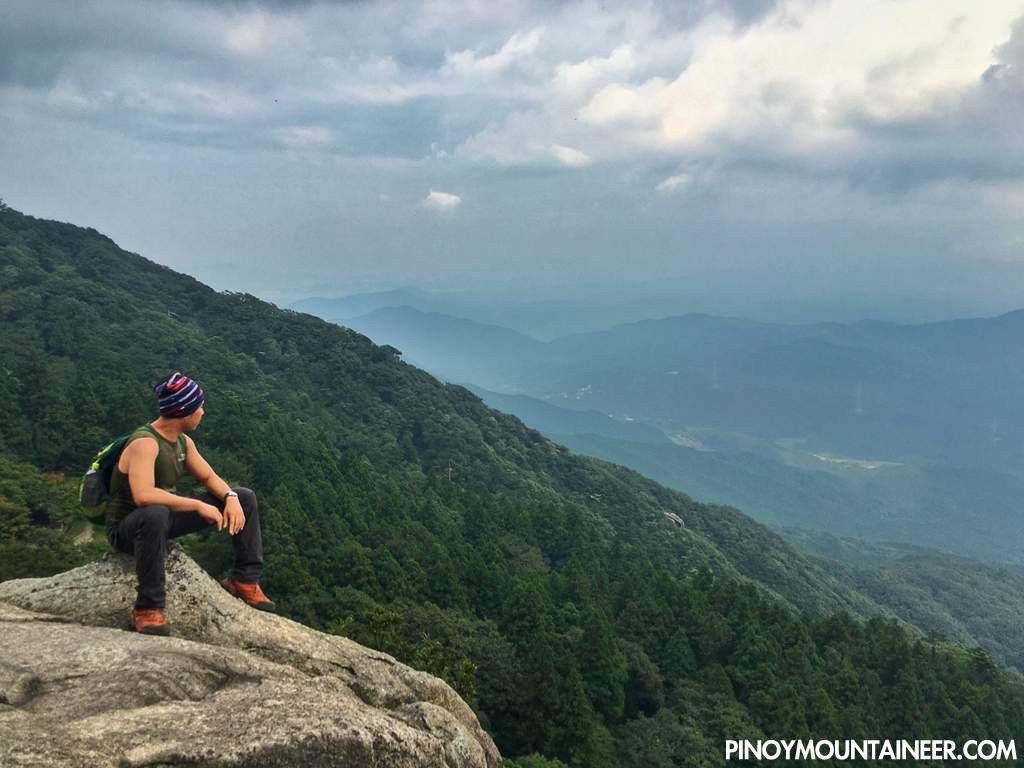
FUKUOKA, JAPAN – Three weeks ago, I had fantastic hiking trip that covered some of Japan’s highest peaks, and during the trip my dream of climbing the Hyakumeizan – the 100 Famous Mountains of Japan – was rekindled. It will be a long-term dream of course, but I was so excited that I actually booked some flights while we were hiking up Mt. Fuji. The destination: Kyushu, the southernmost of Japan’s four main islands. And so here I am in Fukuoka, a city that thanks to Cebu Pacific’s flights is just 3 hours away from Manila. Located in Kyushu’s northwest, it will be our base (I am joined by my longtime hiking pal Jeshua Sales) for doing at least three of the five Hyakumeizan in the island (Mt. Aso is closed, while Mt. Sobo is too far to visit without also going to Mt. Aso).
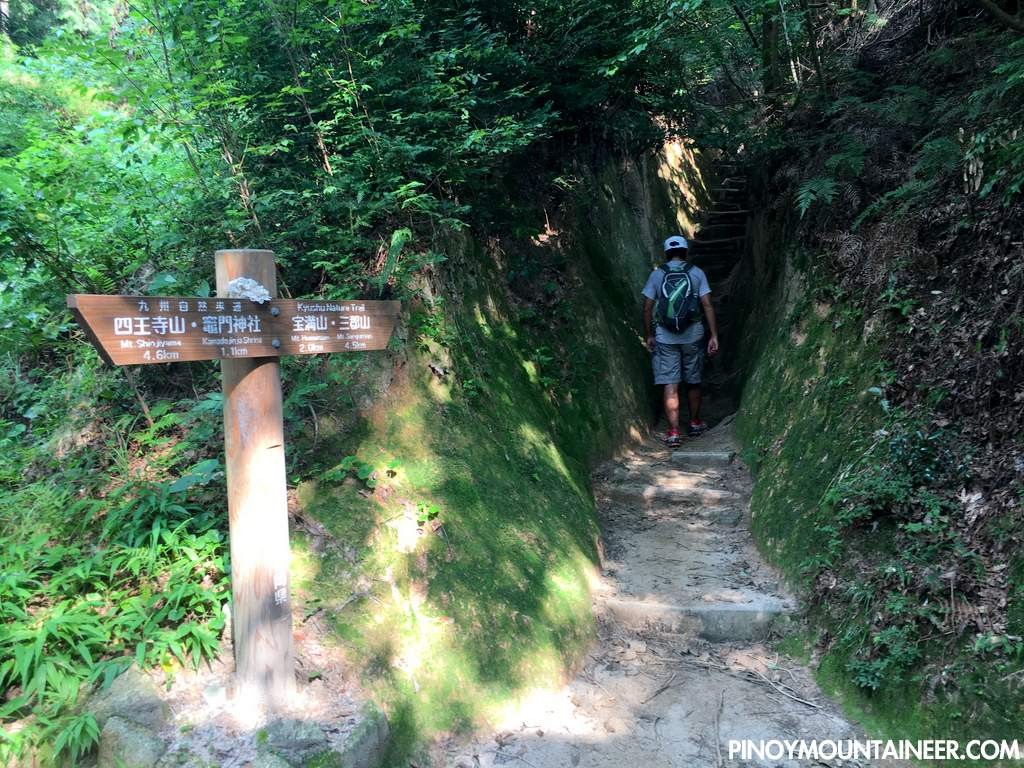
As a “warm up” for the series of hikes, we decided to do a half-day hike of Homanzan (宝満山) – the nearest, and most popular dayhike, for the people of Fukuoka. A beautiful shrine village, Dazaifu, lies at its foot. From Tenjin we took a train to Dazaifu, and should have taken a bus to the foot of Homanzan, but we opted to walk instead, thankfully finding our way to the trailhead of Homanzan a few kilometers away.
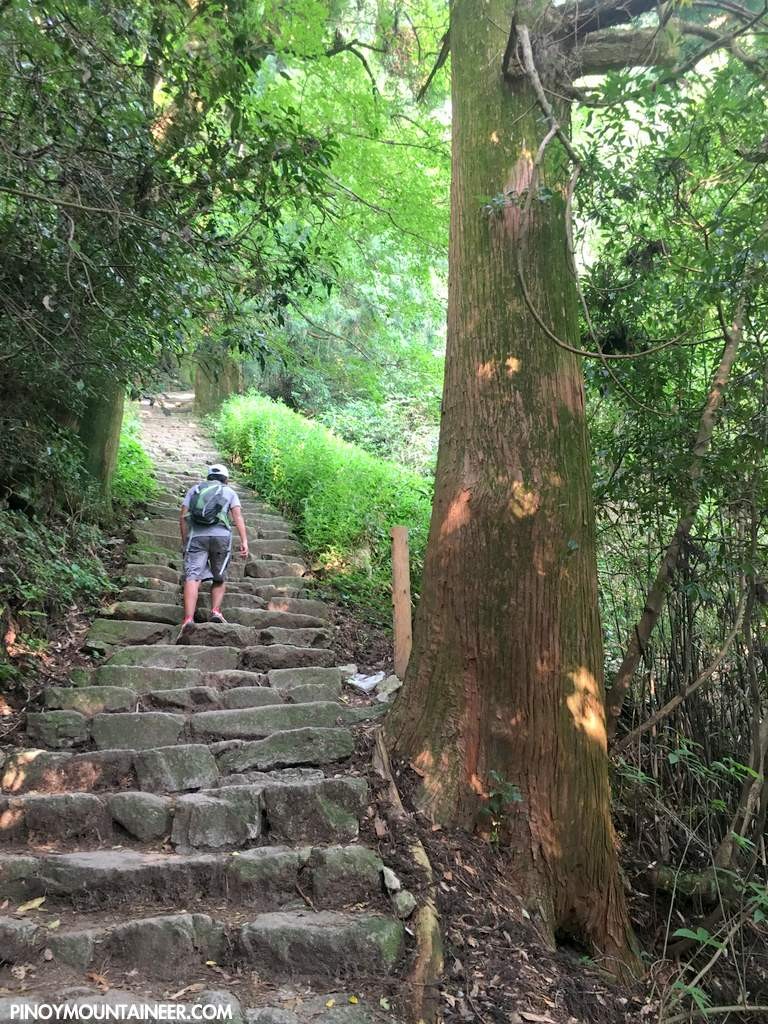
The trail, part of the extensive “Kyushu Nature Trail”, was mostly composed of cemented footpaths through beautiful woodland that actually feels more of the low mountains of Taiwan than Honshu.
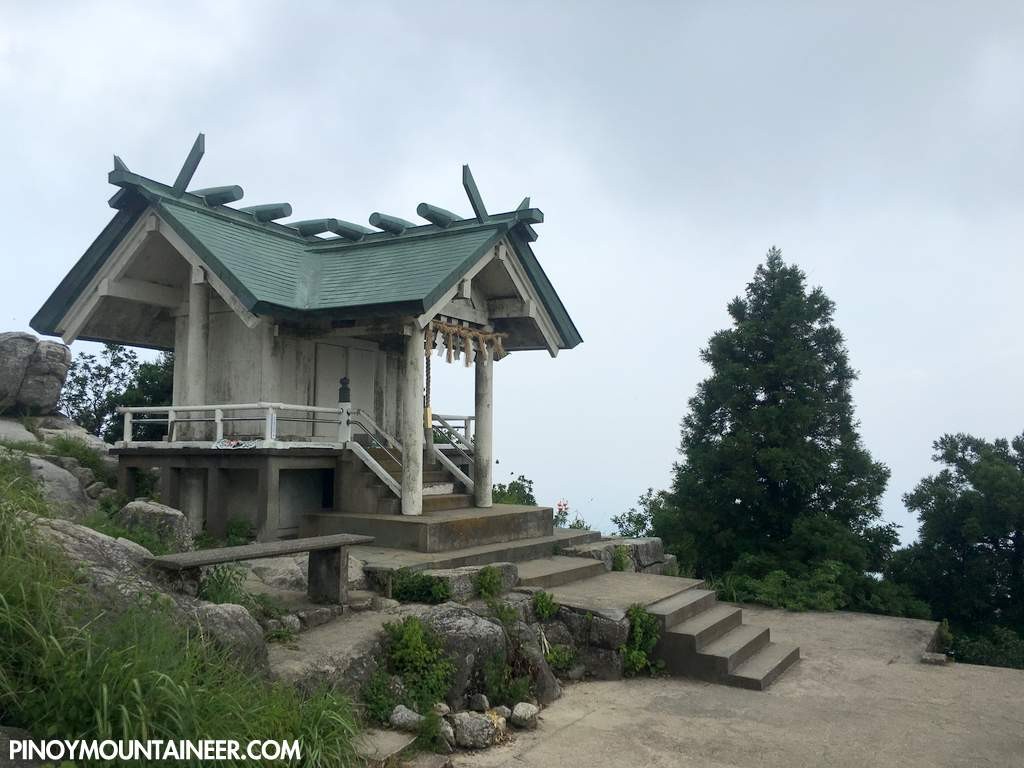
Finally, after two hours of trekking we reached the peak, which is marked by a small shrine and some excellent viewing spots! Although the skies were a bit overcast when we arrived, it was still a great warmup for the hikes to come.
In recognition of my hiking companions since the inception of Pinoy Mountaineer in 2007, I would like to recognize them as Honorary Members of the Pinoy Mountaineer Team.
Name
Date of conferment
Venue of conferment
Ivan Henares (Honorary Chairman)
Aug 2007
Mt. Malindig
Jacob Sarreal (Honorary Vice-Captain)
Apr 2009
Mt. Madjaas
Del Bahena "Swami", Bianca Silva, and Julian Canero
May 2010
Mt. Lawu, Indonesia
Mu Sigma Phi Batch 2011 (Ulysses Gopez, Popo Dumlao, Pinggoy Danguillan, Daniel Dellosa, Jones Santos)
Nov 2010
Mt. Apo
Jo Steven “Iron Lady”
Sep 2011
Mt. Jiri (Jirisan), South Korea
Members of Mt. Kilimanjaro Expedition
Dec 2011
Mt. Kilimanjaro, Tanzania
Javi Cang
Mar 2012
Holy Ridge, Taiwan
Terence Kua and Joshua Torres
May 2012
Mt. Yotei, Hokkaido, Japan
Farah Pasamonte
Sep 2012
Stok Kangri, India
Philippe Arenillo
Nov 2012
Mt. Tapulao
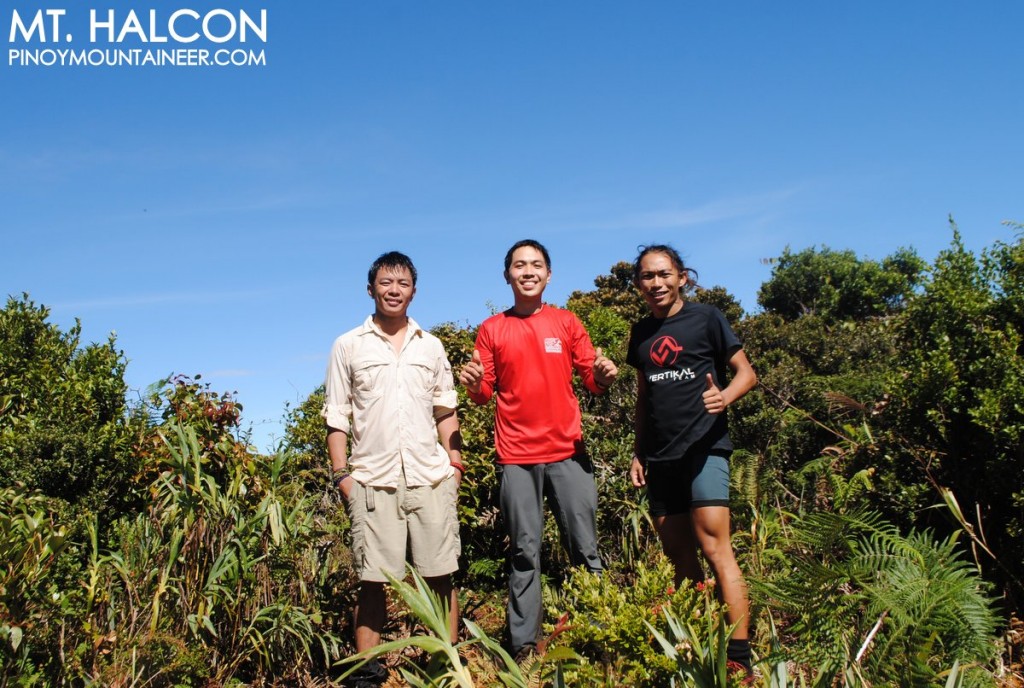
Koi Grey and Daryl Comagon
May 2013
Mt. Halcon
Members of the Mt. Elbrus Expedition
July 2013
Mt. Elbrus, Russia
Leo Oracion
Sep 2014
Le Dole, Switzerland
Chris Tejirian
May 2015
Massachusetts Section - Appalachian Trail
Carlo Cunanan
May 2015
2nd National Mountain Cleanup Day (ex-officio as PM Environment Committee head)


 FUKUOKA, JAPAN – Three weeks ago, I had fantastic hiking trip that covered some of Japan’s highest peaks, and during the trip my dream of climbing the Hyakumeizan – the 100 Famous Mountains of Japan – was rekindled. It will be a long-term dream of course, but I was so excited that I actually booked some flights while we were hiking up Mt. Fuji. The destination: Kyushu, the southernmost of Japan’s four main islands.
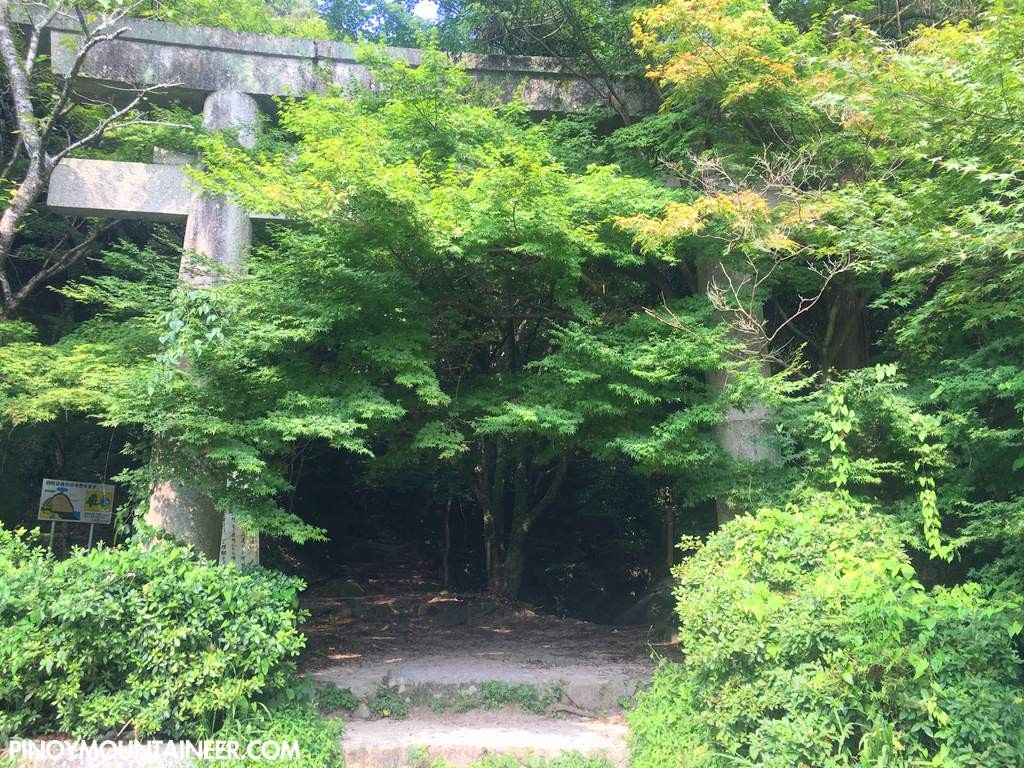 And so here I am in Fukuoka, a city that thanks to Cebu Pacific’s flights is just 3 hours away from Manila. Located in Kyushu’s northwest, it will be our base (I am joined by my longtime hiking pal Jeshua Sales) for doing at least three of the five Hyakumeizan in the island (Mt. Aso is closed, while Mt. Sobo is too far to visit without also going to Mt. Aso).
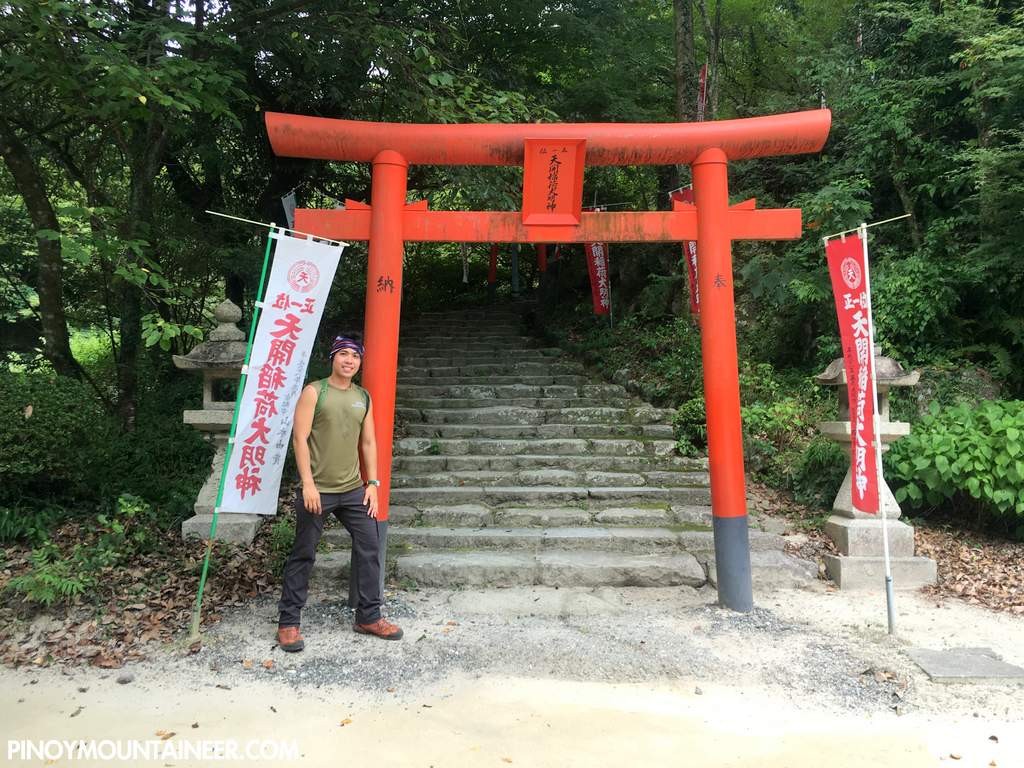 As a “warm up” for the series of hikes, we decided to do a half-day hike of Homanzan (宝満山) – the nearest, and most popular dayhike, for the people of Fukuoka. A beautiful shrine village, Dazaifu, lies at its foot. From Tenjin we took a train to Dazaifu, and should have taken a bus to the foot of Homanzan, but we opted to walk instead, thankfully finding our way to the trailhead of Homanzan a few kilometers away.